

You’ve been thinking about it for weeks now. That empty corner in your basement, the unused wall space in your living room, or maybe that garage spot you keep walking past. A diy bar could go there.
You know it, and honestly, you’ve already pictured yourself behind it, mixing drinks for friends on a Saturday night while everyone enjoys fun games nearby. But where do you even start? The wood, the design, the measurements, it all feels like a lot.
Don’t worry, though. Building your own bar isn’t as complicated as you think, and the best part? You get to make it exactly how you want it.
Why Build a DIY Bar at Home?
You could buy a pre-made bar, sure. But where’s the fun in that? When you build a diy bar yourself, you control everything. The size fits your space perfectly.
The style matches your taste, not someone else’s idea of what looks good. Plus, you save a ton of money compared to those overpriced furniture store options.
And let’s be real, there’s something satisfying about telling people you made it yourself. Your friends will ask questions, and you’ll have stories to share. It becomes a conversation starter, not just another piece of furniture sitting in the corner.
Planning Your DIY Home Bar Project
Before you grab your tools and start cutting wood, you need a plan. A good diy bar starts with knowing what you want and where it’ll go.
- Pick your location: Basements work great, but so do living rooms, patios, or even that weird nook under your stairs. Measure the space twice to avoid getting something too big or too small.
- Decide on a style: Do you want rustic wood with metal accents? Something sleek and modern? Maybe a tiki bar vibe? Your choice sets the tone for everything else.
- Set a budget: Materials add up fast. Know what you can spend before you fall in love with expensive finishes.
- Sketch it out: Doesn’t need to be fancy. Just draw what you’re picturing so you have a reference point.
Before you cut a single piece of wood, use painter’s tape to mark the bar’s footprint on the floor. It sounds like an extra step, but the space always looks different once you can actually walk around the outline.
I’ve caught sizing mistakes this way that would have been costly to fix mid-build. The tape comes up in seconds; ripping apart a frame does not.
Essential Tools and MaterialsTools
Materials
|
Step-by-Step Building Instructions
Building a diy bar sounds intimidating, but it’s really just a series of small tasks. Take it one step at a time, and you’ll have something worth showing off before you know it.
Step 1: Build the Frame
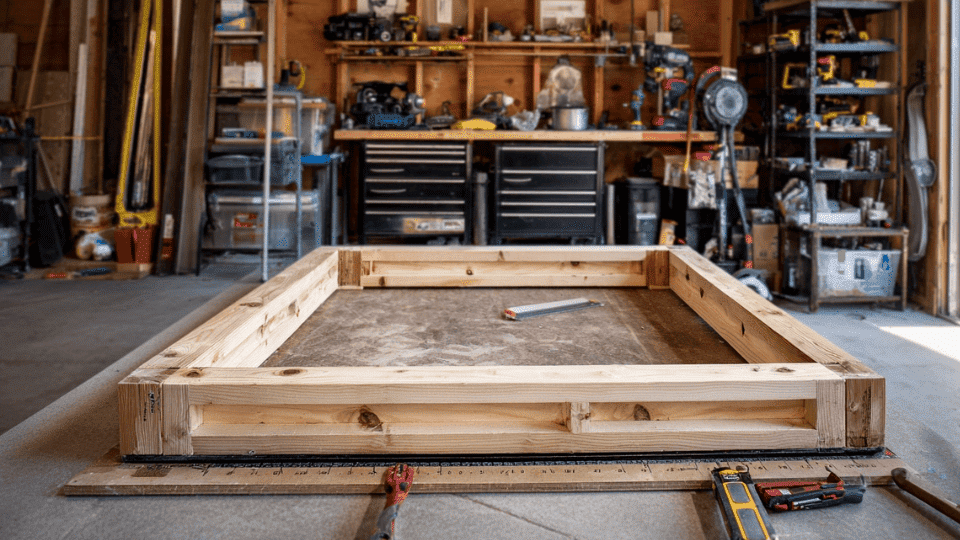
Start with your 2x4s and create a basic frame that matches your measurements. Think of it like building a skeleton. Cut the wood to size, then screw the pieces together to form the front, back, and sides.
Make sure everything is square and level before moving on. This frame holds everything else together, so don’t rush through it.
Step 2: Attach the Bar Top
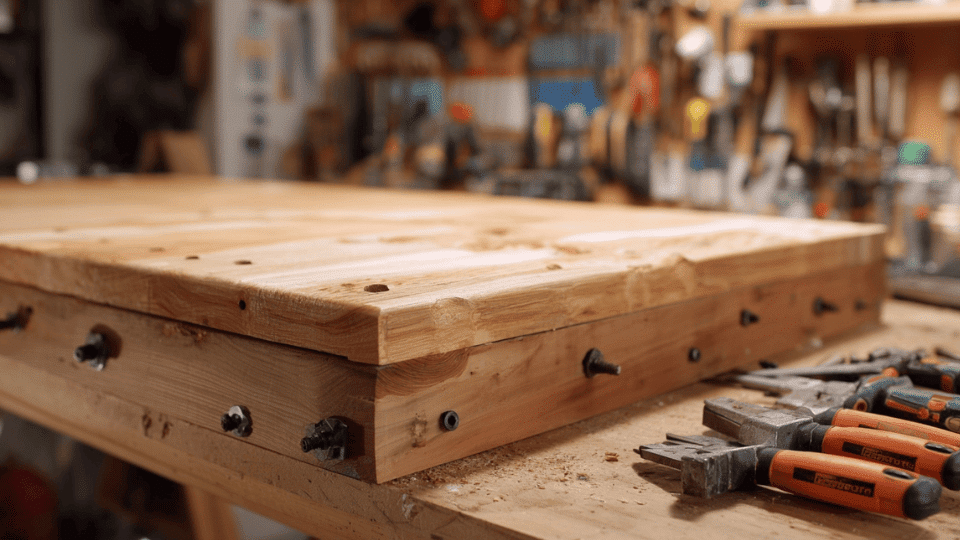
Cut your plywood or wood boards to fit the top of your frame. Sand down any rough edges so nobody gets splinters while grabbing a drink.
A standard bar top runs about 42 inches high and 22 inches deep. That depth gives you enough room for a drink and an elbow without the bar taking over the floor space.
Apply wood glue to the frame, then place the top piece on and secure it with screws from underneath. You want it solid because people will constantly lean on this thing.
Step 3: Add the Front Panels
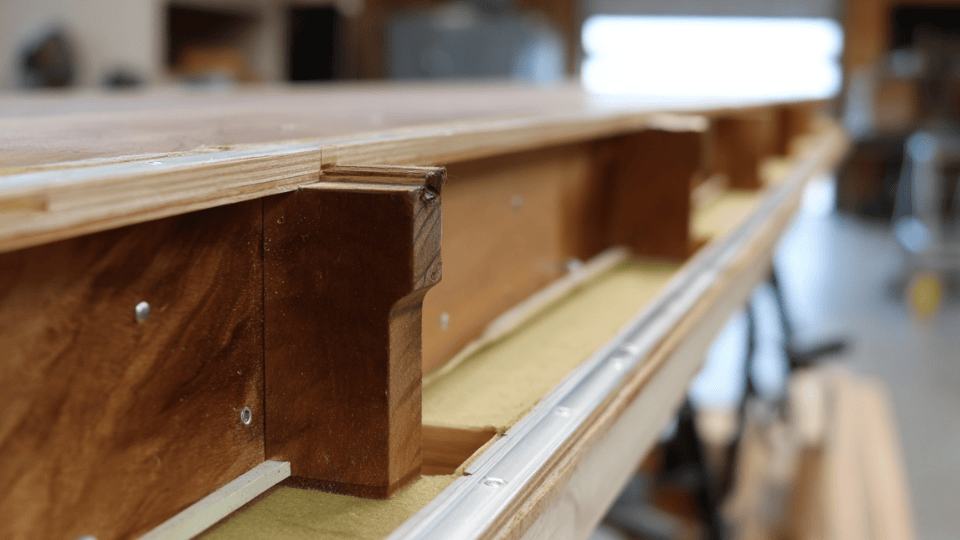
Cut panels to cover the front of your frame. You can use thin plywood, beadboard, or whatever matches your style. Attach them with nails or screws, making sure they’re flush with the edges.
This is where your diy bar starts looking like an actual bar instead of just a wooden box. Sand everything smooth once it’s attached.
Step 4: Finish and Seal
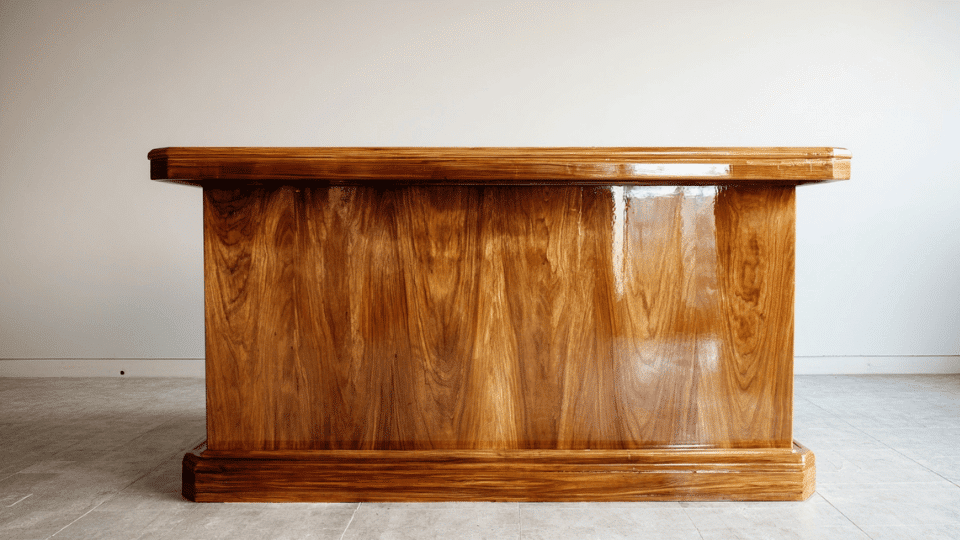
Sand the entire bar one more time, then apply your stain or paint. Let it dry completely between coats. Once the color looks good, add a few layers of polyurethane to protect the wood from spills and scratches. Give it at least 24 hours to cure before using it.
Sealing matters more than most people expect. A bar gets wet constantly, and unprotected wood absorbs it quickly.
I’ve seen unsealed builds show water rings and start warping within a few months. A couple of extra coats of polyurethane at this stage is the cheapest fix you’ll ever do.
How Much Does It Cost to Build a DIY Bar?
Money matters, so let’s break down what you’ll actually spend. Building a diy bar yourself costs way less than buying one ready-made, but prices vary depending on size and materials.
| Budget Level | Cost Range | What You Get |
|---|---|---|
| Low budget | $50 – $300 | Repurposed furniture, basic materials, simple design |
| Mid-range | $300 – $1000 | Custom wood build, quality finishes, bar accessories |
| High-end | $2000+ | Full setup with appliances, premium materials, and built-in features |
You could spend less by using reclaimed wood or shopping during sales at your local hardware store. Or go fancier with premium materials and push closer to the high end.
Essential Bar Features and Add-Ons
Your diy bar doesn’t have to be just a counter with some bottles on it. A few smart additions can make it way more functional and fun to use.
- Shelving or cabinets: You need somewhere to store glasses, bottles, and bar tools. Open shelves look cool and keep everything visible, while cabinets hide the mess.
- Footrest: Mount a pipe or wood rail about 8 inches off the ground. Your guests will thank you when they’re standing around chatting.
- Lighting: LED strips under the bar top or behind shelves create that real bar atmosphere without complicated wiring.
- Bottle opener and towel hooks: Small details that make a big difference. Mount them on the side where you’ll actually use them.
- Mini fridge or cooler space: Keep drinks cold without running back and forth to the kitchen all night.
Pick what fits your space and how you’ll actually use your bar. You can always add more later. Start simple and build up as you figure out what works best for you.
Design and Styling Ideas
The right design is the one that fits your space and the way you actually use the room. Here are eleven styles to work from, each one easy to adapt to different budgets and skill levels.
1. Rustic Wood Bar
Use reclaimed barn wood or rough-cut lumber for that worn, lived-in look. Leave the wood grain visible and go with a dark walnut or weathered gray stain.
Add metal brackets or pipe fittings for the legs and footrest. Skip the polish and keep things a little rough around the edges. That’s the whole point of rustic.
2. Modern Minimal Bar
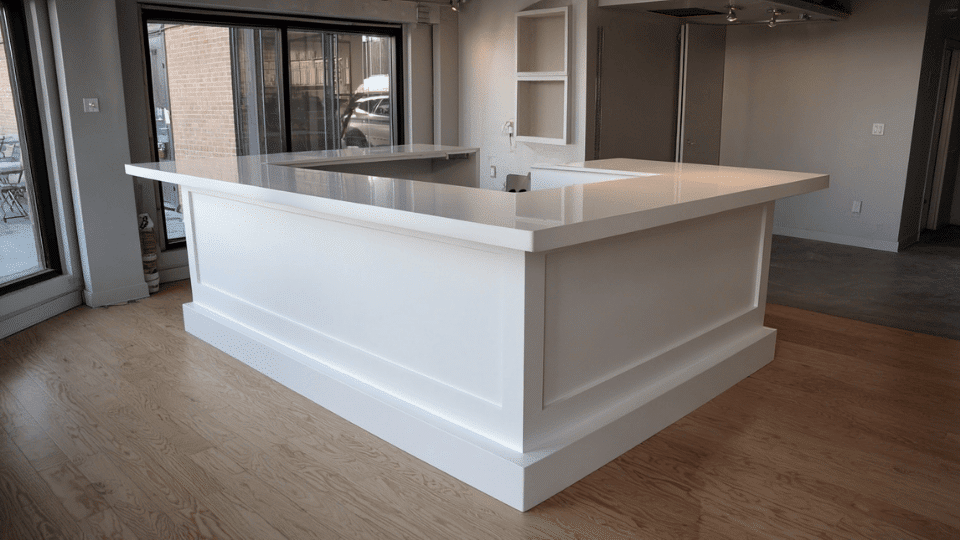
Clean lines and simple shapes are your focus here. Paint everything white, black, or a single bold color. Use smooth plywood with no visible hardware or decorations.
Keep the top flat and uncluttered. Less is more, so ditch anything that doesn’t serve a clear purpose. A sleek design like this works great in smaller spaces.
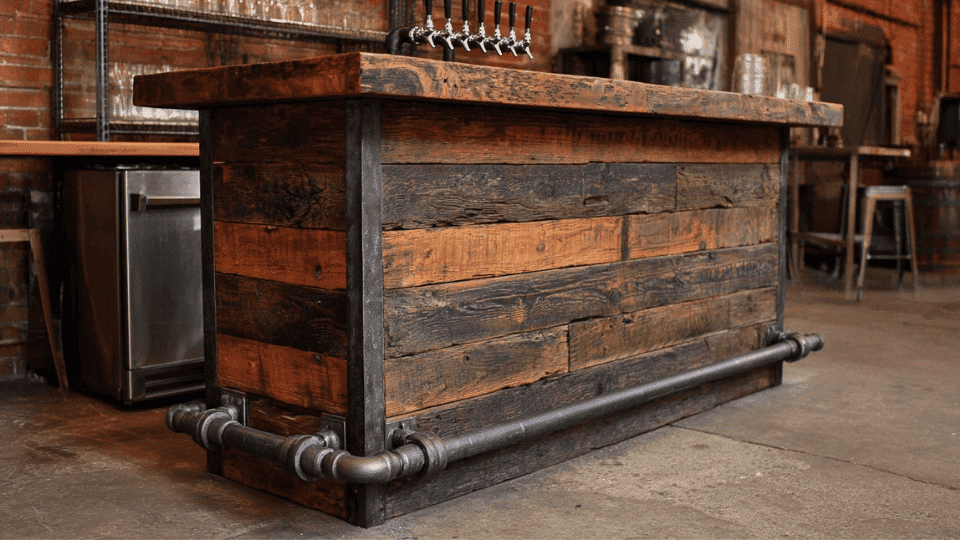
3. Industrial Style Bar
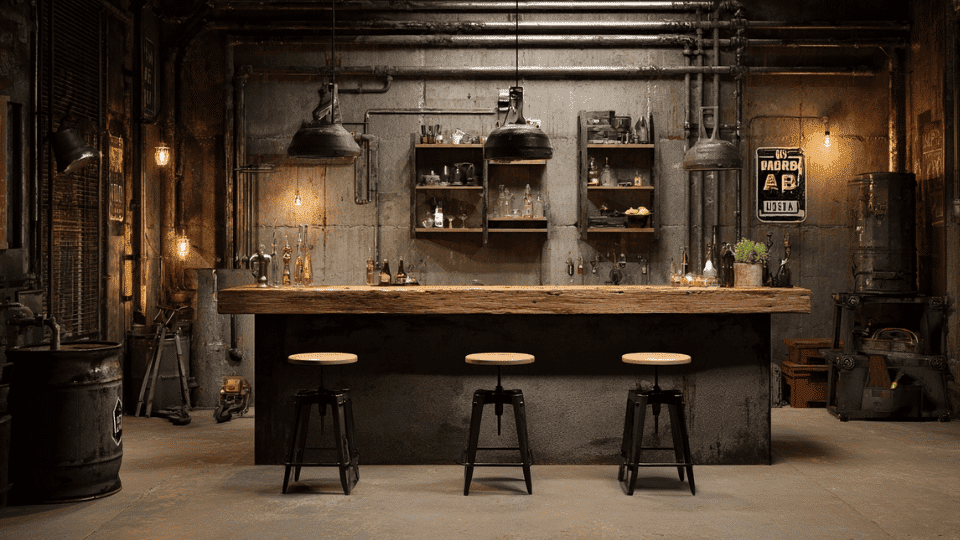
Think exposed metal, dark wood, and an unfinished vibe. Use a black pipe for the frame or footrest, then pair it with stained wood.
Leave screw heads visible instead of hiding them. Add Edison bulb lighting or metal bar stools to complete the look. This style looks tough and works well in basements or garages.
4. Corner Bar Setup
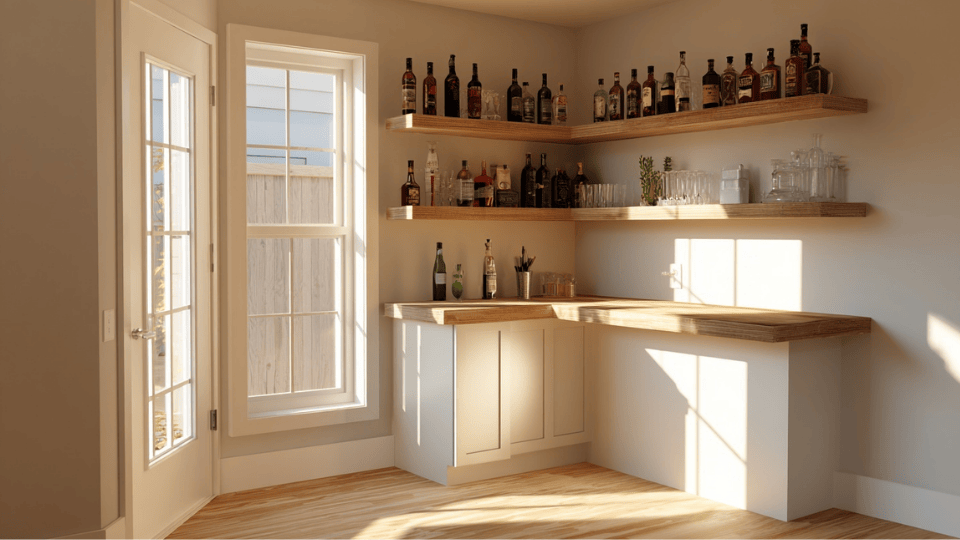
Corners get ignored, but they’re perfect for a compact diy bar. Build an L-shaped counter that fits snugly into the corner.
You save floor space and still get plenty of surface area for drinks and bottles. Add shelves on both walls above the bar. This setup works great in apartments or smaller rooms.
5. Bar Cart Style Setup
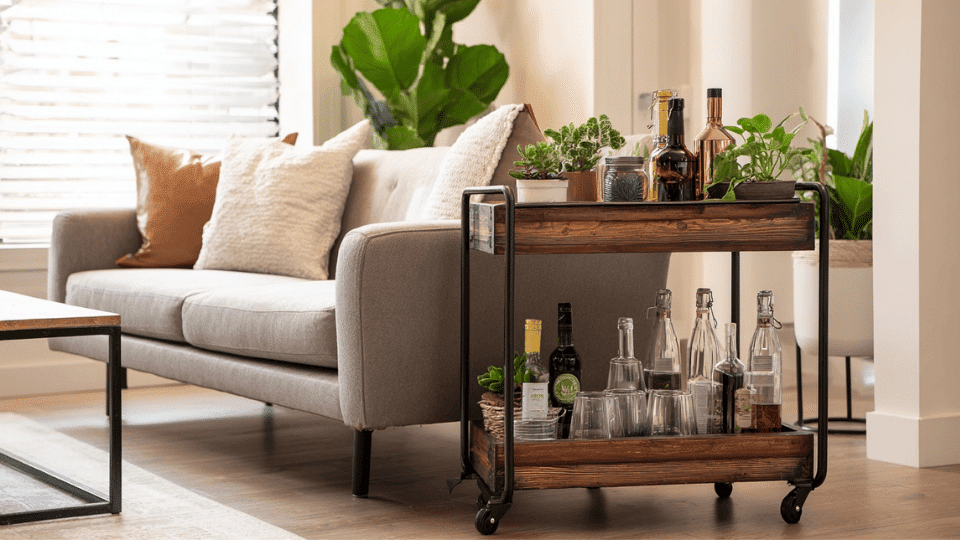
Not ready to commit to a permanent bar? Build a rolling cart instead. Use a small frame with casters on the bottom so you can move it around.
Add two or three shelves for bottles and glasses. Stain or paint it to match your room. You get all the fun of a bar without locking yourself into one spot.
6. Outdoor Patio Bar
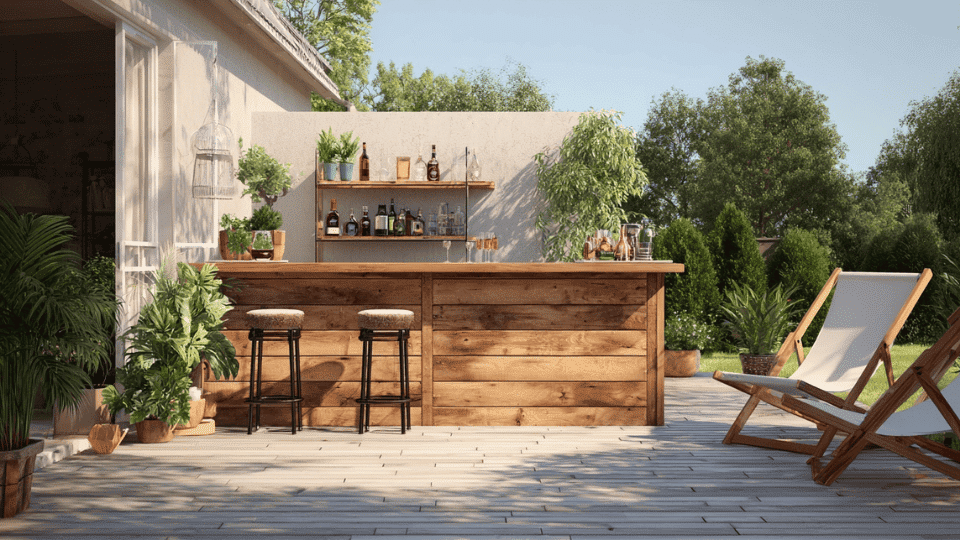
Build your diy bar with weather-resistant wood like cedar or treat regular lumber with outdoor sealant. Keep the design simple since it’ll face rain and sun.
Add a roof overhang or umbrella hole to keep things dry. Mount it against your fence or deck railing to save space. Perfect for summer cookouts and weekend hangouts.
7. Built-In Wall Bar
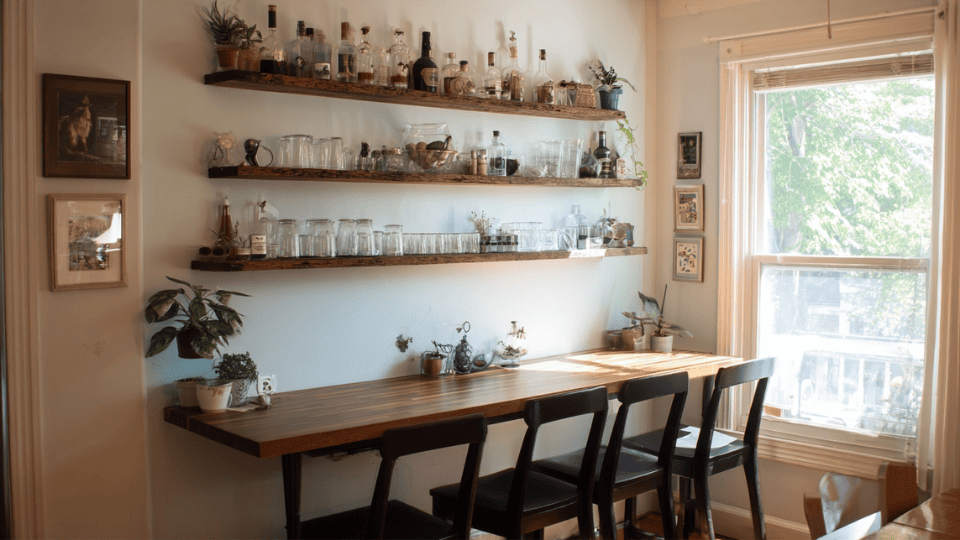
Turn an empty wall into a functional bar by building shelves and a counter directly into the space. Mount a fold-down countertop if you’re tight on room.
Add a backsplash with tile or beadboard for extra style. This option looks custom and uses space that would otherwise just sit there doing nothing.
8. Pallet Wood Bar
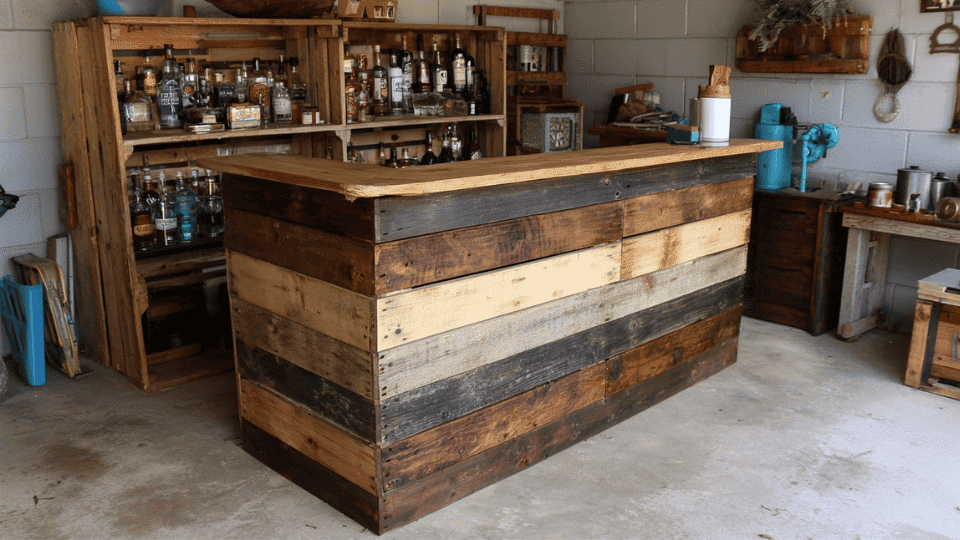
Grab free pallets from behind stores or warehouses and break them apart for wood. Sand everything down really well because pallets can be rough and splintery.
Stain the boards in different shades for a mixed, layered look. This is the cheapest way to build a diy bar, and it looks surprisingly good when done right.
9. Farmhouse Style Bar
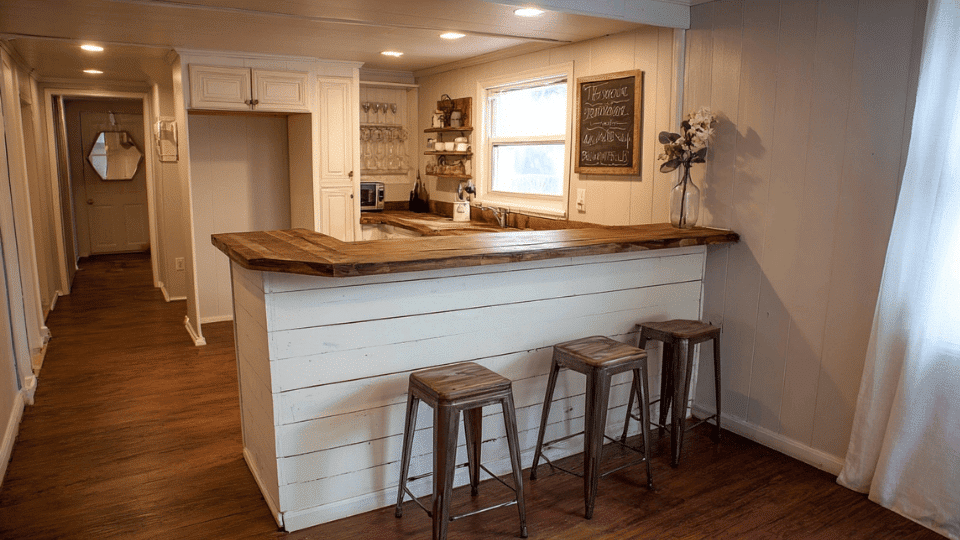
Go with light-colored wood or white paint and simple, chunky designs. Add shiplap panels to the front or use tongue-and-groove boards.
Stick with soft, neutral tones and avoid anything too sleek or modern. Throw in some vintage hooks or mason jar lights for extra charm. This style feels cozy and welcoming.
10. Hidden Cabinet Bar
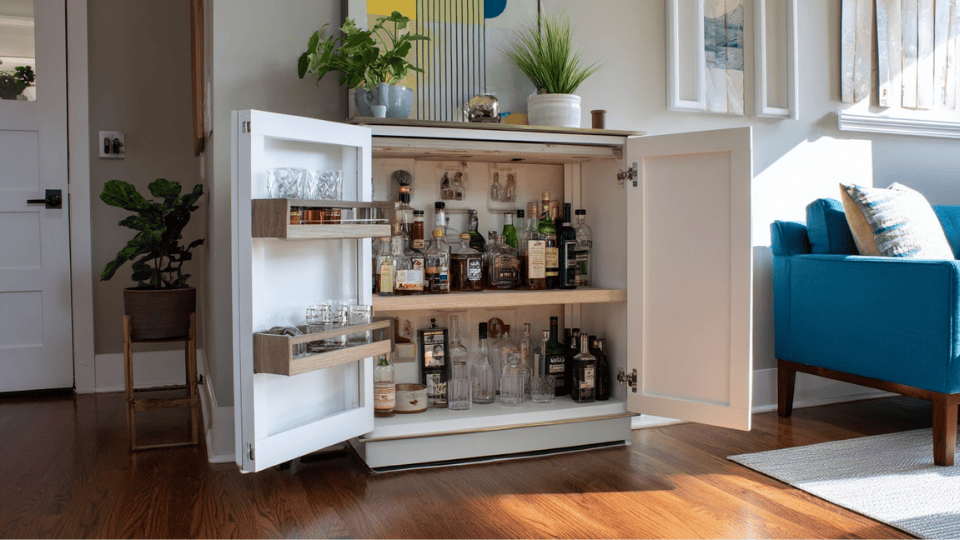
Build your bar inside an old armoire or cabinet, so it disappears when you close the doors. Add shelves inside for bottles and glasses, then mount a small countertop that pulls out or folds down.
This works great if you want a bar but don’t want it on display all the time. Guests won’t even know it’s there until you open it up.
11. LED-Lit Bar
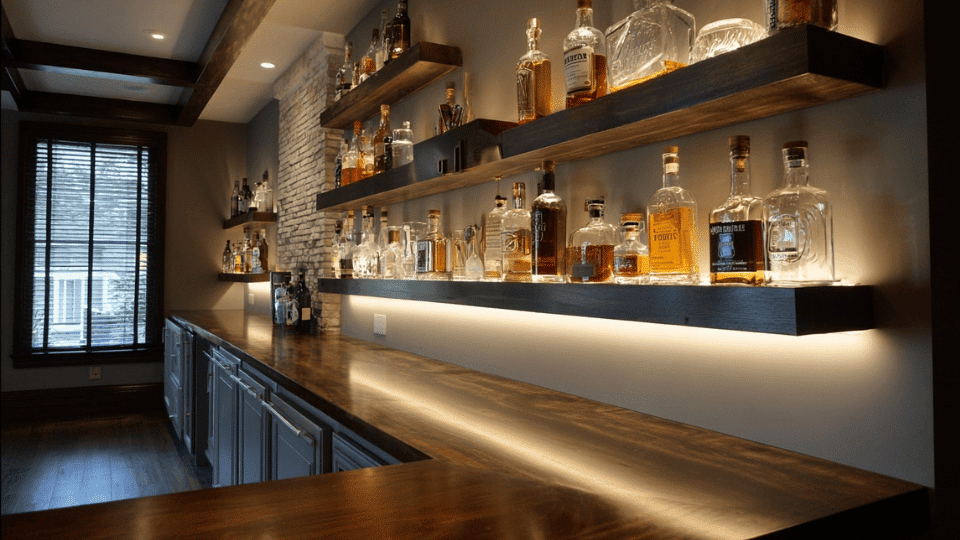
Install LED light strips under the bar top, behind shelves, or inside glass cabinets. Use color-changing bulbs to switch up the mood.
The lights make your diy bar look way more expensive than it actually is. Plus, they’re easy to install and don’t require any complicated electrical work. Just peel, stick, and plug in.
Mix ideas freely. A rustic pallet built with LED strips underneath, for example, is one of the most popular combinations because the contrast works. Pick a style to start from, then adjust it to match what you actually like.
Not interested in a full cocktail setup? The same building techniques work just as well for a DIY coffee bar, which focuses on a dedicated morning routine space rather than an evening one.
Common Mistakes to Avoid
Building a diy bar is pretty straightforward, but a few rookie mistakes can mess things up or cost you extra time and money. Watch out for these.
- Skipping measurements: Measure your space before you build anything. A bar that’s too big or too small is a waste of materials and effort.
- Using cheap screws: They strip out or break when you need them most. Spend a few extra bucks on decent hardware.
- Forgetting to seal the wood: Spills happen constantly at a bar. Without sealant, your wood will stain, warp, and look terrible within weeks.
- Building too high or too low: Standard bar height is around 42 inches. Go shorter, and it feels awkward. Go taller, and nobody can reach their drink comfortably.
- Not planning for storage: You need somewhere to put glasses, bottles, and tools. Don’t realize this after you’ve already built everything.
Learn from other people’s screw-ups instead of making them yourself. A little extra planning saves you headaches later.
Final Thoughts
Building a diy bar gives you something store-bought options never will: a space that’s completely yours. You picked the style, chose the materials, and put in the work.
Now you’ve got a spot where friends gather, stories get told, and drinks taste a little better because you made the place they’re served. Your diy bar might not be perfect, but that’s what makes it real.
Every scratch and imperfection just adds character. So stop scrolling through expensive bar catalogs and start building. Grab your tools, pick a design, and make it happen. Your home bar is waiting.
Frequently Asked Questions
Is It Cheaper To Build Or Buy A Bar?
Building a bar is usually cheaper, especially if you use basic wood and already own some tools. Buying costs more because you pay for labor, design, and delivery.
What Materials Are Best For A DIY Bar?
Plywood, 2×4 lumber, and solid wood boards work well for most DIY bars. For outdoor bars, use treated wood and a weather-resistant sealant.
Do Home Bars Increase Property Value?
A home bar may add appeal, but it does not always raise property value. It helps most when it looks built-in and fits the space well.