

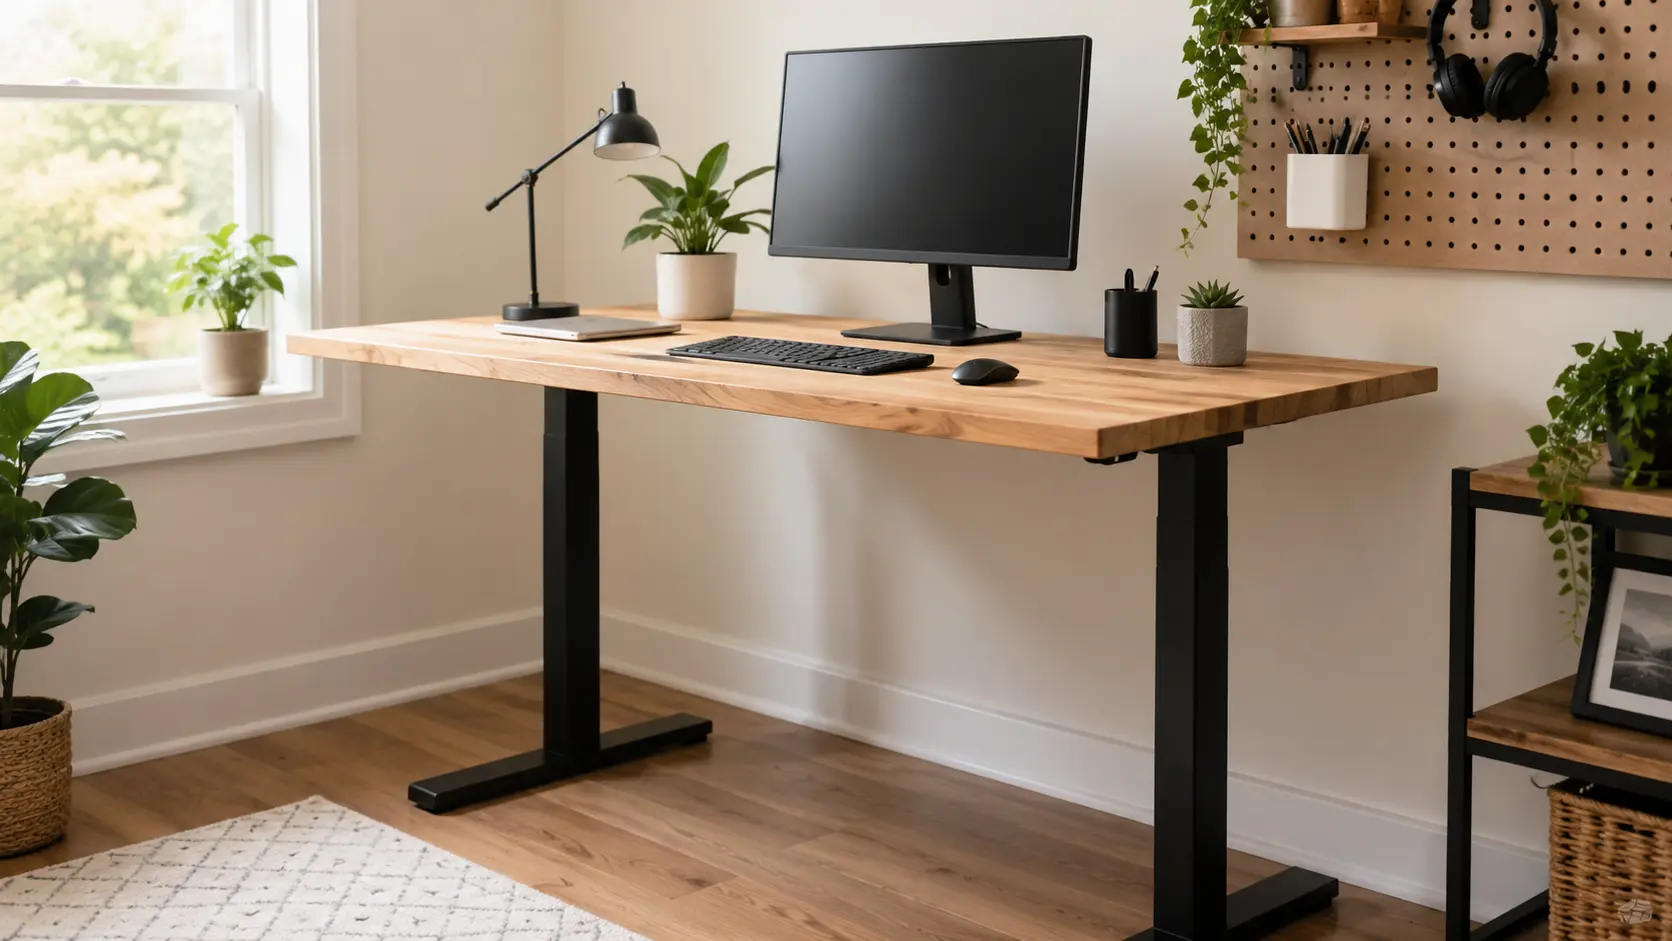
My lower back started complaining before my coffee even got cold.
Six years of writing at a regular desk will do that, and buying a standing desk was not in the budget when I was already knee-deep in a craft project that had taken over half my living room.
Working from home made me realize how much time I was spending hunched over a desk that never really fit my posture or workflow.
So I built one myself. It cost a fraction of the store price, fit my space perfectly, and changed how I work through a long writing day.
Mayo Clinic backs this up, too. Active workstations are far better for your health than sitting for hours on end.
A DIY standing desk makes more sense than most people realise, cheaper, fully customizable, and not as complicated to build as it sounds.
Here are the ideas, the steps, and everything I learned along the way.
What to Know Before You Build a DIY Standing Desk
A little planning before you start saves a lot of fixing later. Here’s what to sort out first.
Get the Height Right
Your elbows should rest at about a 90-degree angle when your hands are on the desk. For most people between 5’4″ and 5’10”, that usually means a desk height of 38 to 42 inches from the floor.
Measure before you cut. Fixing the height after the build can waste both time and material.
Know How Much Space You Need
A 48 x 24-inch surface works well for a single-monitor setup. For dual monitors, add another 12–18 inches of width.
Try to keep at least 3 feet of open space behind the desk so you can shift positions while standing.
Plan Your Budget
A simple diy standing desk can cost around $30–$50 if you use reclaimed wood or storage crates.
Mid-range builds with solid wood and metal legs often cost $100–$250. Adjustable sit-stand setups with electric frames usually cost $300–$600, depending on the frame and tabletop material.
Do You Need Any Building Experience
No prior woodworking experience needed. If you can measure, drill, and follow steps, you’re ready. Most beginner builds take 2–4 hours from start to finish.
Check the tips by Healthline for using the standing desk appropriately.
Materials and Tools You’ll NeedTabletop Materials
Frame & Support Options
Tools
|
Diy Standing Desk Step-By-Step Guide
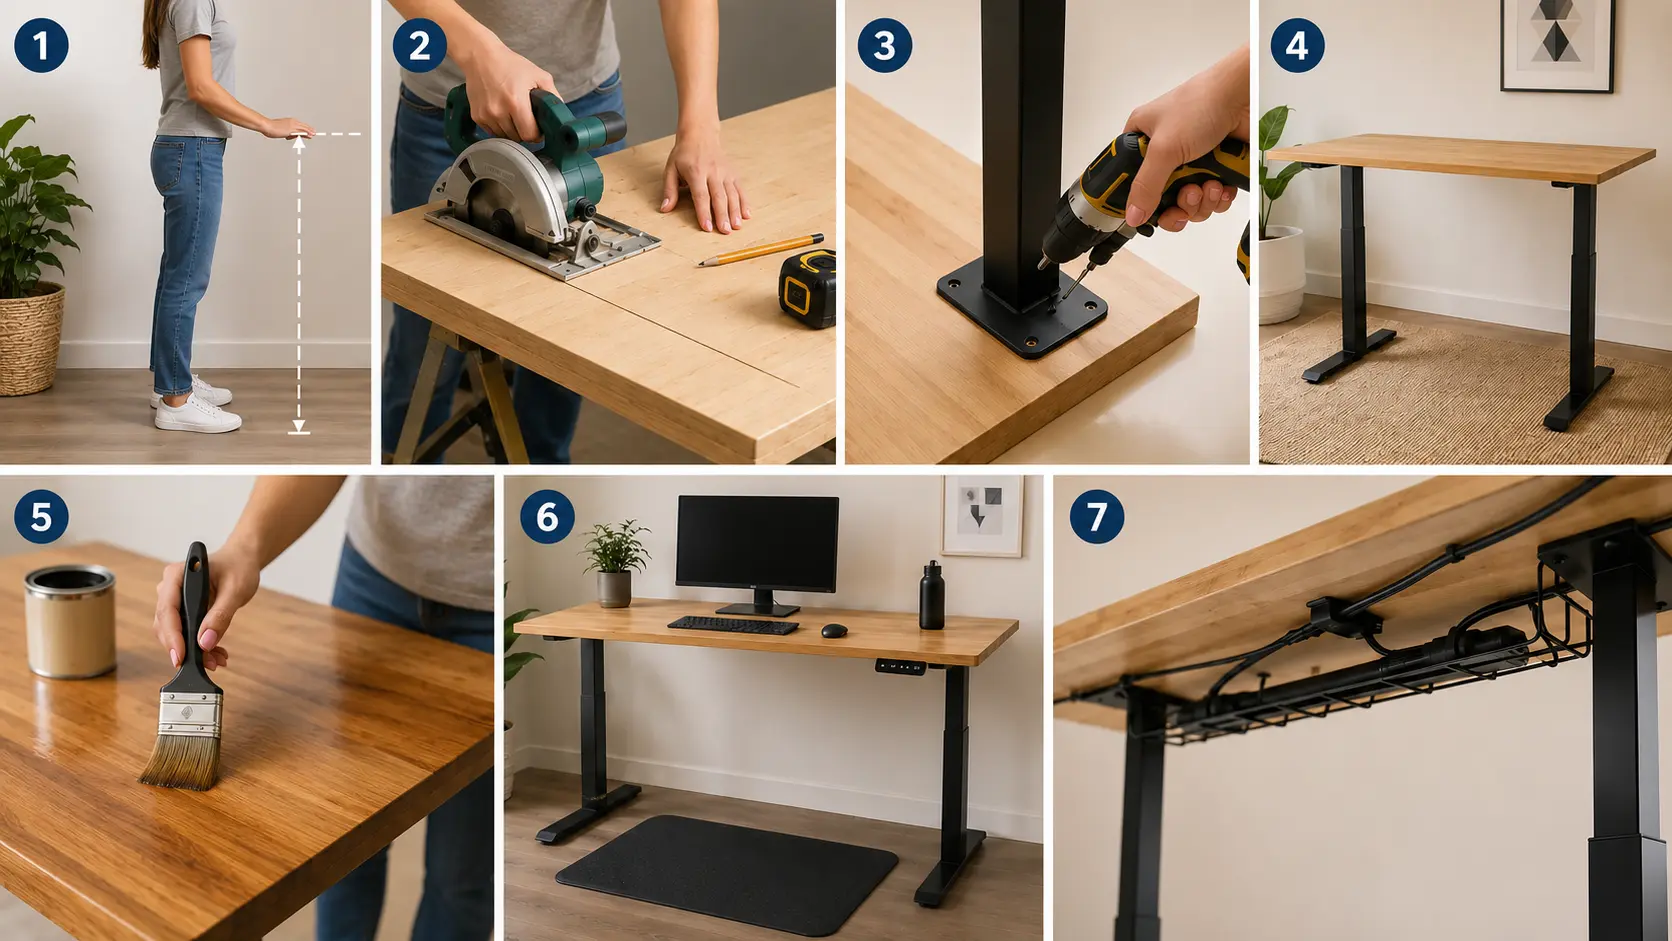
Building your own standing desk is simpler than most people expect. Follow these steps in order, take your measurements seriously, and you’ll have a solid working desk ready in a few hours.
Step 1: Measure Your Ideal Height
Stand straight with your arms relaxed. Bend your elbows to 90 degrees and measure from the floor to your hands; that’s your target desk height. Mark it clearly before touching any material.
Tip: Add half an inch if you plan to use an anti-fatigue mat.
Step 2: Cut or Prepare the Desktop
Mark your measurements on the tabletop material and cut carefully along a straight edge. Sand the cut edges lightly before moving on.
Tip: Ask your hardware store to cut the board for you, most do it for free or a small fee, saving you time and effort.
Step 3: Build or Attach the Frame
Position your legs or frame at each corner, at least 2 inches from the edges. Pre-drill holes to avoid splitting the wood, then screw everything in firmly.
Tip: Metal hairpin legs or ikea legs work straight out of the box, no building required.
Step 4: Secure and Stabilize the Desk
Flip the desk upright and test for wobble. Tighten any loose screws and add corner brackets under the table if needed.
Tip: Place it on a flat surface while checking stability; uneven flooring gives a false reading.
Step 5: Sand and Finish the Surface
Sand the entire surface starting with medium grit, then finish with fine grit for a smooth result. Apply a wood stain, paint, or clear coat based on your preference.
Tip: Two thin coats of finish hold better than one thick coat. Let each coat dry completely before adding the next.
Step 6: Set up And Test Ergonomics
Place your monitor at eye level, roughly an arm’s length away. Your wrists should stay flat on the surface, not bent upward or downward.
Tip: Stand for 20–30 minutes, then sit. alternating keeps your body comfortable and reduces fatigue over long work sessions.
Step 7: Add Cable Management
Once the desk height feels right, tidy the cables, then call the project finished. Use adhesive cable clips, a slim cable tray, or reusable ties to guide cords along the underside of the tabletop instead of letting them hang behind the desk.
Tip: Label both ends of each cable before securing them. It makes unplugging one device much easier later.
Best Wood Options for a Diy Standing Desk
|
Video Tutorial
A special thanks to Ex ocontralto for their detailed YouTube tutorial on building a standing desk, which guided the steps and provided practical insights for this project.
Diy Standing Desk Ideas You Can Try at Home
Not every build looks the same. Your space, budget, and comfort with tools all point to different starting points. Here are eight solid options worth considering.
Simple Wooden Standing Desk
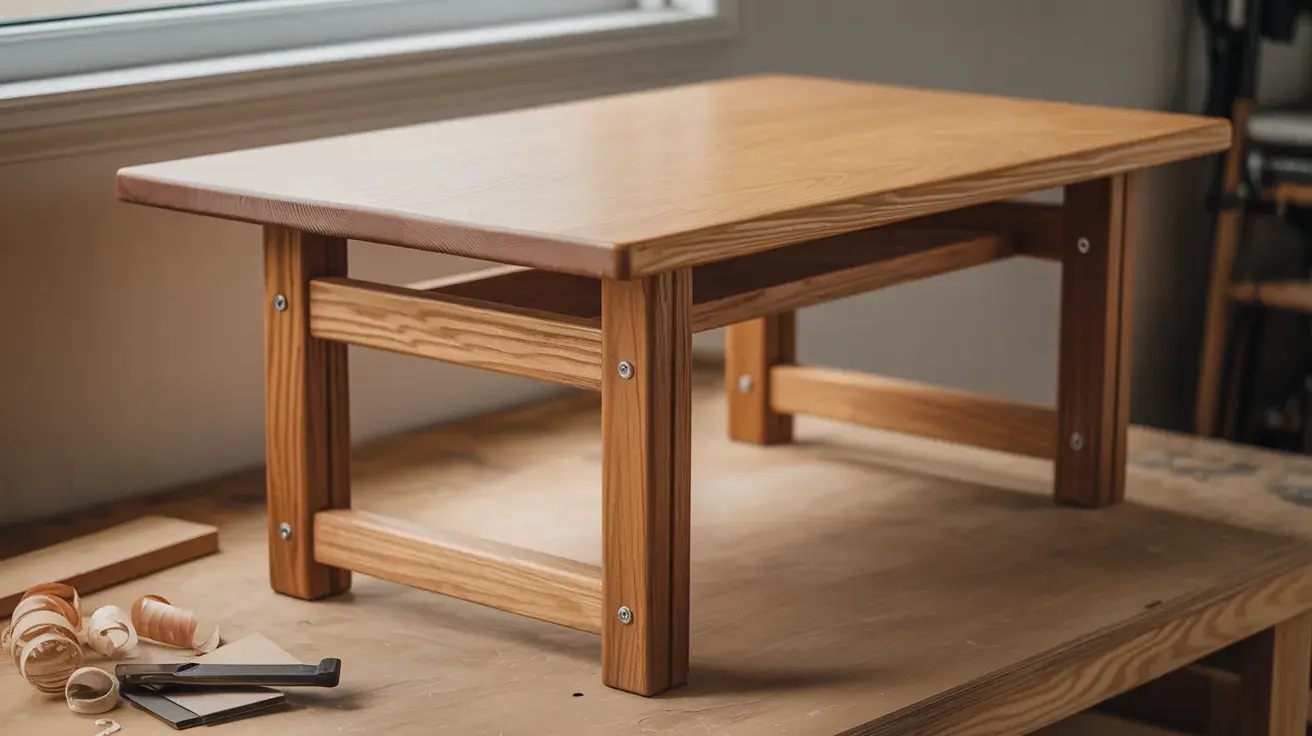
A flat wooden tabletop mounted on four solid legs, clean, straightforward, and built to last. You pick the wood, cut it to your size, and attach legs at your exact standing height.
Sand it down, add a finish coat, and it looks as good as anything you’d buy from a furniture store.
- Who it is For: anyone trying a Standing Desk for The First Time
- Cost: $50–$120
- Difficulty: beginner
Adjustable Diy Standing Desk
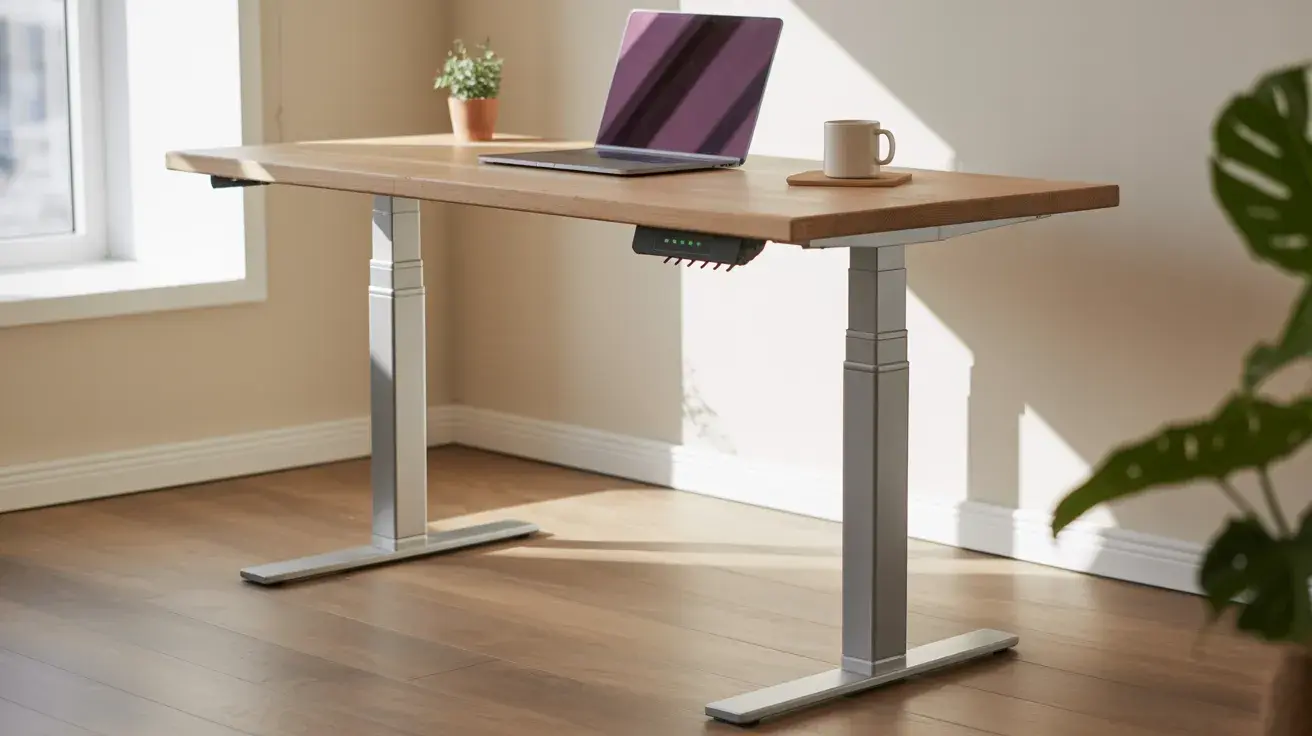
Built with a hand-crank mechanism or electric legs that let you switch between sitting and standing throughout the day.
Electric legs can be sourced separately and fitted under almost any tabletop. It takes a bit more assembly than a fixed build, but the day-to-day comfort is worth the extra effort.
- Who it is for: People who want flexibility without committing to standing full-time
- Cost: $150–$400
- Difficulty: intermediate
Wall-Mounted Foldable Desk
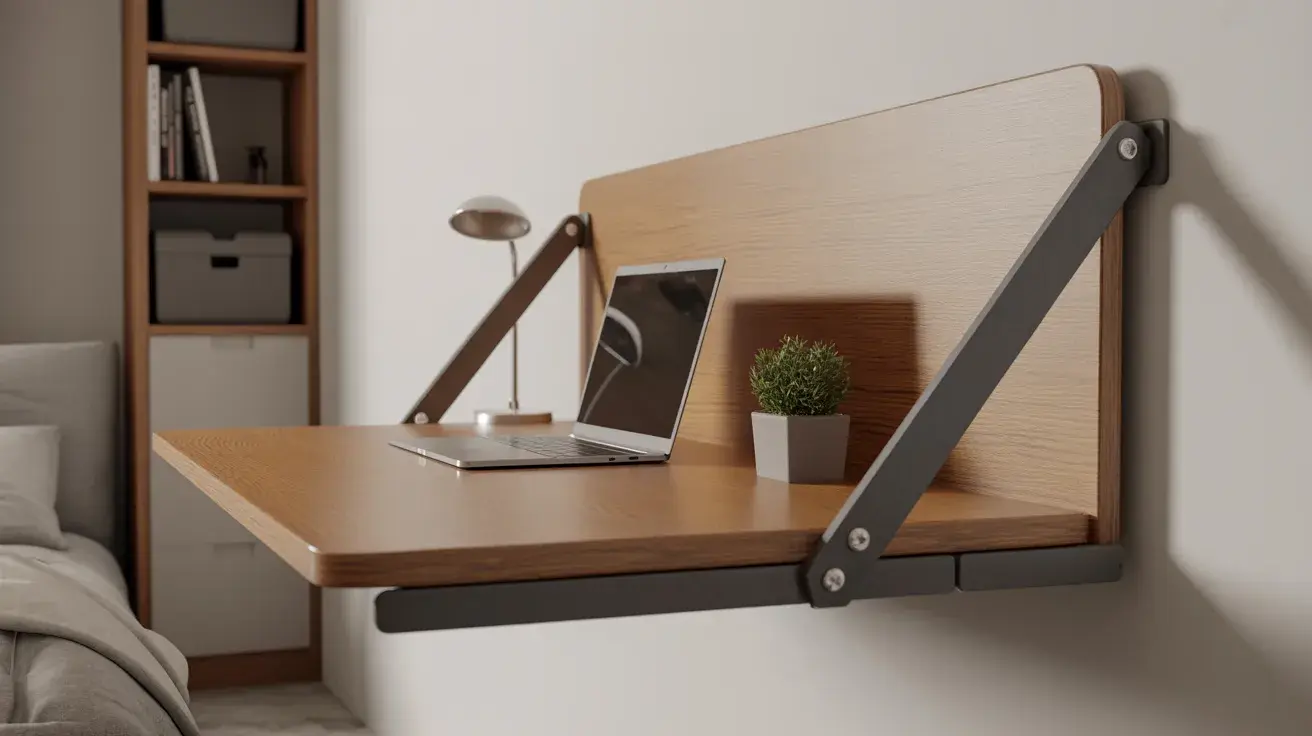
A hinged board, fixed directly to the wall and folding flat when not in use, takes up almost no floor space.
When open, it gives you a clean working surface at the right standing height. When closed, the wall looks clear, and the room feels open again.
- Who it is for: Small rooms, home offices with limited space
- Cost: $30–$80
- Difficulty: Beginner
IKEA Hack Standing Desk
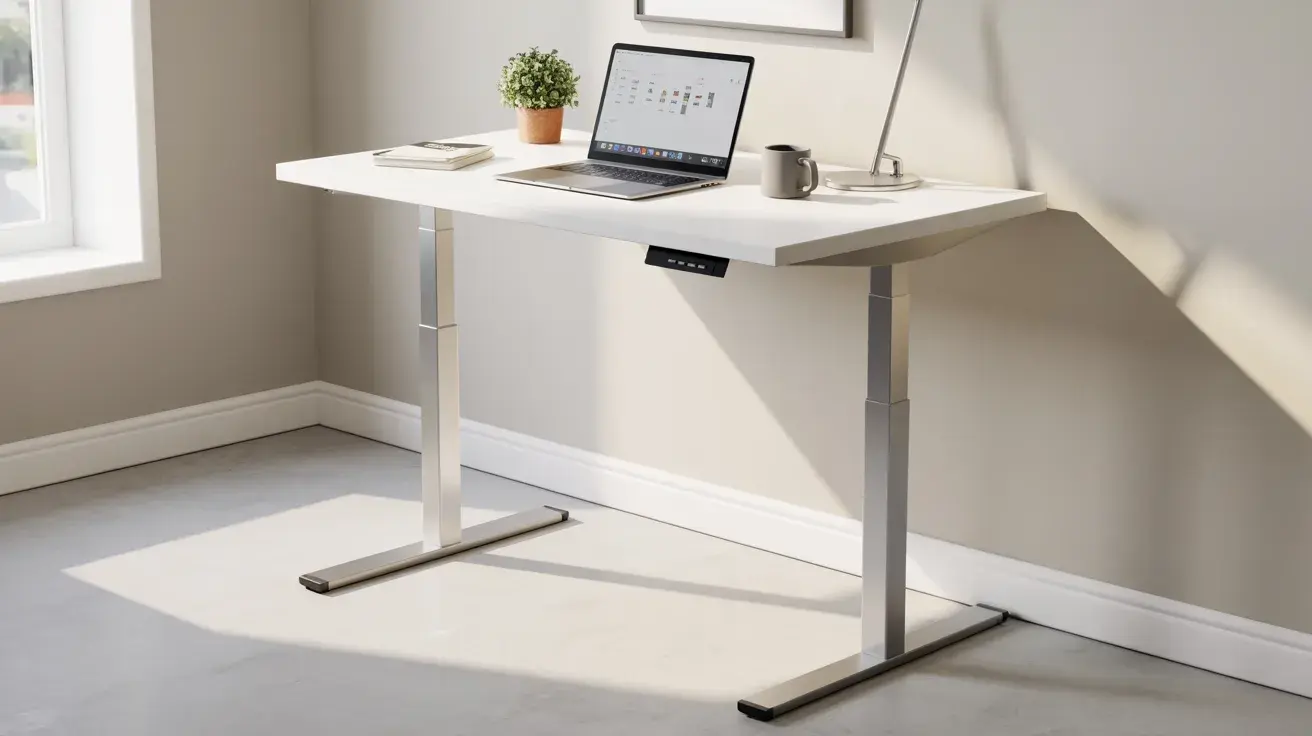
Use an Ikea countertop or shelf unit as the base, then adjust the height with drawers, risers, or wall supports.
A Karlby countertop paired with Alex drawer units is a popular choice for a sturdy, clean-looking desk with built-in storage.
Check the current IKEA stock in your area before planning the build, since some older parts, including certain adjustable legs, may not be available in every market.
- Who it is for: Budget builders who want a neat desk without cutting lumber
- Cost: $80–$250
- Difficulty: Beginner to intermediate
PVC Pipe Standing Desk
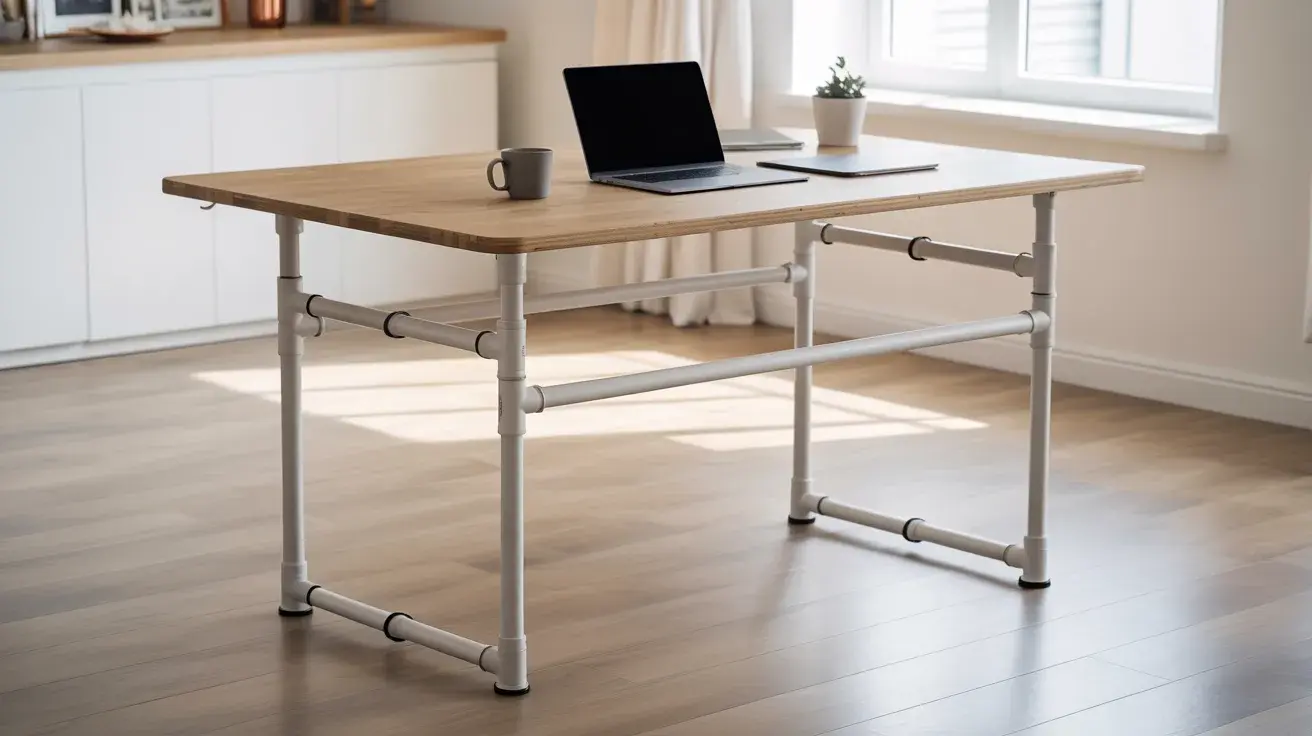
A frame built entirely from PVC pipes and fittings, topped with a flat board or plywood surface. PVC is light, easy to cut with a hand saw, and simple to reconfigure if you want to change the height.
It doesn’t look like much on its own, but a coat of spray paint and a decent tabletop make it look far better than the price suggests.
- Who it is for: Renters or anyone who wants something lightweight and temporary
- Cost: $25–$60
- Difficulty: Beginner
Crate or Box Standing Desk
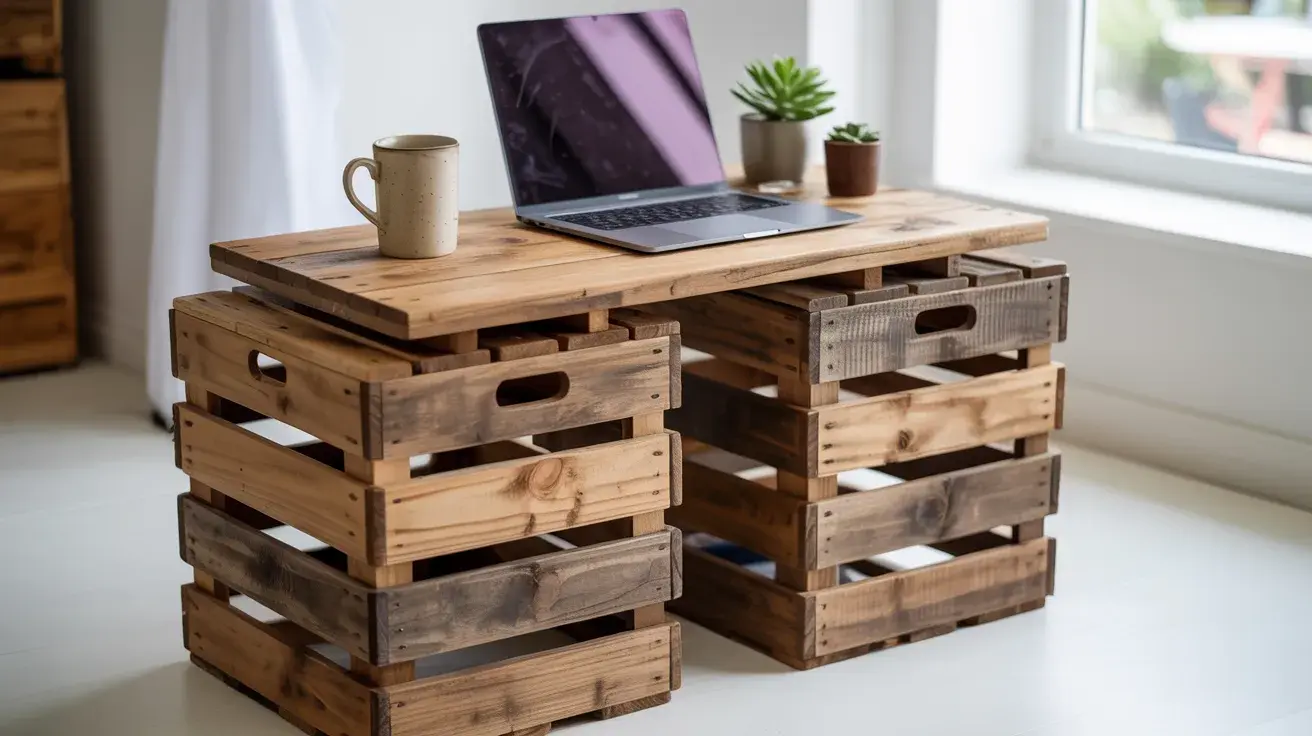
Wooden crates or sturdy storage boxes stacked and secured to the right height, with a flat board placed on top as the working surface.
No cutting, no drilling, and no special tools required, just stack, secure, and done. Paint the crates or leave them natural, depending on the look you’re going for.
- Who it is for: Minimal-effort builds on a very tight budget
- Cost: $15–$40
- Difficulty: Beginner
Corner Standing Desk
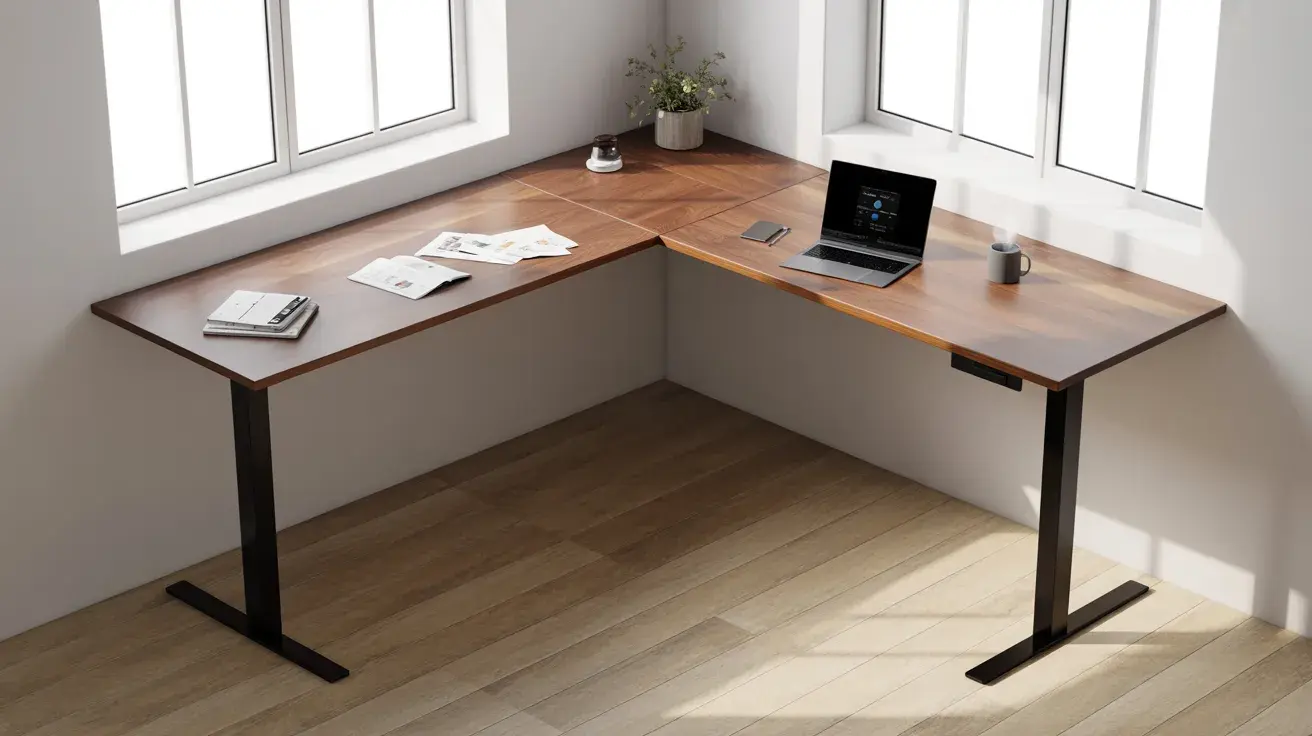
An L-shaped surface that fits snugly into a corner, giving you more working area without taking over the whole room.
Building it from two separate boards joined at an angle keeps the construction manageable.
It makes good use of the Corner space for grabbing coffee and working, which often goes wasted in most home offices.
- Who it is for: Dual-monitor setups or anyone who needs extra desk space
- Cost: $100–$250
- Difficulty: Intermediate
Minimal Laptop Standing Desk
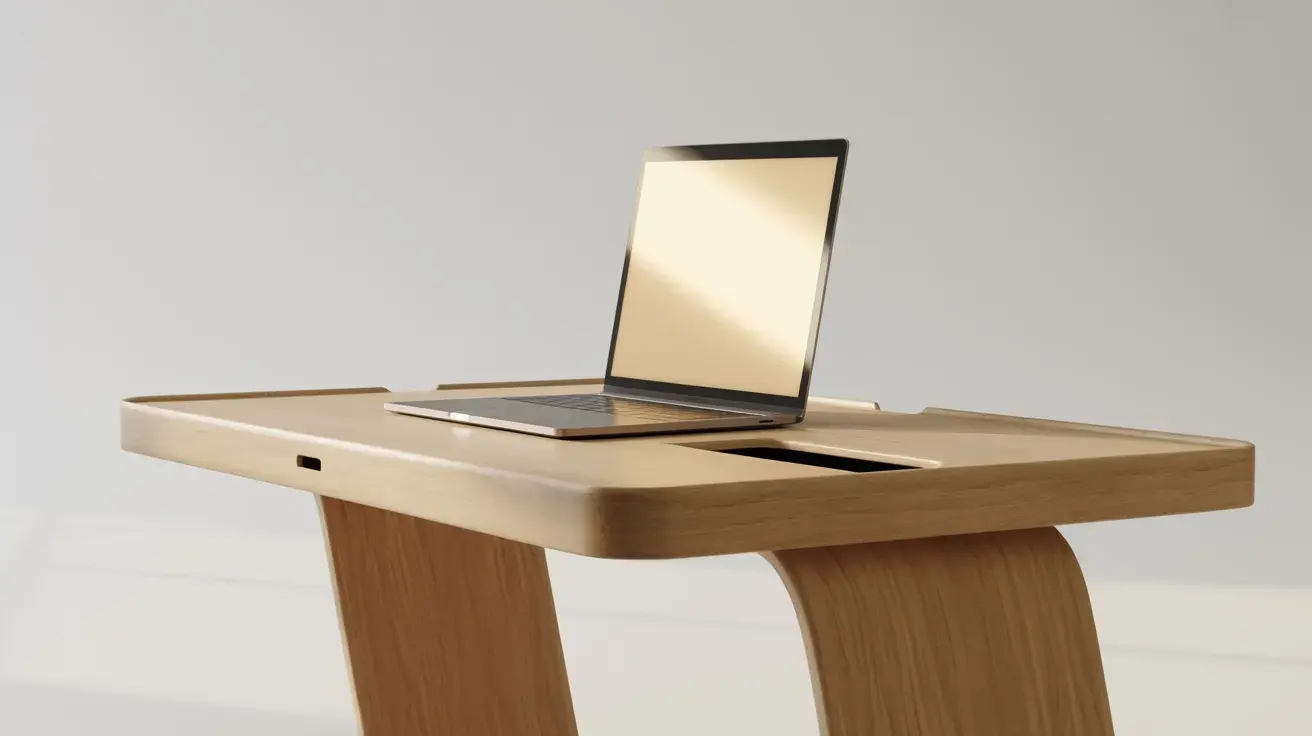
A single raised platform or shelf built to the exact height you need, designed purely for laptop use.
There are no extra cutouts, no cable management trays, nothing unnecessary, just a clean surface at the right level. It’s the fastest build on this list and requires the fewest materials.
- Who it is for: Remote workers and students who only need space for a laptop
- Cost: $10–$35
- Difficulty: Beginner
Common Mistakes to Avoid
Building a standing desk is straightforward, but a few common errors can turn a solid project into a frustrating one. catching these early saves you time, money, and a rebuild.
- Building at the Wrong Height: Most people guess rather than measure properly, resulting in a desk that strains the neck or wrists. Always measure with your shoes on and your arms bent at 90 degrees before cutting anything.
- A Weak Frame that Wobbles: This usually comes from legs that aren’t secured tightly or a frame that wasn’t squared before drilling. Use corner brackets underneath and check all joints before calling the build done.
- Underestimating Weight Support: A dual-monitor setup, laptop, and accessories add up fast. MDF and thin plywood can sag over time if the frame doesn’t carry the full load. Go with thicker wood and add a center support beam for heavier setups.
- Skipping the Finish: Raw, unsanded edges are sharp, collect dust, and look incomplete. A quick sand and one coat of finish take under an hour but make a real difference in how the desk holds up over time.
Most of these mistakes take five minutes to avoid and hours to fix. Get them right the first time, and the rest of the build goes smoothly.
Diy Standing Desk vs Store-Bought
Not sure if you want to build or buy? This quick comparison breaks down where each option wins.
| Factor | Diy Standing Desk | Store-Bought |
|---|---|---|
| Cost | $20–$400 Depending on the build | $350 to Over $1,000 for Decent Quality |
| Flexibility | Full Control Over Size, Height, and Finish | Limited to Available Models and Sizes |
| Durability | Depends on Materials and Build Quality | Generally Consistent, Warranty Included |
| Setup Time | 2–6 Hours | 30 Mins to 1 Hour Assembly |
| Customisation | Build Exactly What You Need | Minimal, Mostly Color or Size Options |
| Skill Required | Basic Tools and Measuring | No Skills Needed |
| Weight Capacity | Varies by Build | Clearly Rated by The Manufacturer |
When Diy Makes Sense:
- You’re on a tight budget, and store options are too expensive
- You need a non-standard size that no off-the-shelf model covers
- You enjoy Hands-on projects and want something built your way
- You already have leftover wood or materials at home
When Buying Makes More Sense:
- You need an electric height-adjustable desk without the complexity
- You want a warranty and a guaranteed weight rating
- Time is more important to you than cost savings
Build It Once, Work Better Every Day
I won’t pretend my diy standing desk took no effort, but it took far less than I expected. The desk i built still holds everything i throw at it, and my lower back stopped complaining somewhere around week two.
If you’ve read this far, you already know enough to start. Pick the idea that fits your space and your budget, gather the materials, and give yourself an afternoon to get it done.
You don’t need to build the perfect desk on the first try; you just need to build one that works for you right now.
Pick your build from the list above, grab your materials, and get started this weekend. Your back will thank you sooner than you think.
Frequently Asked Questions
Can I Convert My Existing Desk Into a Standing Desk?
Yes, desk risers or monitor stands can raise your current setup to a standing height without any building. It’s not as precise as a full build, but it works well as a starting point.
How Long Does a Diy Standing Desk Last?
A well-built desk made of solid wood and with securely fastened joints can last 10 years or more. The finish and frame quality matter more than the material cost for long-term durability.
Is It Possible to Add Cable Management to a Homemade Standing Desk?
Clip-on cable trays and adhesive cable channels attach easily to most diy builds without any extra drilling. Running cables along the underside of the tabletop keeps the surface clean and the setup looking organized.
What Type of Wood Holds up Best for Daily Use?
Birch plywood and oak are both reliable choices, hard enough to resist scratches and stable enough to hold their shape over time. MDF works fine on a budget, but chips at the edges if left unfinished.