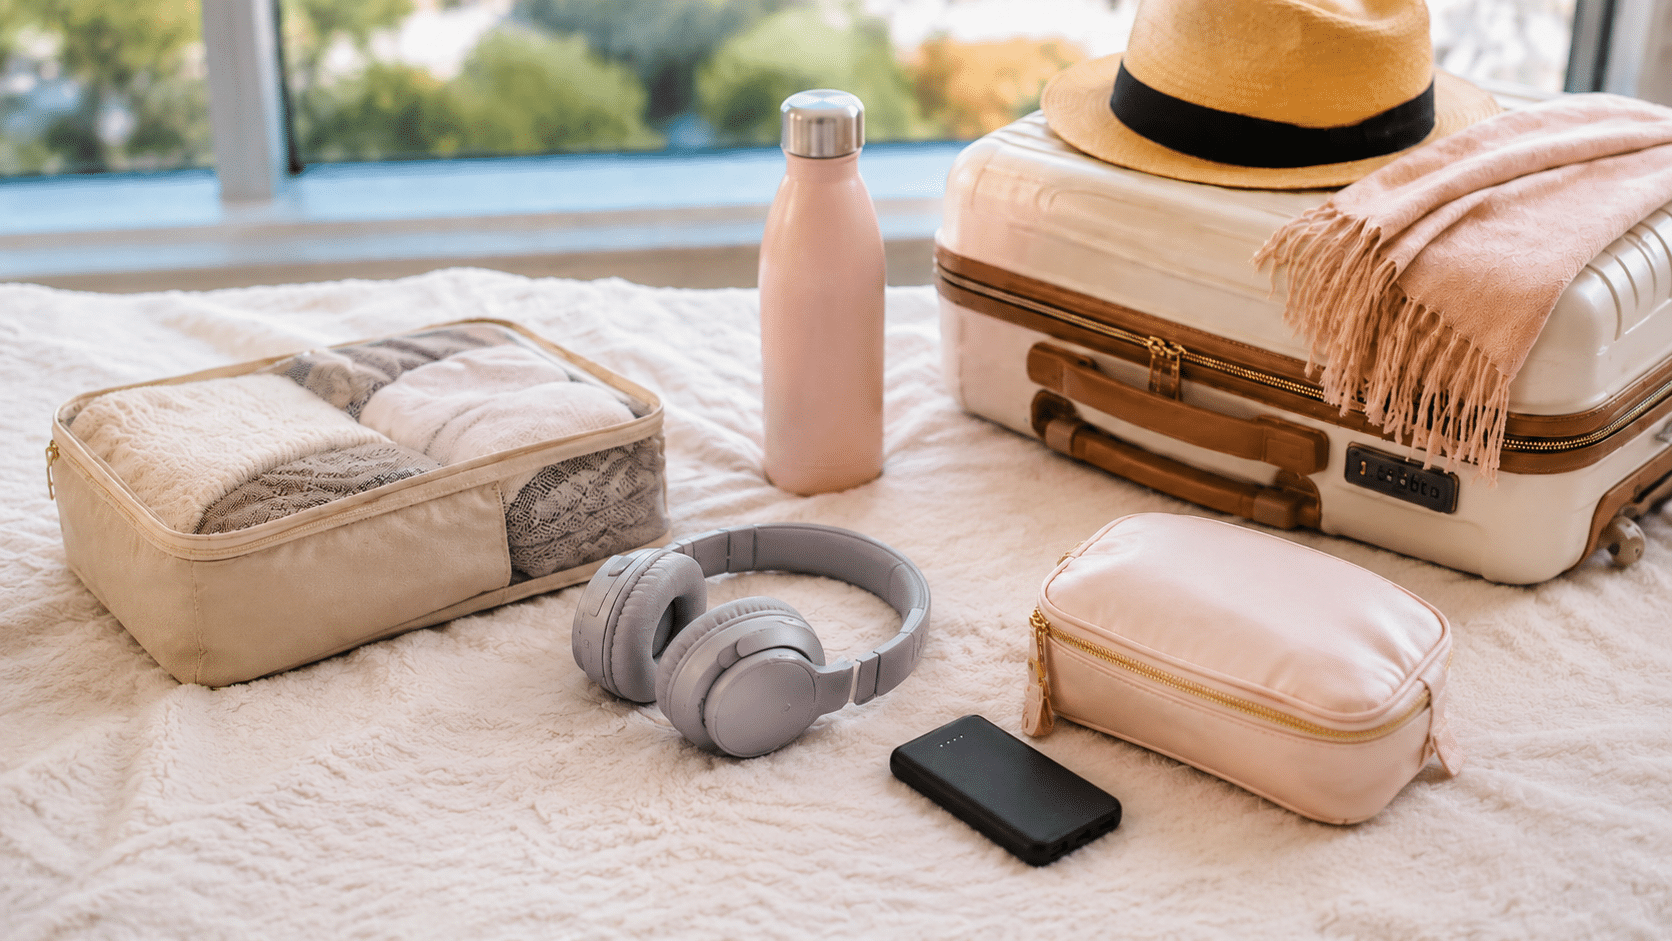

Planning a wedding can feel like a checklist that just keeps growing. And the invitations? They usually cost way more than you’d think.
That’s why more couples are choosing to make their own DIY wedding invitations in this modern time. They feel personal, cost less, and are honestly kind of fun to put together at home.
You don’t have to be a designer. You don’t need expensive tools either. Just grab some nice cardstock, a bit of free time, and an app like Canva, and you can make something that actually feels like you two.
Every little detail tells a piece of your story. Rustic, modern, soft, and romantic, whatever your vibe is, your invitations set the mood before anyone even shows up.
Why Couples are Choosing DIY Wedding Invitations in 2026
Couples are choosing DIY wedding invitations in 2026 because they want something personal, affordable, and easier to control.
Instead of paying for a full custom stationery suite, many are using templates, home printers, or online print services to keep costs manageable.
DIY wedding invitations give you more freedom than ready-made designs, especially when you’re trying to match the look and feel of your venue, from garden settings to unique wedding venues.
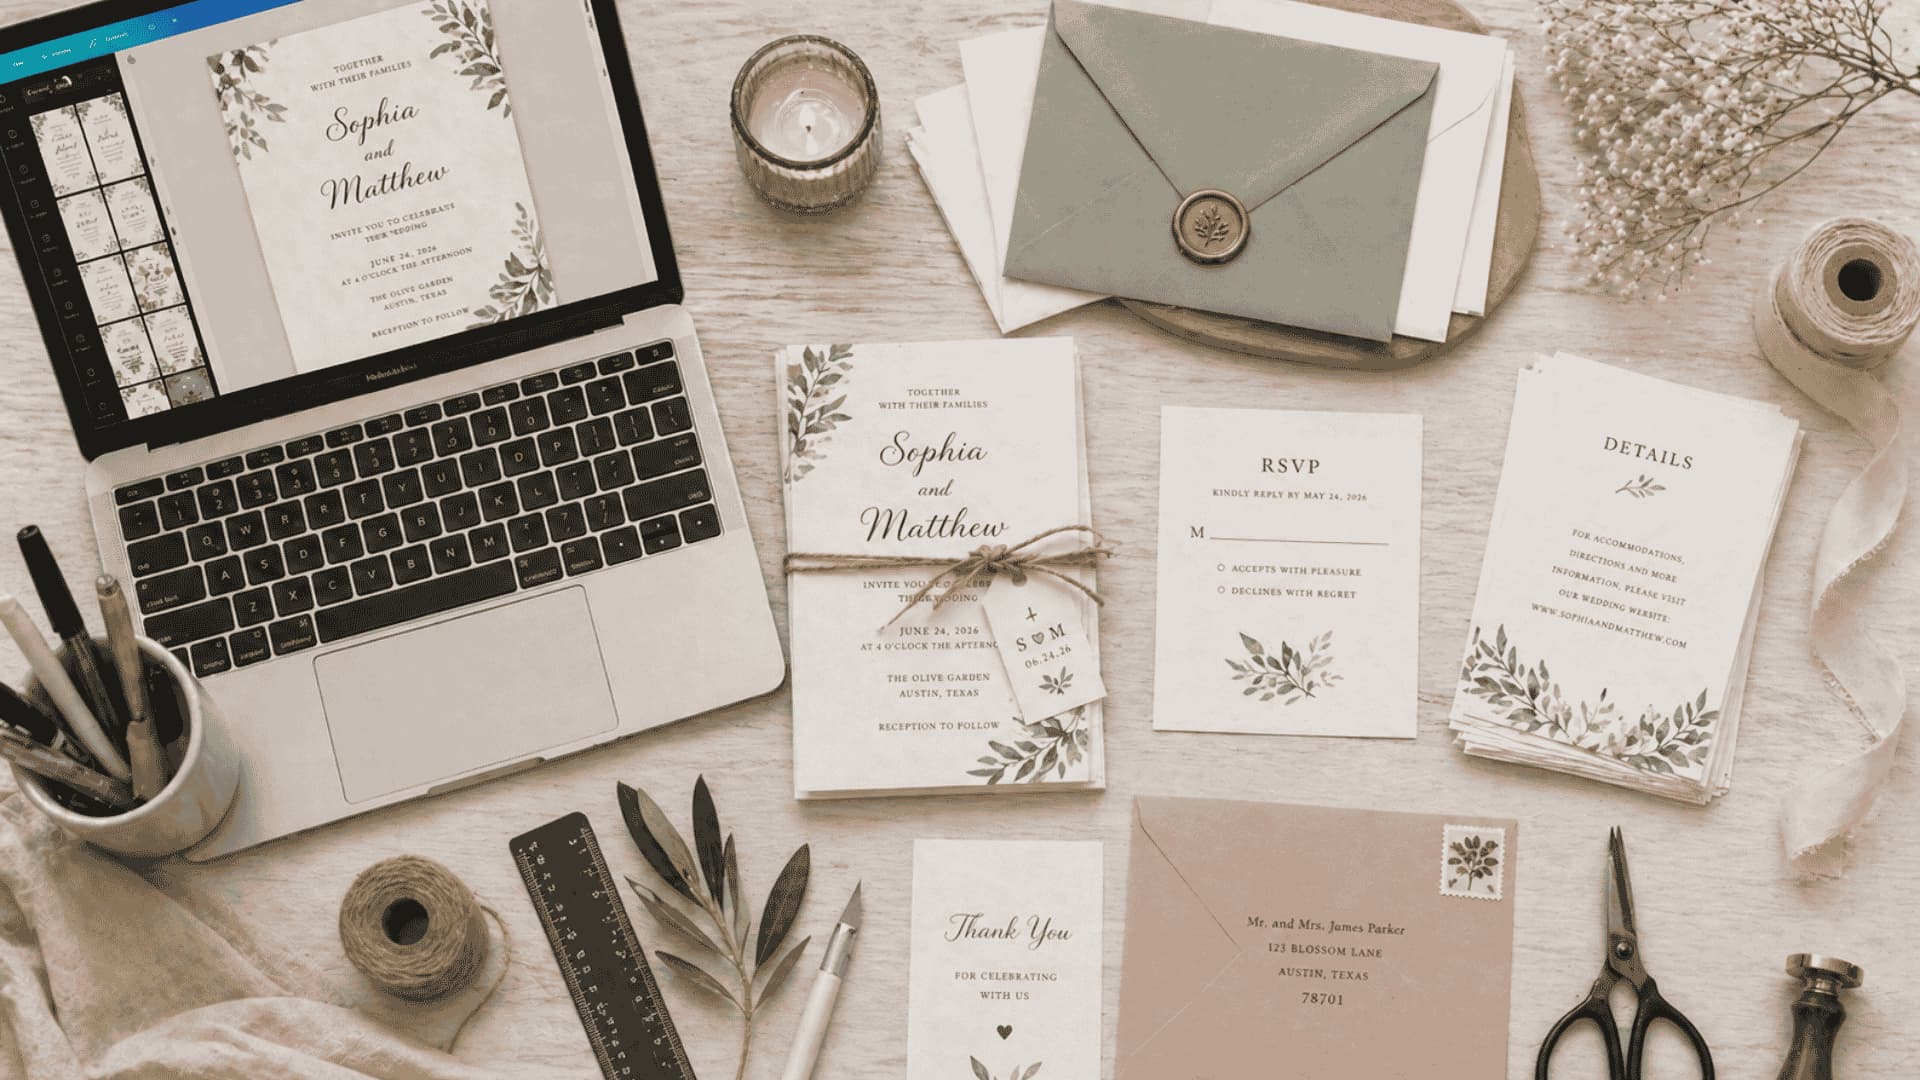
Platforms like Canva, Adobe Express, and Cricut Design Space offer ready-made templates that can be edited without design experience. Many couples are also choosing recycled paper, plantable seed paper, or digital save-the-dates to reduce waste.
The only thing to remember is time. Printing, cutting, and assembling can take a few weekends, so planning ahead makes the process much smoother.
The Three Main Types of DIY Wedding Invitations
DIY wedding invitations can be as simple or hands-on as you want. Before choosing a design, decide how much time, effort, and printing work you can realistically manage.
| Type | What You Do Yourself | Best For |
|---|---|---|
| Fully Handmade | Design, print, cut, and assemble everything at home | Small guest lists, creative couples |
| Semi-DIY | Use a template, print at home, and assemble yourself | Mid-size weddings, modest budgets |
| Hybrid | Design yourself, use a print service, then assemble at home | Larger weddings, polished finish on a budget |
Whichever route you choose, the goal stays the same: personal invitations that feel like your wedding without stretching your budget or adding unnecessary stress.
What Goes Inside a Wedding Invitation Suite
Before you start designing, it helps to know what a full invitation suite actually includes. Not every wedding needs all of these pieces, but knowing your options lets you plan your paper and printing budget upfront.
- Main invitation card: The primary piece with names, date, time, and venue. Standard sizes are 5″×7″ or 4.5″×6.25″.
- RSVP card: A separate, smaller card guests return with their response. Include a reply-by date and a pre-addressed return envelope.
- Details card: An insert for information that doesn’t fit on the main card, like accommodations, directions, or your wedding website URL.
- Outer envelope: Addressed to your guests with your return address. This is what they receive in the mail.
- Inner envelope (optional): A traditional touch that lists exactly who is invited, including children or plus-ones by name.
For casual weddings, the main card, RSVP card, and outer envelope are often enough. For more formal events, the full suite gives guests everything they need without having to track you down for details.
What You’ll Need to Make Your Own Wedding Invitations
Before you start designing, gather your supplies first. Having everything ready makes the process smoother and helps you avoid last-minute printing, cutting, or assembly problems.
DIY Wedding Invitation Materials ChecklistEssential Supplies:
Optional Upgrades for a Premium Look:
Best Free Design Tools:
|
How to DIY Wedding Invitations Step by Step
Once your materials are ready, break the process into small steps. This keeps the work manageable and helps you avoid wasting paper, ink, or time.
Step 1: Choose Your Invitation Style
Start by choosing a style that matches your wedding theme. It could be simple, floral, rustic, modern, or classic. Try not to mix too many design ideas at once. A clear style makes it easier to choose fonts, colors, paper, and small details later.
Pro tip: Save 3–5 inspiration images before designing so your invitation style stays consistent.
Step 2: Finalize Your Invitation Wording
Write all the important details before you start designing. Include both names, wedding date, time, venue, dress code if needed, and RSVP information. Keep the wording clear and easy to read. Once written, read it out loud to catch awkward lines or missing details.
Pro tip: Ask someone else to check spelling, names, dates, and venue details before printing.
Step 3: Design Your Invitation
Use a simple design tool like Canva, Adobe Express, or Cricut Design Space. Choose one main font and one accent font if needed. Keep enough white space around the text so the invitation feels neat, not crowded. Make sure every detail is easy to read.
Pro tip: Avoid using more than two fonts, or the design may look messy.
Step 4: Print a Sample First
Before printing the full batch, print one test copy on regular paper. Check the size, spacing, colors, and text alignment. This is the easiest time to fix problems. Once you’re happy with the sample, try one copy on your final cardstock.
Pro tip: Always test print before using expensive cardstock to avoid wasting your best paper.
Step 5: Print on Final Paper
Print your invitations in small batches instead of all at once. This helps you catch printer issues early, like smudging, color changes, or paper feeding problems. Let each batch dry fully before stacking. Handle the paper by the edges to keep it clean.
Pro tip: Check every few prints so you can catch mistakes before wasting more paper.
Step 6: Cut and Assemble
Use a paper trimmer or craft knife for clean edges. If your invitation includes layers, vellum, belly bands, or ribbon, prepare each piece before assembling. Work slowly and keep one finished sample nearby so every invitation looks the same.
Pro tip: Assemble one complete invitation first, then use it as your guide.
Step 7: Address and Send Your Invitations
Once everything is assembled, address the envelopes clearly and check postage before mailing. Invitation suites with wax seals, ribbons, or extra cards may weigh more than a standard letter. Send wedding invitations around 6–8 weeks before the wedding date.
Pro tip: Take one finished invitation to the post office to confirm the correct postage.
5 Most Popular DIY Wedding Invitation Ideas
DIY wedding invitations give you more freedom than ready-made designs. You can match your theme, budget, and style without limits. Below are practical ideas you can recreate at home, even if you’re just starting out.
As you decide on a style, it’s worth considering how it ties in with other personal details, including your guest book alternatives, so the whole experience feels cohesive for your guests.
1. Rustic & Boho DIY Wedding Invitations
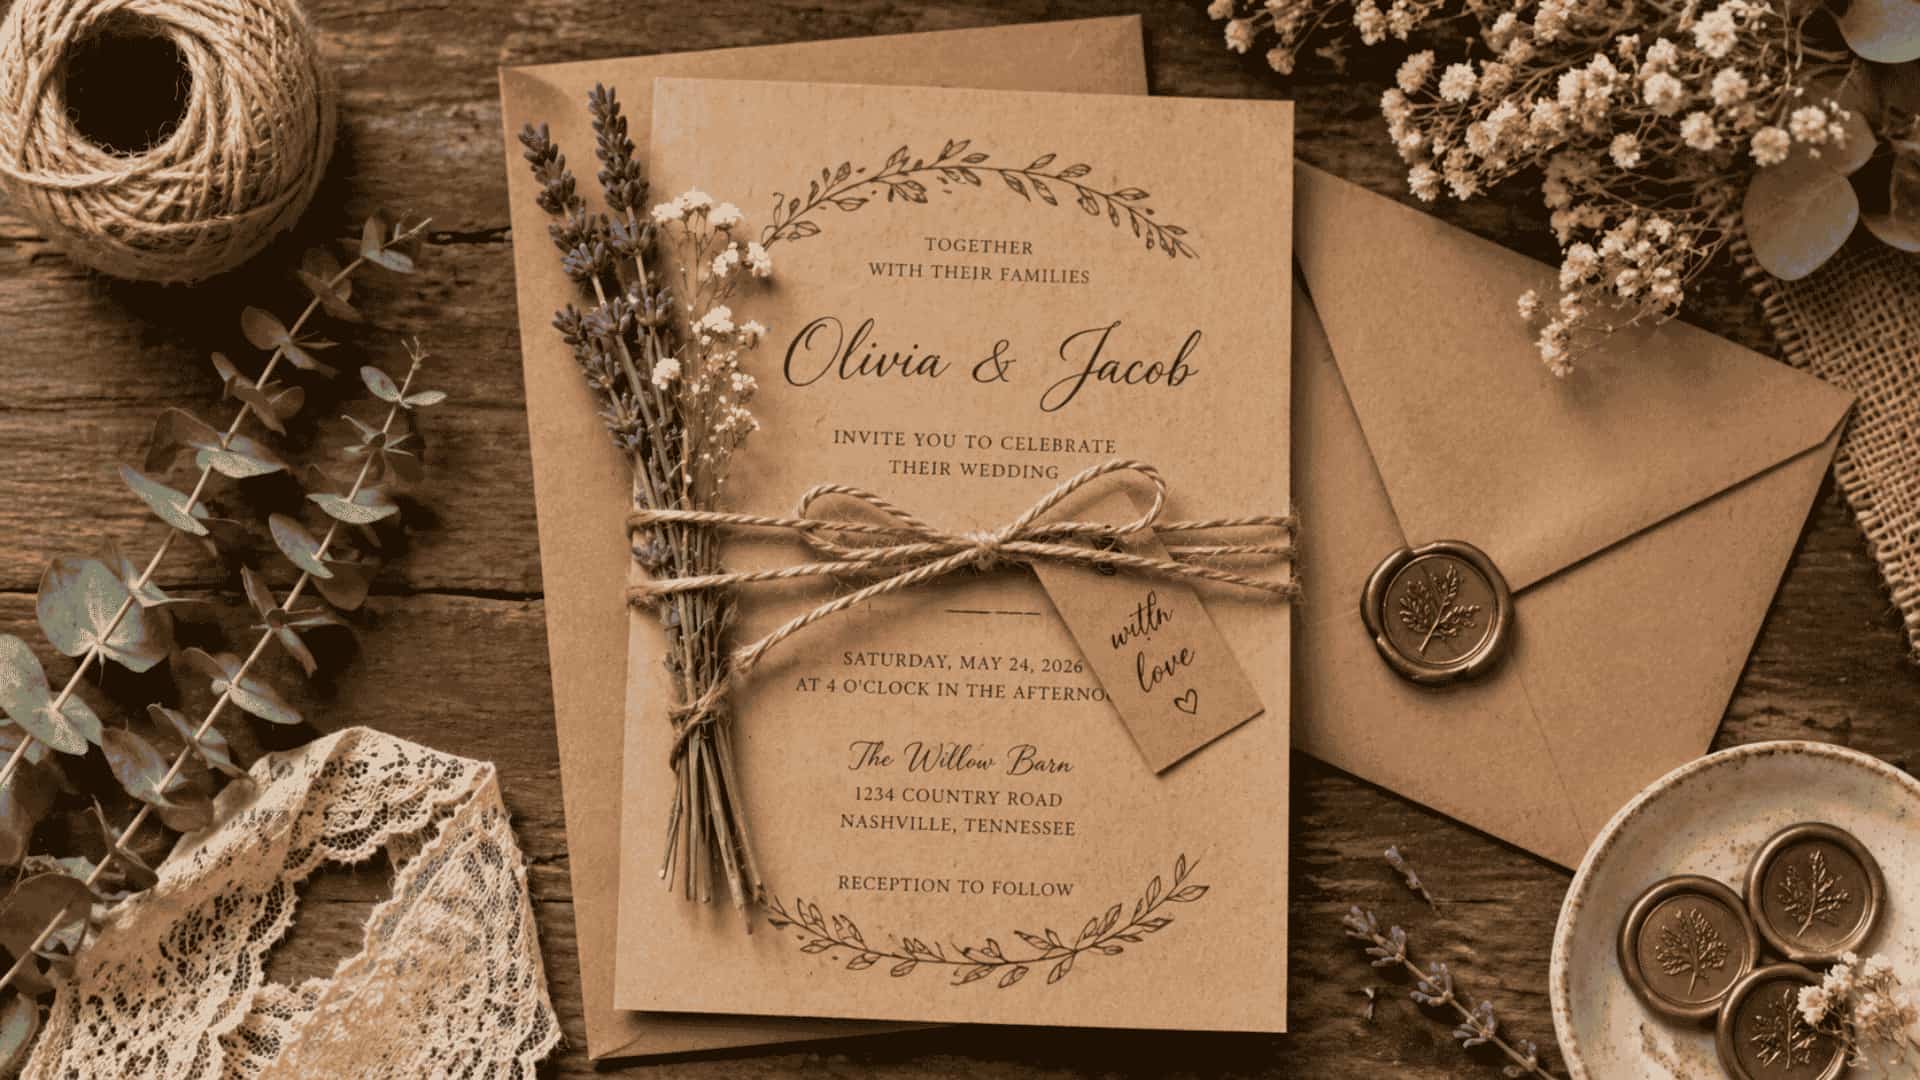
This style is one of the easiest to work with at home. It doesn’t need perfect edges or symmetry, which makes it forgiving and budget-friendly.
How to make it:
- Use kraft cardstock with simple printed text
- Tie dried florals like lavender or eucalyptus with twine
- Add wax seals with pressed flowers
Best for: Outdoor, barn, garden, or seasonal weddings
2. Minimalist & Modern DIY Wedding Invitations
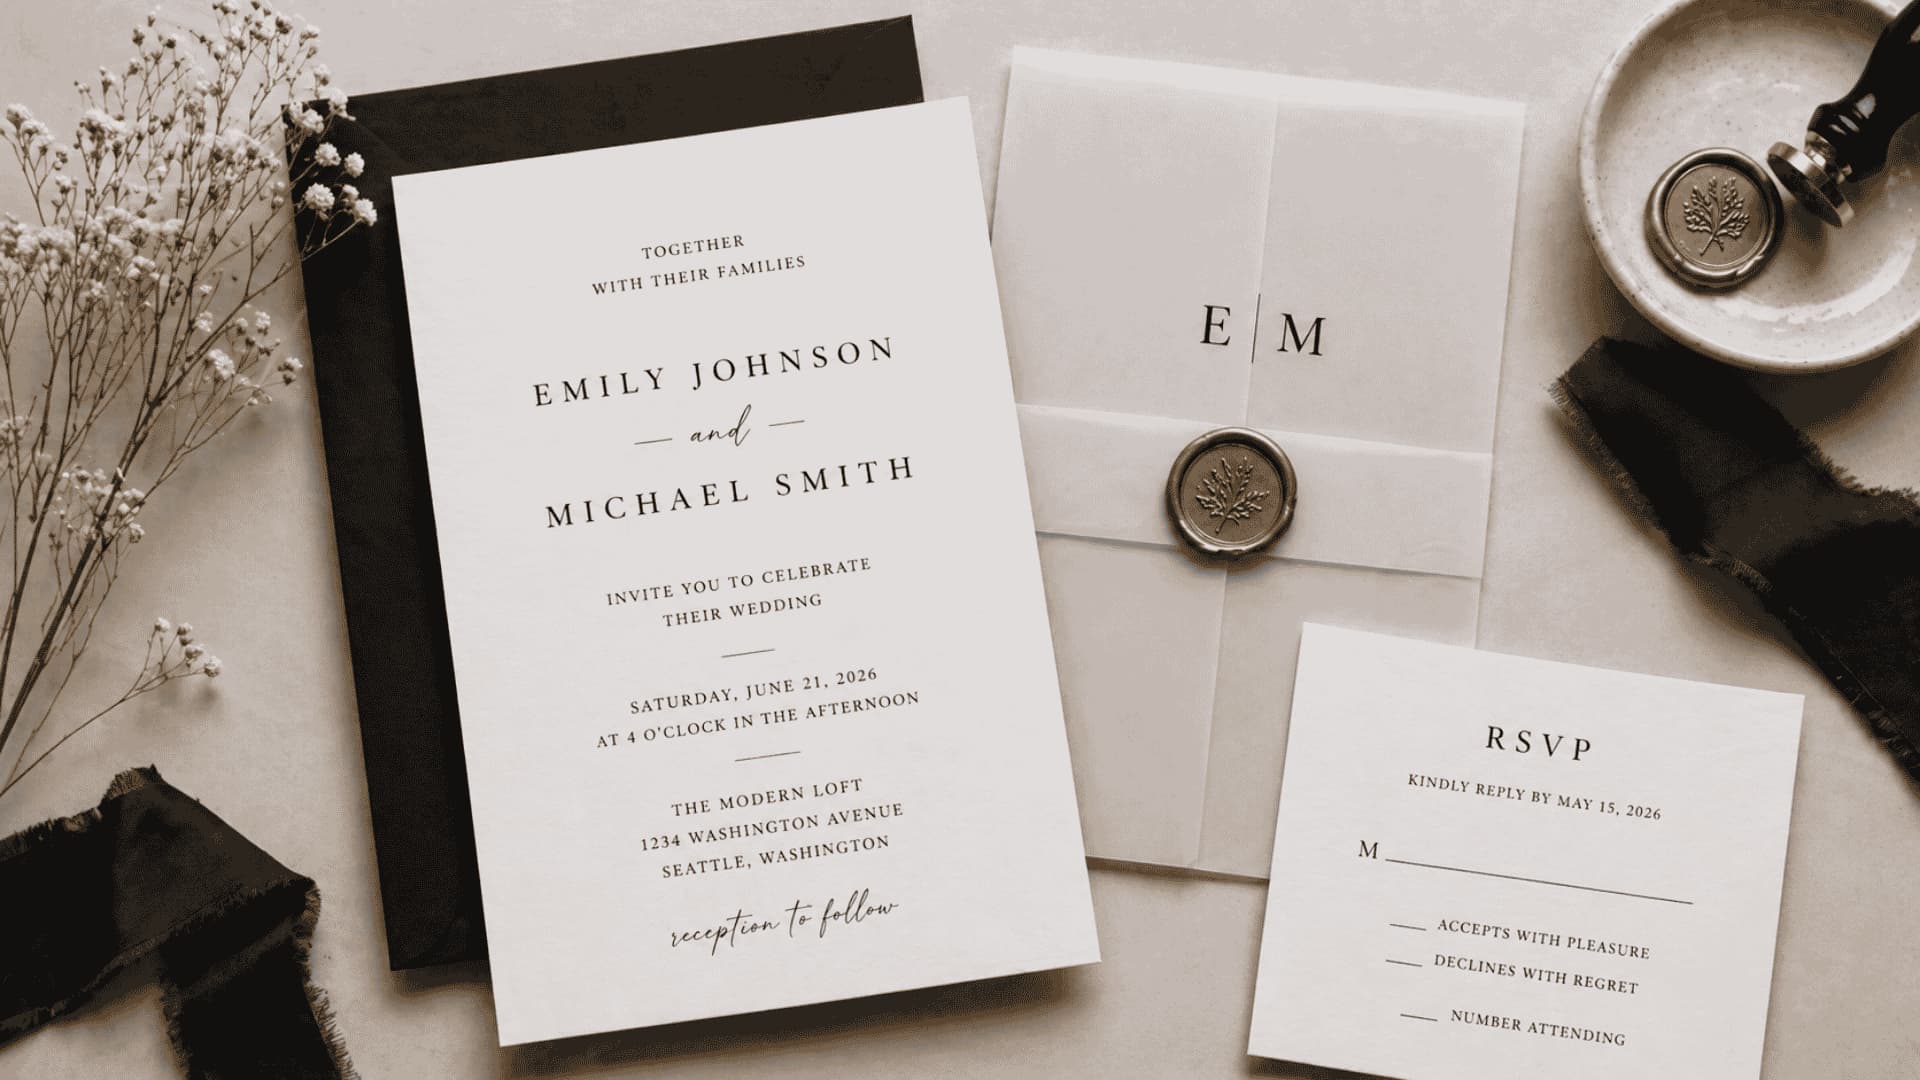
A clean, simple design that looks polished without needing extra materials. It’s also one of the easiest styles to print at home.
How to make it:
- Use black text on white or off-white cardstock
- Stick to one or two fonts only
- Add a vellum overlay with a small seal if needed
Best for: City weddings, modern venues, formal events
3. Vintage & Romantic DIY Wedding Invitations
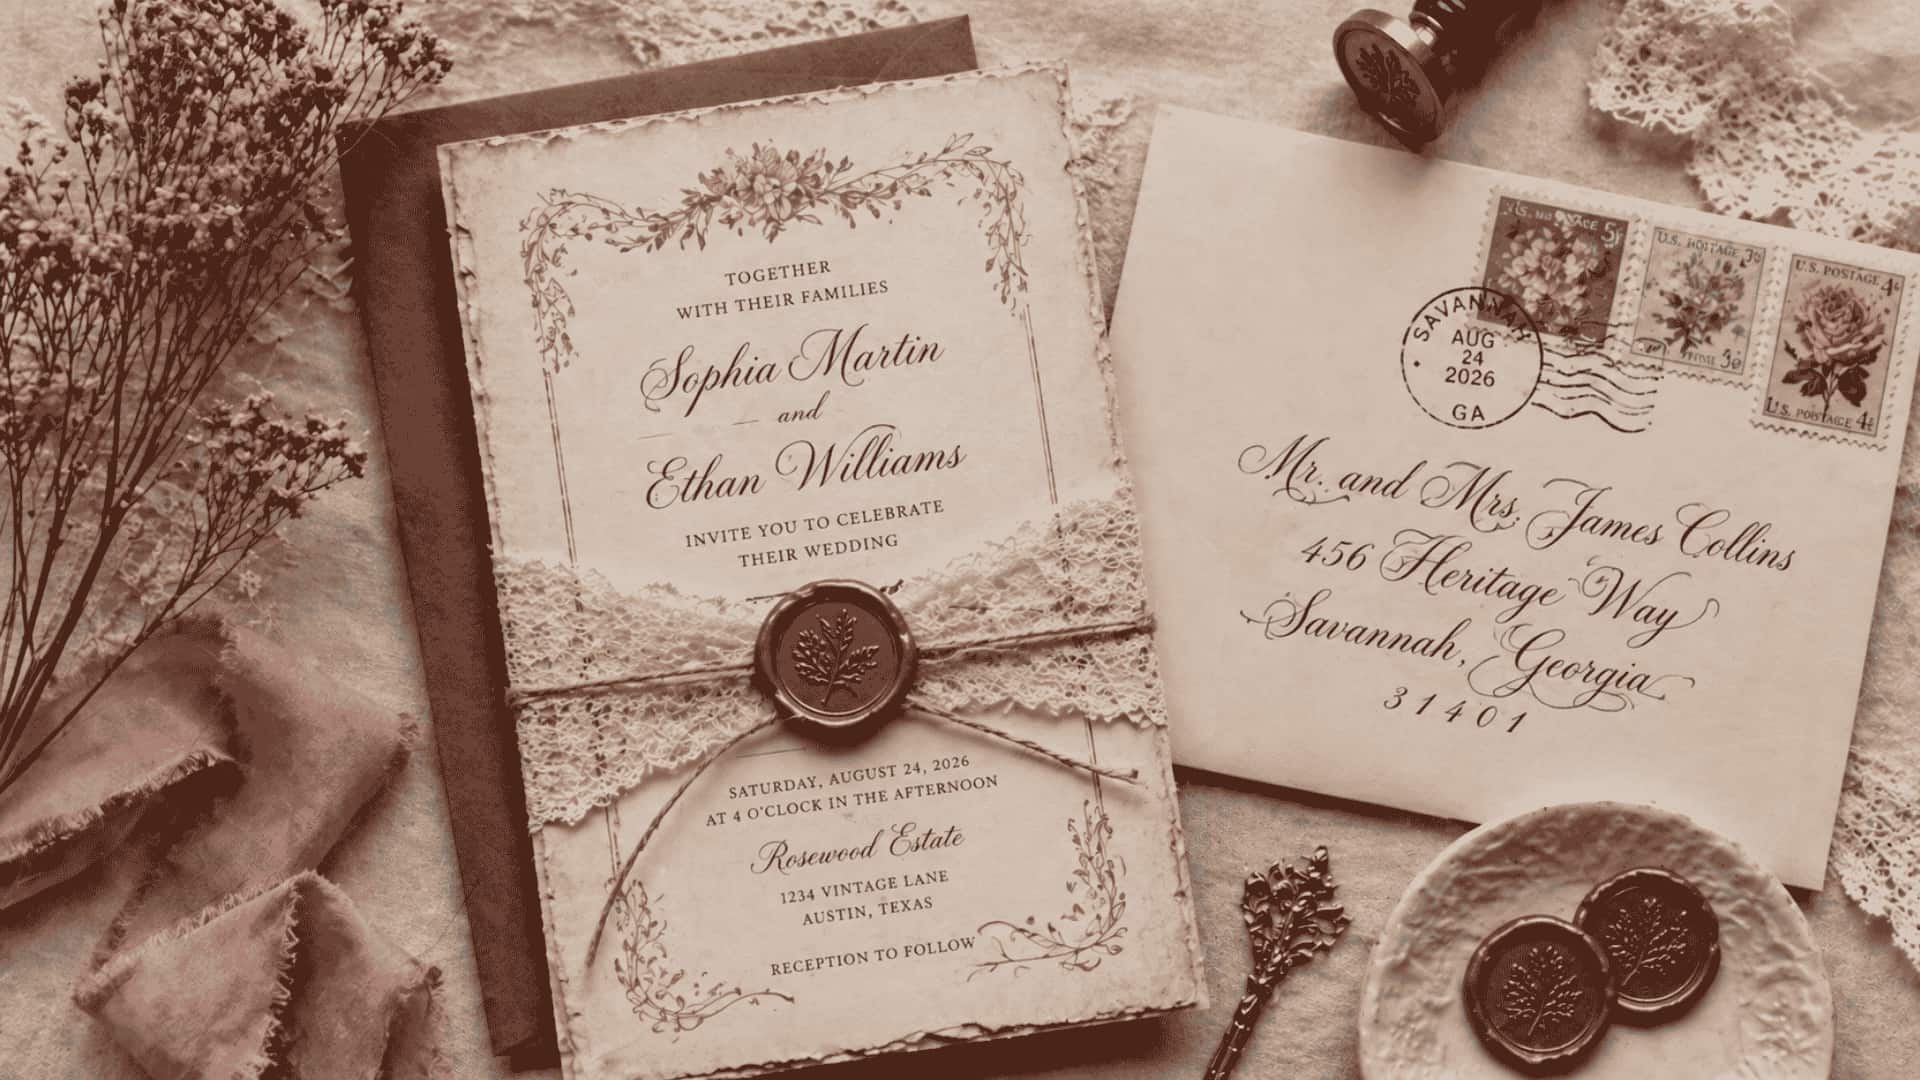
This style adds a soft, classic feel. Small details make a big difference here, especially with paper and finishing touches.
How to make it:
- Use textured or slightly aged paper
- Add lace ribbon or soft-toned wax seals
- Use vintage-style fonts or calligraphy
Best for: Garden venues, heritage locations, intimate weddings
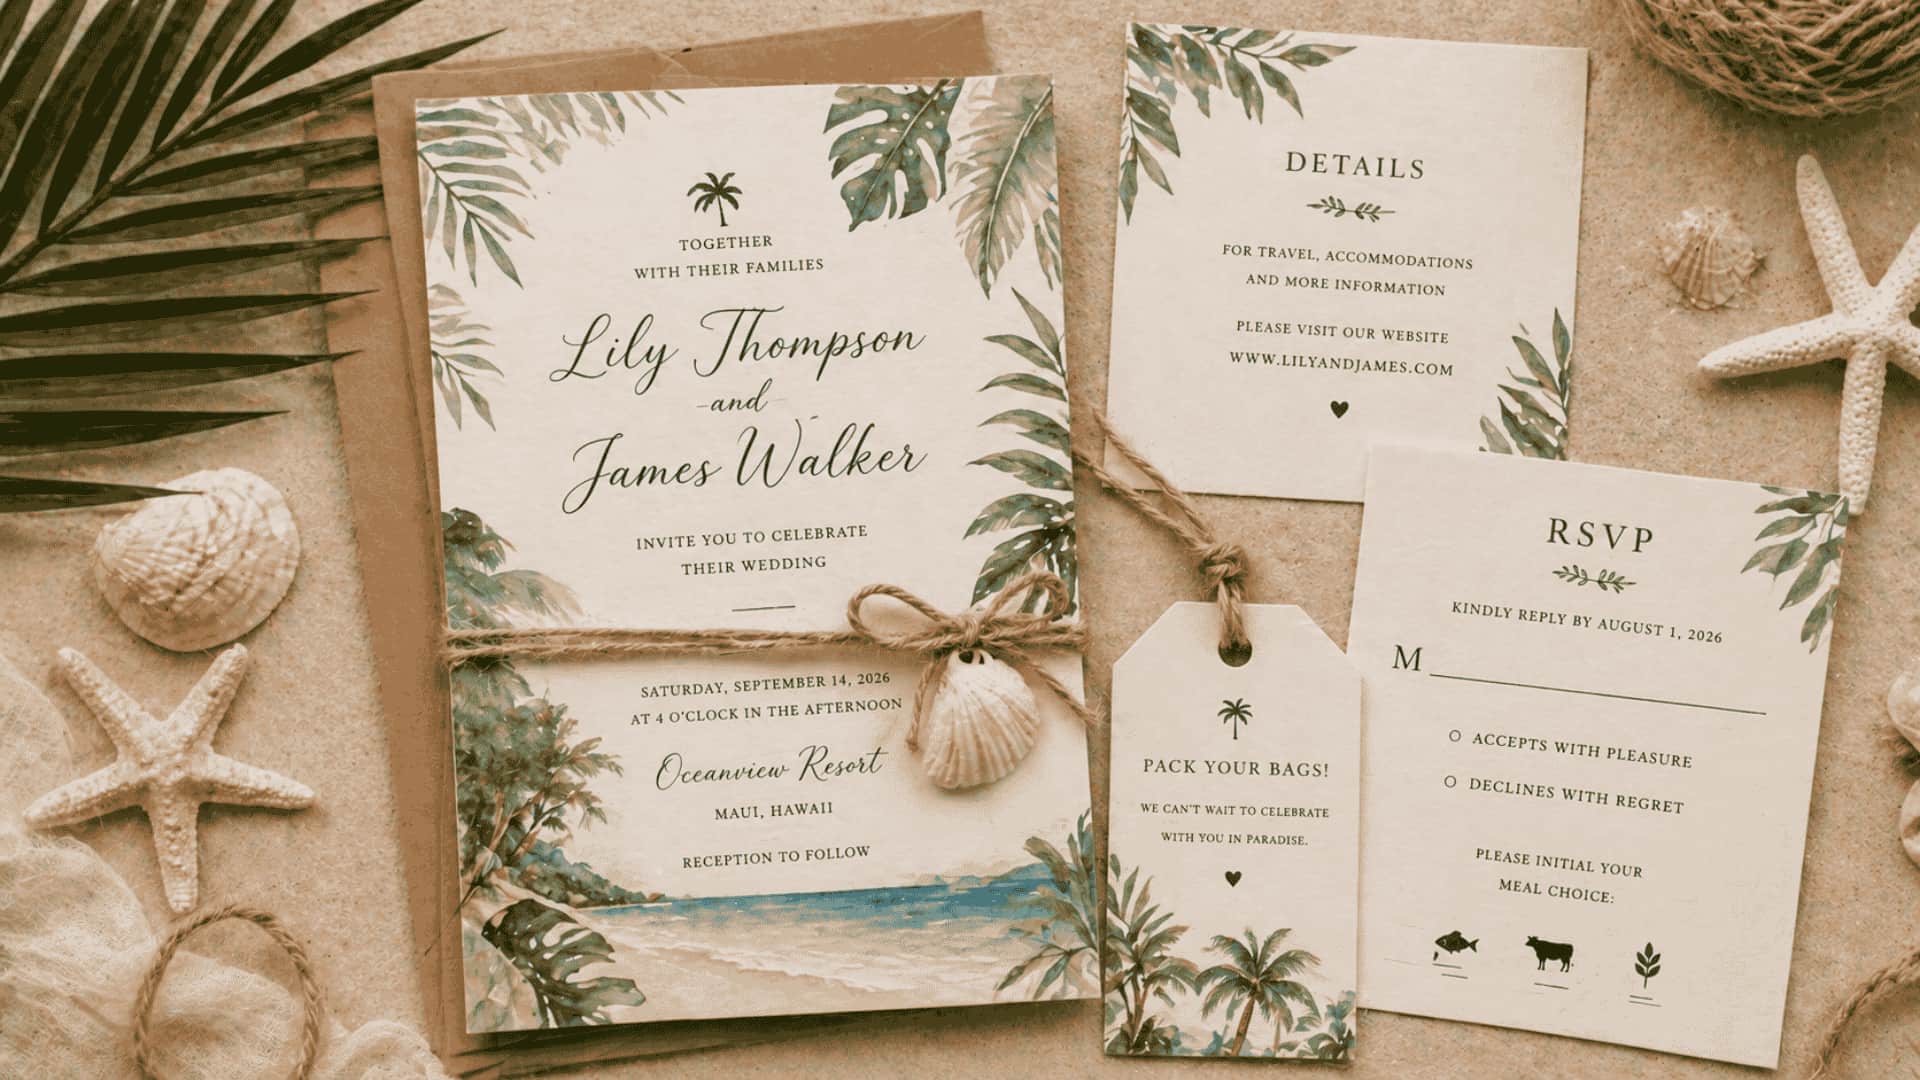
4. Eco-Friendly DIY Wedding Invitations

A good option if you want to reduce waste while still creating something thoughtful and well-designed.
How to make it:
- Use recycled or handmade paper
- Try seed paper that guests can plant
- Consider digital invitations with RSVP tracking
Best for: Outdoor weddings, small gatherings, eco-conscious couples
5. Themed DIY Wedding Invitations
If your wedding has a strong theme or cultural influence, your invitation can reflect that from the start.
How to make it:
- Match colors and patterns to your theme
- Add simple elements like maps, motifs, or icons
- Keep the design consistent across all inserts
Best for: Destination weddings, cultural celebrations, themed events
Common Mistakes to Avoid When Making Invitations
DIY wedding invitations are simple when planned well, but small mistakes can waste paper, money, and time. Here are the common issues to avoid early.
- Choosing thin paper: Lightweight paper can look cheap and may not hold ink well. Use sturdy cardstock for a cleaner finish.
- Skipping a test print: A sample print helps you catch spacing, color, spelling, and alignment issues before printing everything.
- Using too many fonts: Too many font styles can make the invite hard to read. Stick with one or two fonts.
- Forgetting extra supplies: Order extra paper, envelopes, and ink so small mistakes do not delay the whole project.
- Leaving it too late: Cutting, printing, and assembling take time. Start early and spread the work over several days.
- Ignoring postage weight: Wax seals, ribbon, and inserts can increase postage. Check one finished invite before mailing.
Avoiding these mistakes keeps the process calmer and helps your invitations look neat, personal, and ready to send without last-minute stress.
What Nobody Tells You Before You Start
I’ve helped put together invitation suites for a few bridal showers and small events, and the same lessons keep coming up. Always order 10 to 15% extra cardstock and envelopes. Printers jam, wax seals smudge, and reordering mid-project is a nightmare, especially if your paper is seasonal or a specific weight.
Before mailing the full batch, send one finished invitation to yourself first. I started doing this after a friend’s suite came back postage-due because her wax seal pushed it over the standard weight limit. That one test envelope saves a lot of embarrassment.
Use a paper trimmer rather than scissors, block a full weekend for assembly, and have someone help if your guest list is over 80. The folding, stuffing, and sealing take much longer than the designing.
Save your design files. The same layout works for menus, escort cards, and thank-you cards, and you’ll be glad you kept them once the wedding gets closer.
These invitations don’t need to be flawless. They need to feel like you made them on purpose, and that intention comes through regardless of small imperfections.
Final Thoughts
DIY wedding invitations are about more than saving money. They’re a chance to add a personal touch to one of the first things your guests will see about your wedding.
With the right tools, supplies, and a clear plan, you can create invitations that feel polished, intentional, and truly yours.
Start early, test before printing, choose sturdy paper, and keep your design simple.
Small touches like wax seals, ribbon, or vellum can lift the whole look without stretching your budget. Most importantly, give yourself room for small mistakes; they’re part of the process.
Your invitation sets the tone for your big day, so make it count.
Which DIY style feels most like you, rustic, modern, vintage, eco-friendly, or themed? Share your pick in the comments and bookmark this page for your assembly weekend.
Frequently Asked Questions
Is It Cheaper to DIY Wedding Invitations?
Yes, DIY invitations usually cost 40–60% less than custom ones, especially when you use templates, home printers, and bulk cardstock.
Does Husband or Wife Name Go First on Return Address?
Traditionally, the husband’s name goes first, but modern couples often list the wife’s name first or use both names equally.
Can I Make My Own Wedding Invites?
Yes, you can easily make your own using free tools like Canva, basic cardstock, a home printer, and simple assembly supplies.