
Happy (almost) Hannukah! I’m so excited for chocolate gelt, latkes, and lighting candles. To me, lighting the Hannukah menorah reminds me of the responsibility I have to bring more light into the world–I hope it inspires you as well!
I put together DIY instructions for you to create your own menorah! Please see directions and important safety info below! Happy Holidays!
What You Need:
- 10 wooden blocks (between 1” and 2”)
- 9 1/4” copper tubes (these will set you back about .75 each at Home Depot)
- Blue Tape
- Paint (I used Martha Stewart brand)
- Paintbrushes
- E6000 glue
Directions:
PLEASE read the important safety note at the bottom of this post!
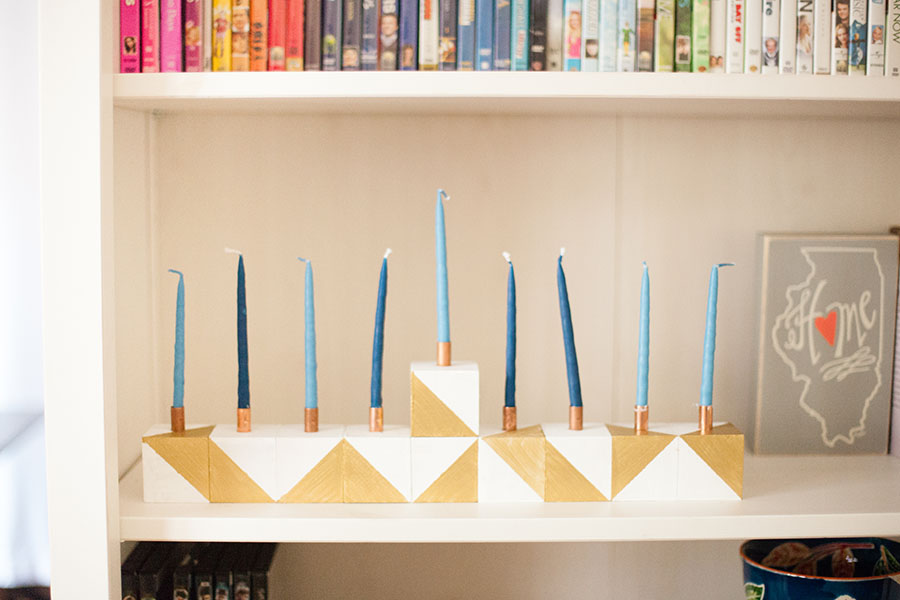
Decide on your color scheme. I chose a white/gold theme, but my friend Stephanie (photographed here) chose a white/gold/blue color theme! It’s totally up to you!

Paint your blocks the base color you’d like. In this case, Stephanie chose white. I prefer to paint all 4 sides for consistency, but you can certainly just paint the sides that will show!

Once the base paint has dried, use blue tape to tape off a triangle-shaped section of the block. If you start at one corner and go diagonally, it should all meet at the corner nicely! You’ll only cover 3 half-sides this way. Be sure that the tape is completely secured to the block so you don’t end up with some spots that leak through!


Paint the taped-off section of your blocks a different color. In these photos, Stephanie decided to use blue AND gold! She’s so creative. Wait for this to dry completely before removing the tape.

Once the painted blocks are dry and you remove the tape, arrange them (without gluing) how you’d like them to look in their final setting. You won’t be able to change their positions once they’re glued, so make sure you like how they look! I didn’t use a specific pattern; I did them kind of randomly but that’s how I liked it.
Time to glue the blocks together! I recommend doing 2 blocks at a time, then gluing 2 sections together, and so on until they’re all glued together. Be sure to line them up as you go so they’re perfectly in line with each other!


Next, you need to glue the copper tubes to the base. I just kind of eyeballed it, but you can certainly use a ruler and pencil to see where exactly the middle is. Make sure these are firmly in place — you’re putting candles in them!


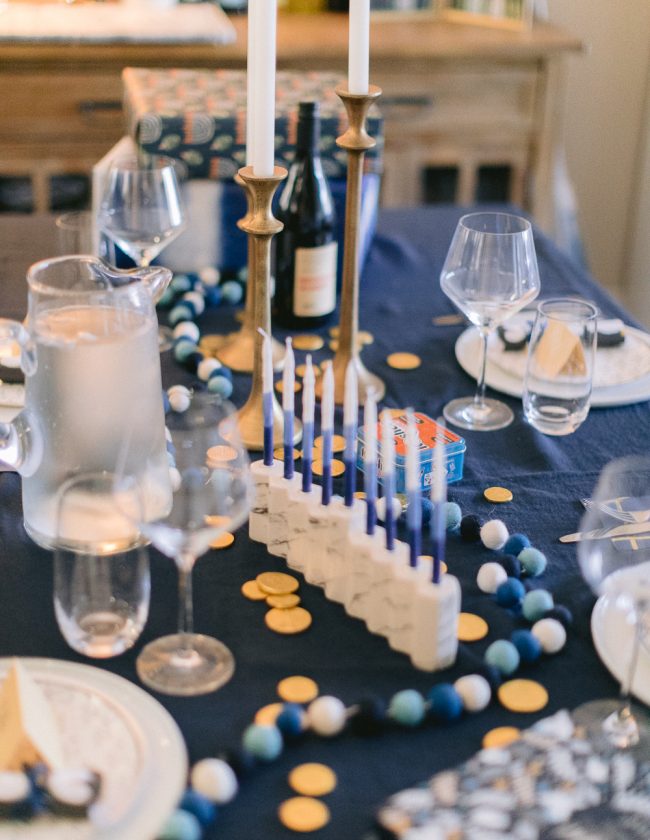
Once everything is glued into place, you’re done! How pretty is that?! If you need candle recommendations, I love these, these, and these. You can also leave this unlit — it can be a purely decorative piece! On that note…
IMPORTANT NOTE: This is (obviously) a wooden menorah, and you’re lighting candles with (obviously) fire. PLEASE be smart and don’t leave your menorah unattended. If you must blow the candles out, do it. No religious rules are worth a dangerous fire (sorry).
Happy Hanukkah to you and yours! <3 And be sure to pass this DIY Menorah Tutorial around to any friends who might be interested.