
Getting your ears pierced sounds simple, but walking into a studio without a plan can leave you feeling lost.
There are several ear piercing placements, each with its own pain level, healing time, and jewelry style. Some placements work on every ear.
Others depend on your anatomy. Knowing the difference saves you time, money, and unnecessary pain.
Read on for a full ear-piercing chart breakdown, placement details, beginner tips, and ear stack ideas to help you plan the perfect curated ear.
Ear Piercing Placements Chart Explained
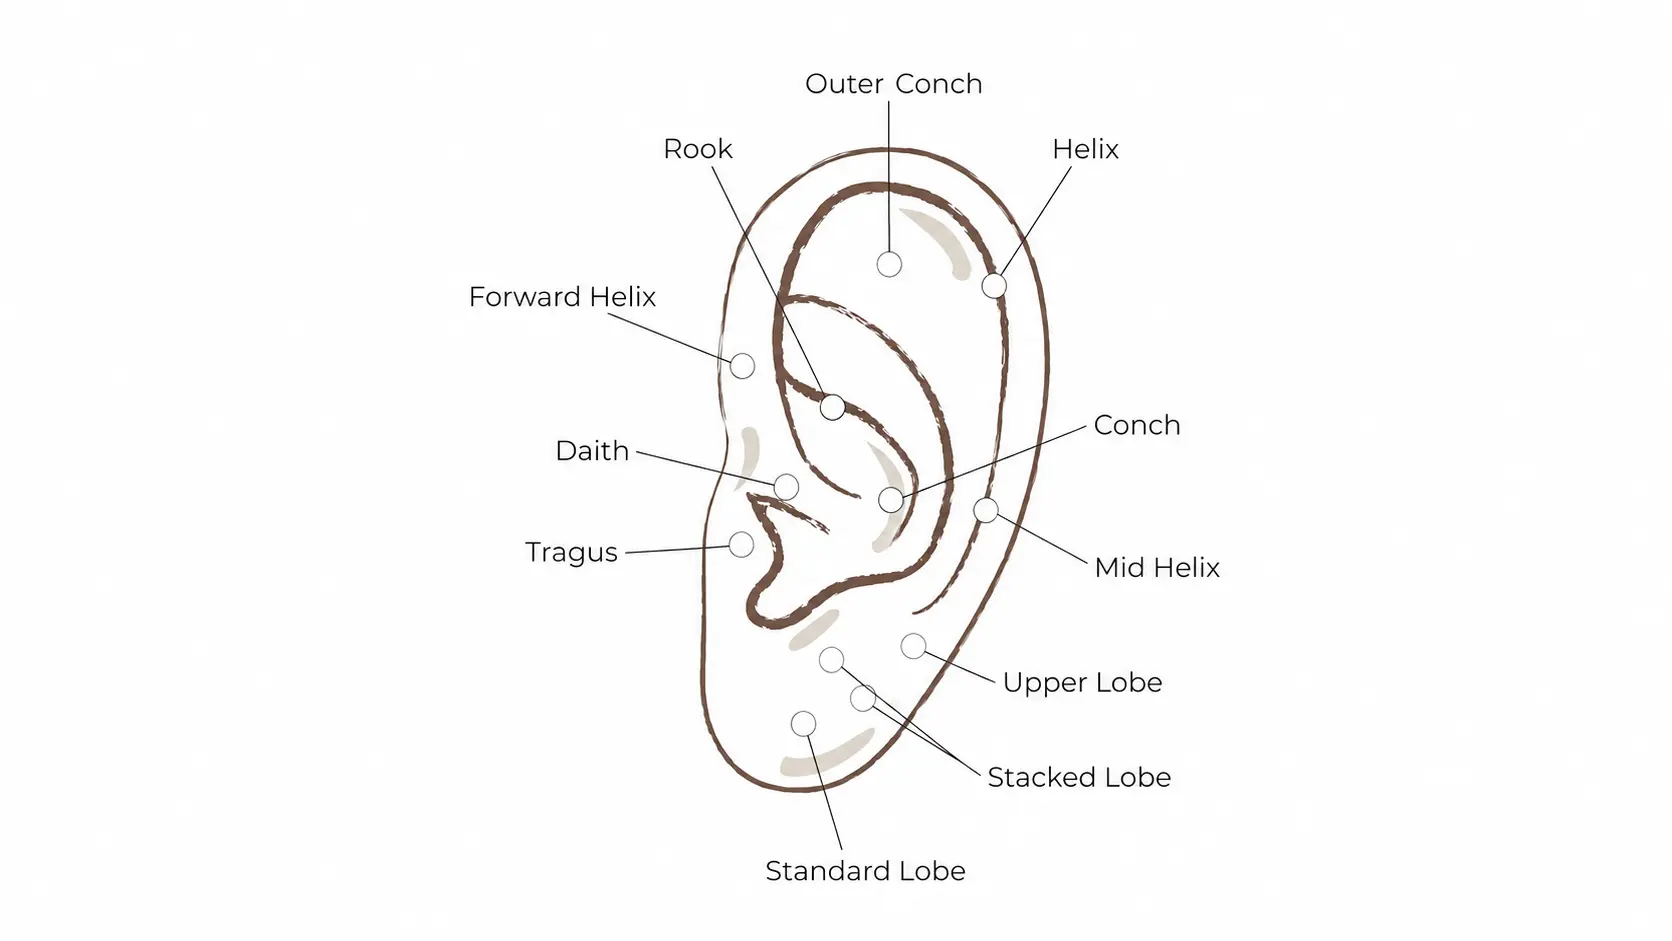
An ear piercing chart helps you understand where each piercing sits, how painful it is, and which styles work best together.
Before picking a placement, it helps to know the full map of your ear. Think of it as your piercing map for ears, from the soft lobe at the bottom to the firm cartilage folds at the top.
Here is every placement explained simply. All placement details below are based on guidance from professional piercers and industry-standard aftercare references.
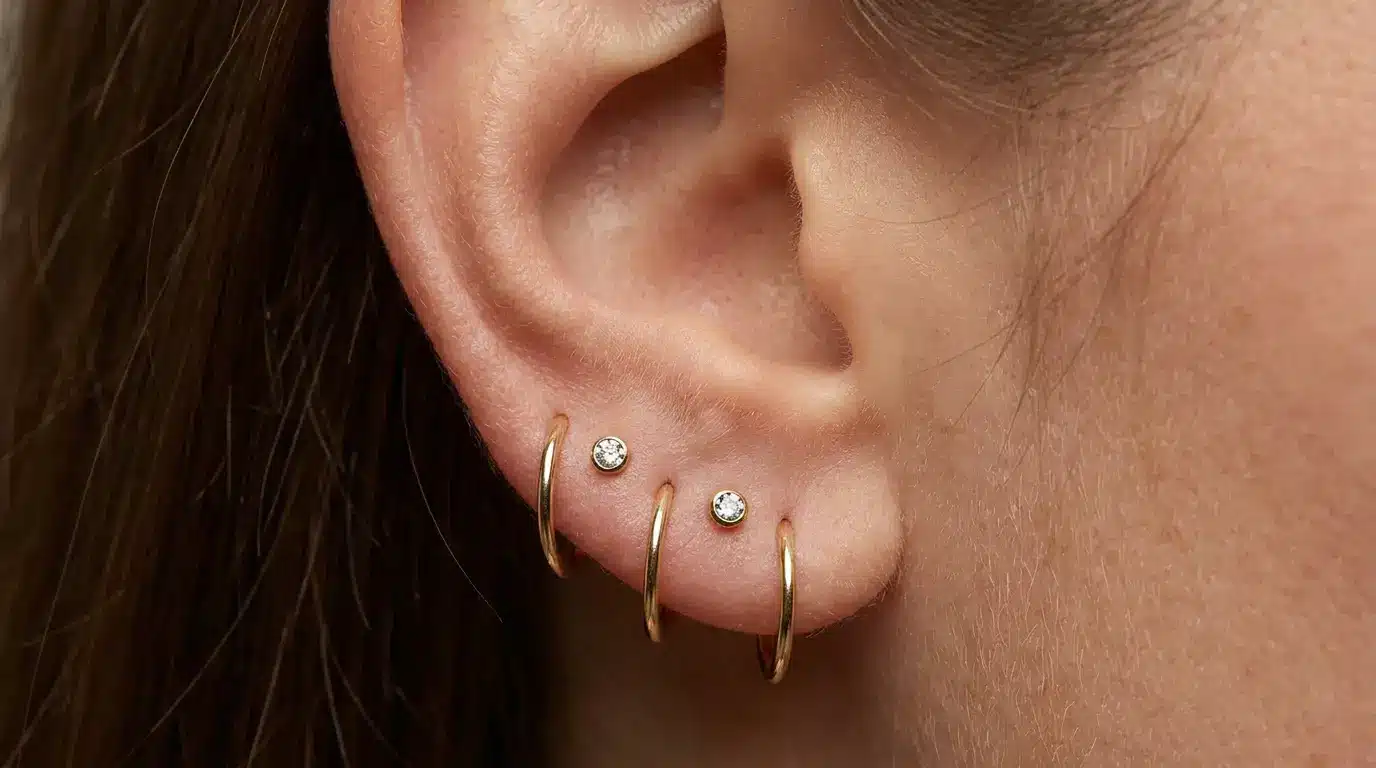
1. Standard Lobe Piercing
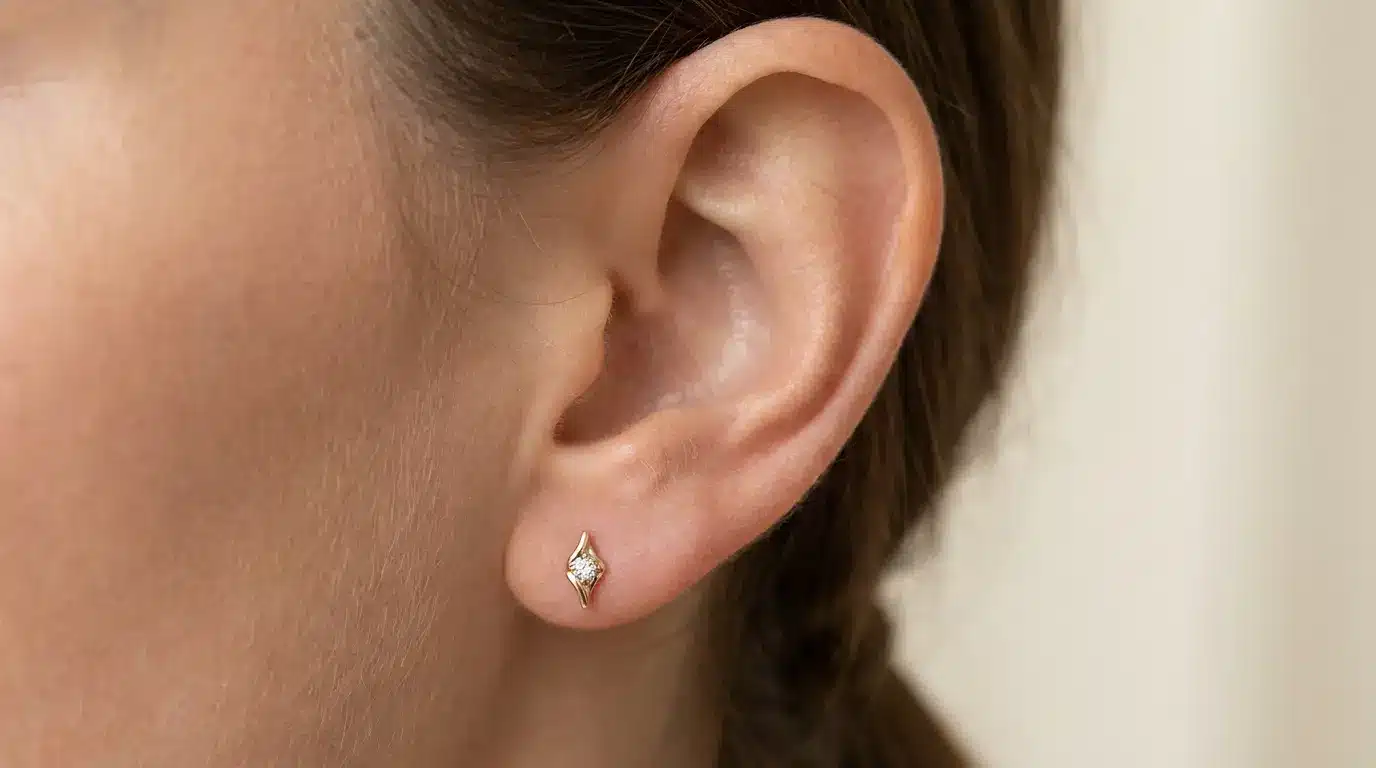
This is the most common ear piercing in the world. The lobe is soft tissue with no cartilage, so it heals fast and hurts very little. Almost any jewelry style works here.
- Placement: Center of the soft lower lobe
- Pain level: 2/10
- Healing time: 6 to 8 weeks
- Best jewelry: Studs, small hoops, huggie earrings
- Beginner-friendly: Yes, the most beginner-friendly option
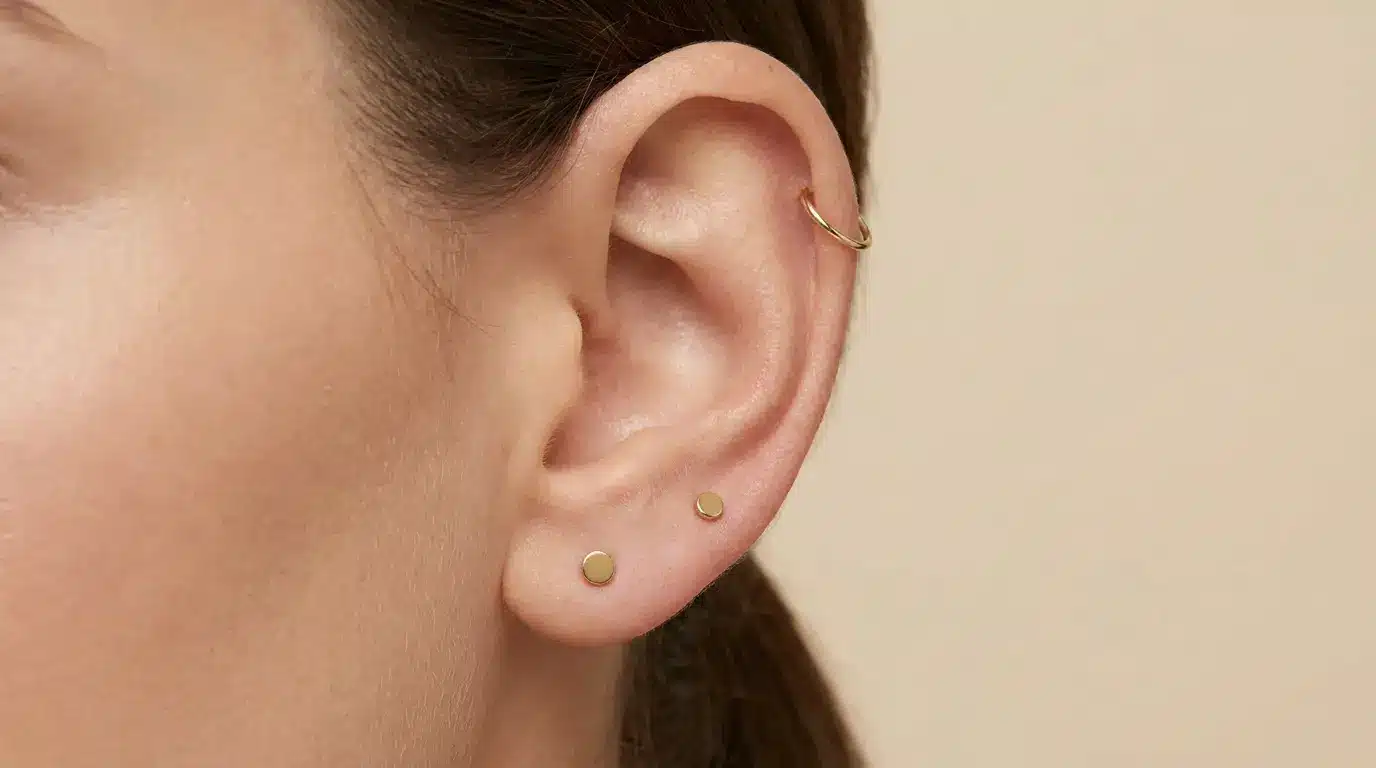
2. High Lobe Piercing
A second or third hole is placed higher on the lobe. It stacks well with a standard lobe and is still soft tissue, so healing is easy.
- Placement: Upper part of the soft lobe, just before the cartilage begins
- Pain level: 3/10
- Healing time: 2 to 3 months
- Best jewelry: Small studs, flat-back earrings
- Beginner-friendly: Yes
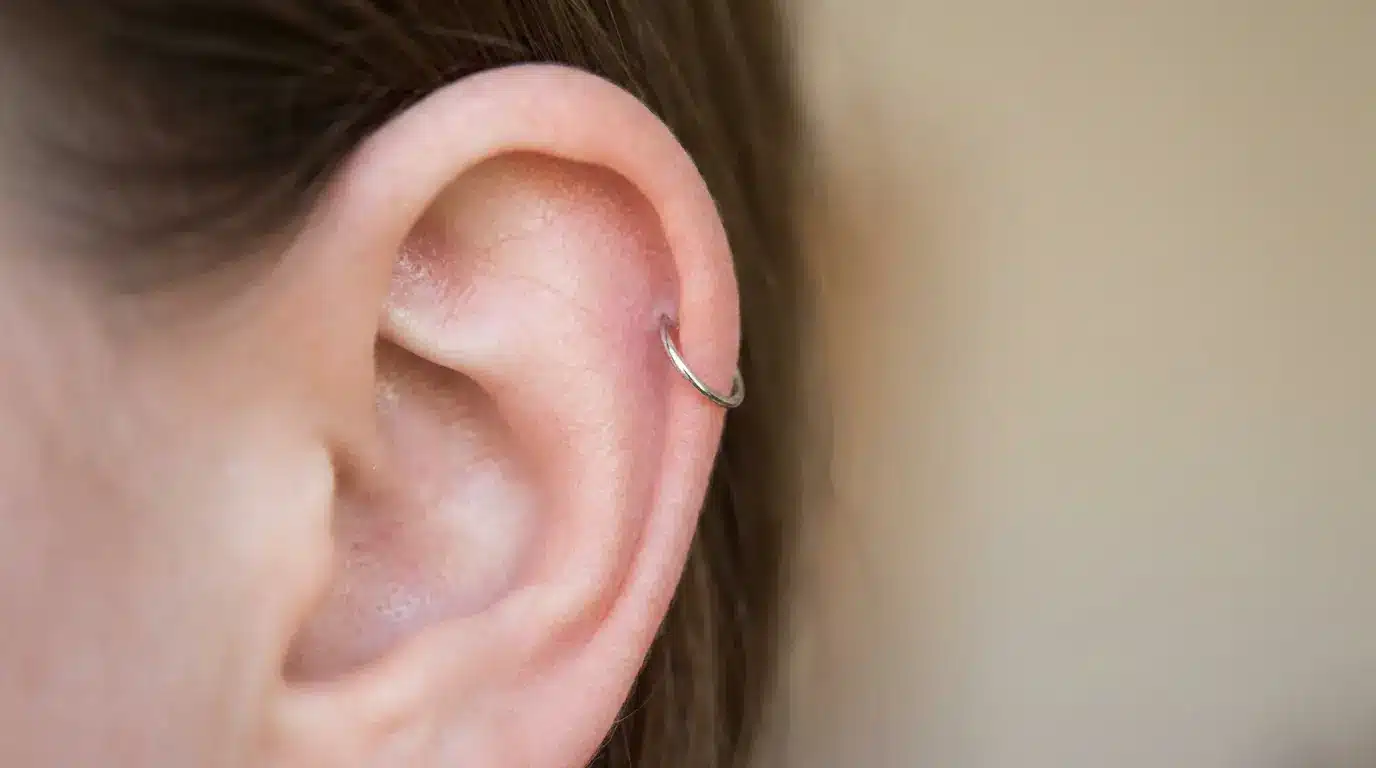
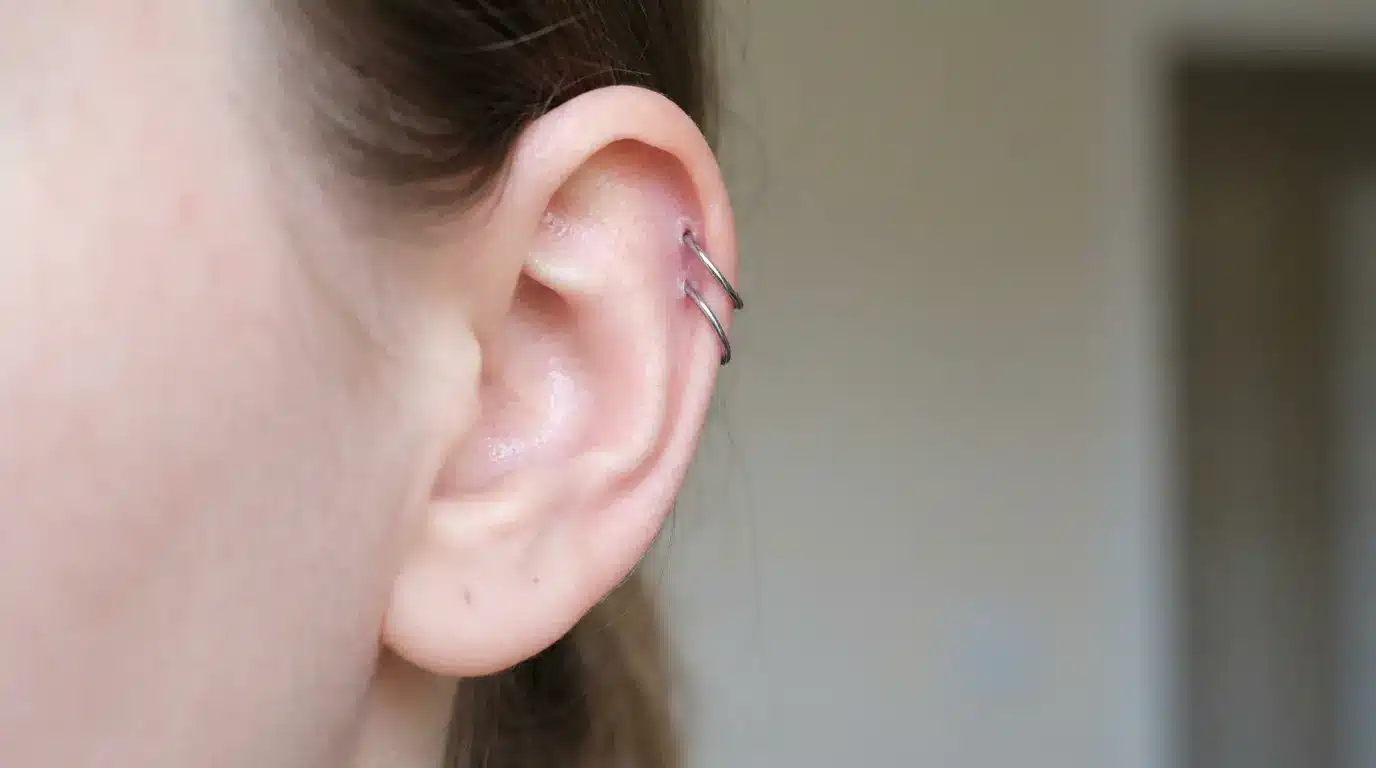
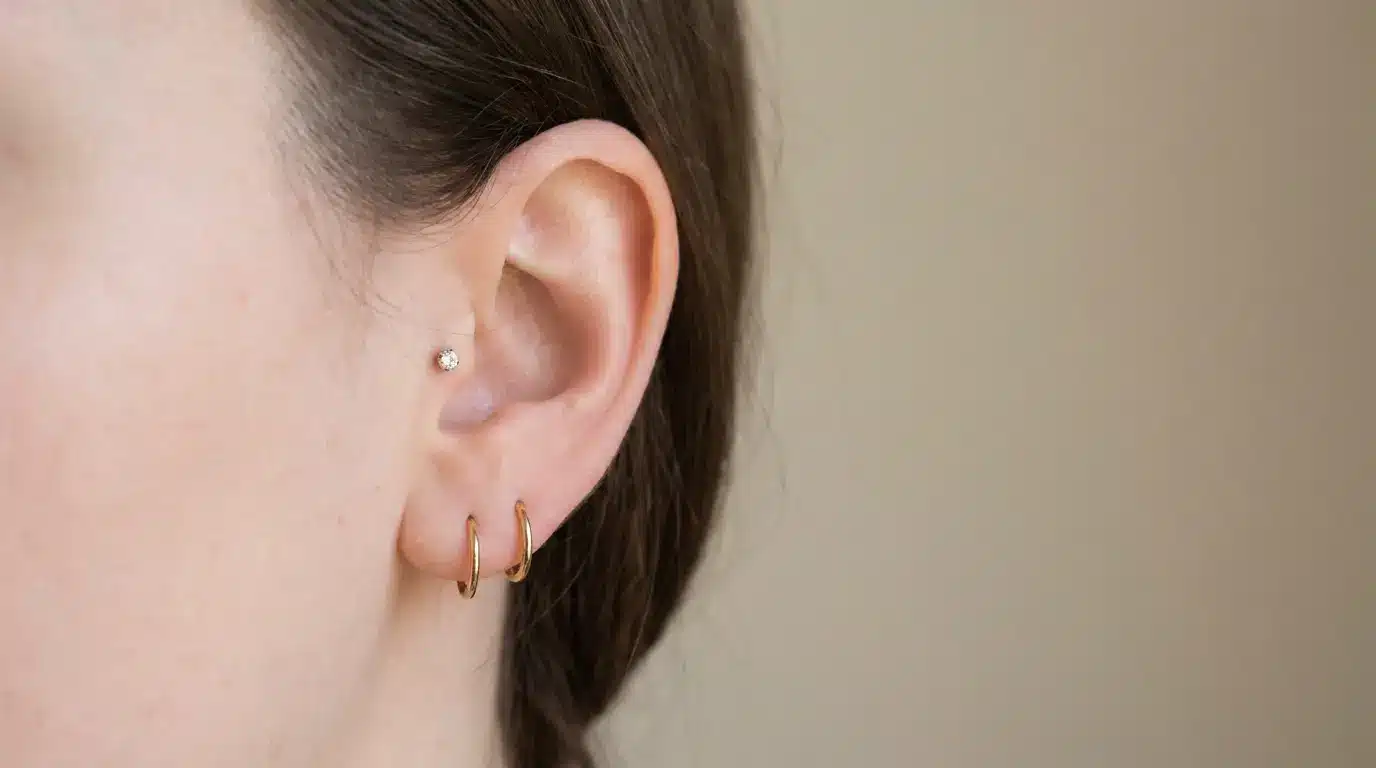
3. Helix Piercing
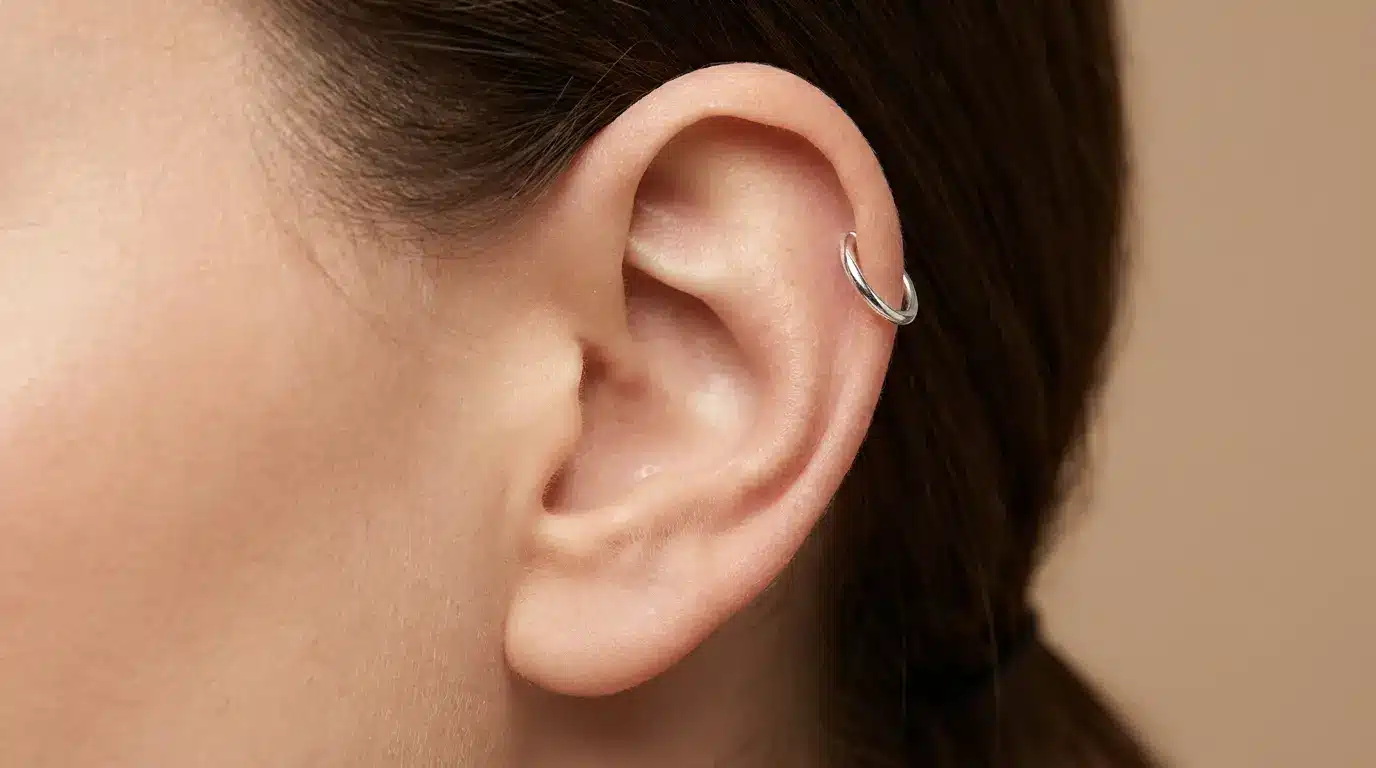
The helix runs along the outer curve of the ear. It is one of the most versatile cartilage piercings and looks great with almost any jewelry style.
- Placement: Outer upper cartilage rim
- Pain level: 4/10
- Healing time: 6 to 9 months
- Best jewelry: Studs, small hoops, curved barbells
- Beginner-friendly: Yes, one of the most popular cartilage piercings
4. Forward Helix Piercing

This sits at the inner front curve of the helix, closer to the head. It is a subtle placement that frames the ear nicely.
Anatomy matters here, since some ears lack sufficient cartilage ridge for this placement.
- Placement: Front of the helix, near the face, above the tragus
- Pain level: 5/10
- Healing time: 3 to 9 months
- Best jewelry: Small flat-back studs
- Beginner-friendly: Moderately beginner-friendly if anatomy supports it
5. Flat Piercing
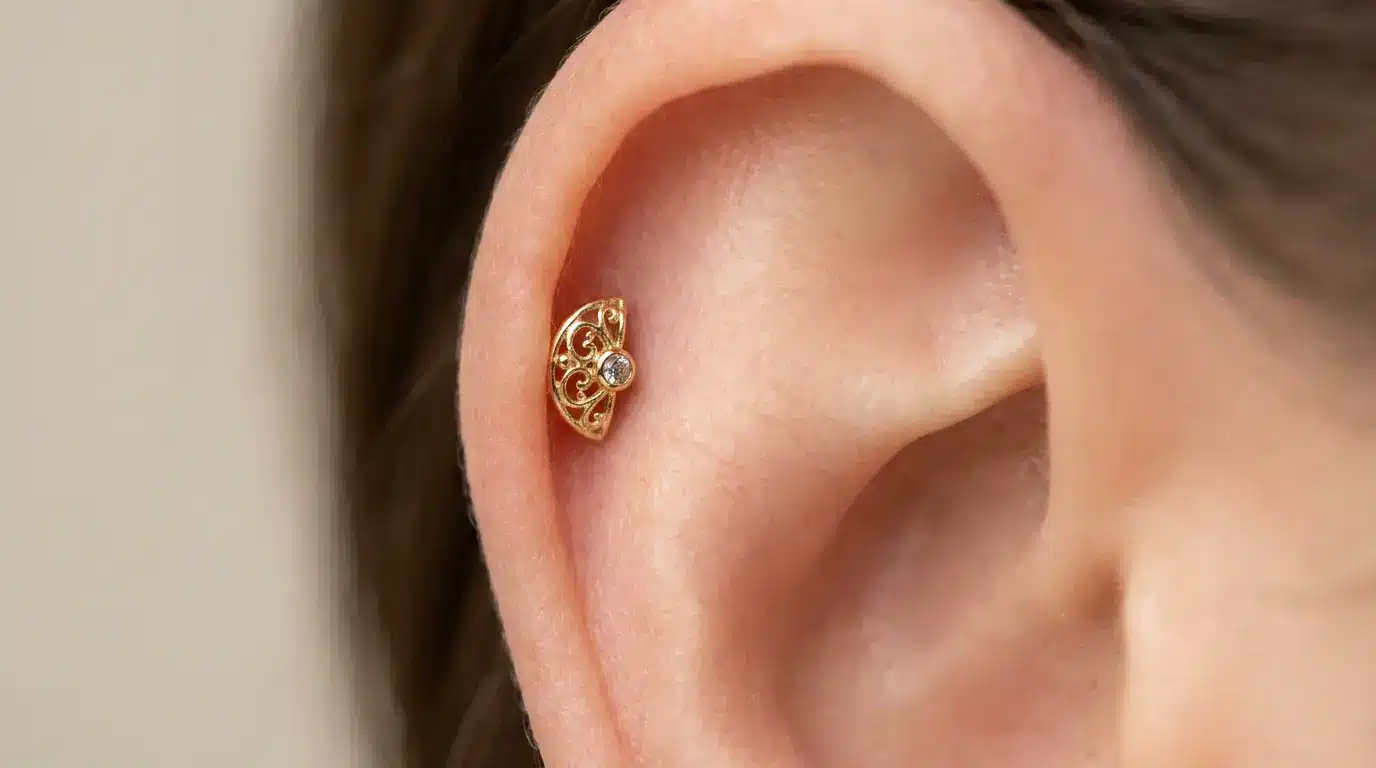
This sits on the wide flat area of cartilage inside the helix. Because jewelry rests flat against the ear, it showcases detailed stud designs well.
- Placement: Flat inner surface of the upper cartilage
- Pain level: 4/10
- Healing time: 6 to 12 months
- Best jewelry: Flat-back studs only
- Beginner-friendly: Yes, easier than many cartilage piercings
6. Auricle / Mid-Helix Piercing
The auricle is the middle stretch of the outer ear rim. It fills the gap between a lobe piercing and a standard helix, making it a great addition to a layered ear stack.
- Placement: Middle section of the outer helix, between the lobe and the top of the ear
- Pain level: 4/10
- Healing time: 6 to 9 months
- Best jewelry: Small hoops, studs
- Beginner-friendly: Yes, similar to a helix piercing
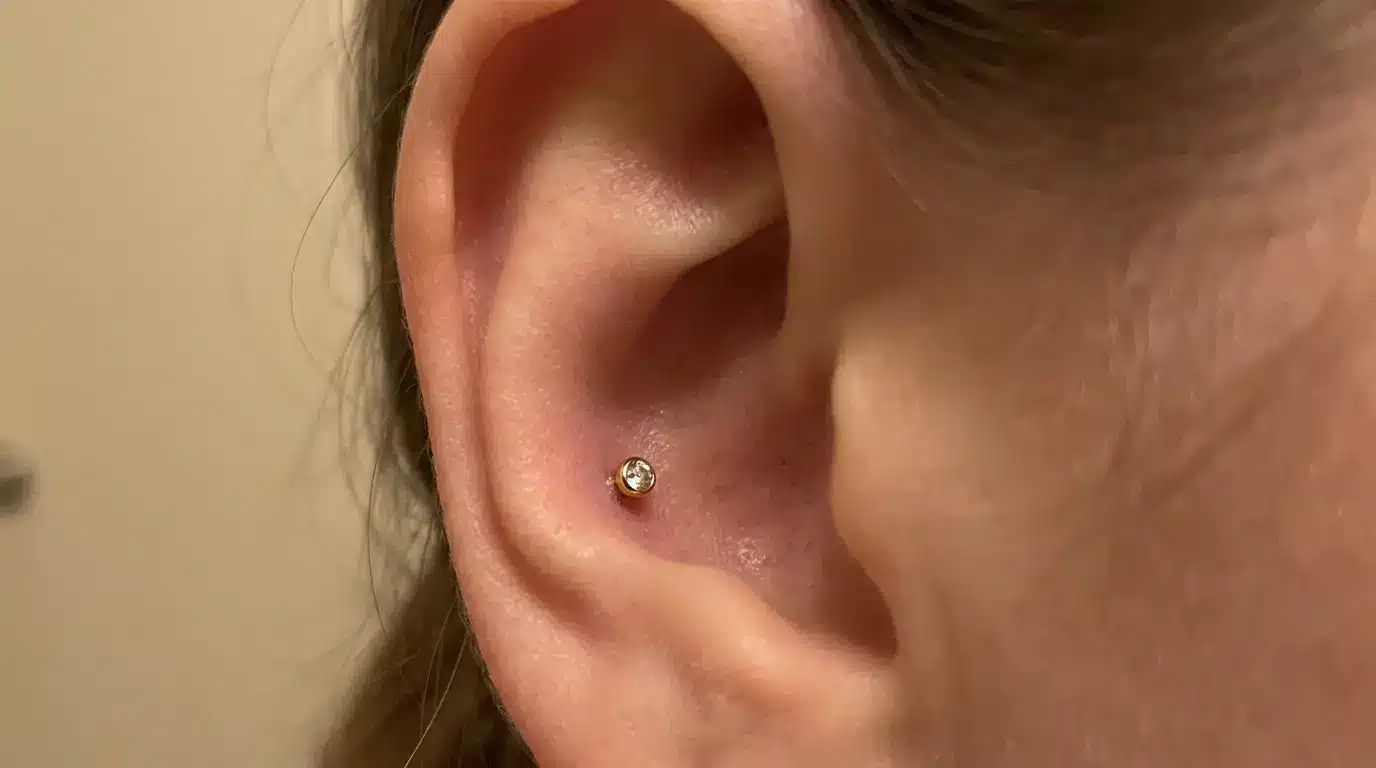
7. Tragus Piercing
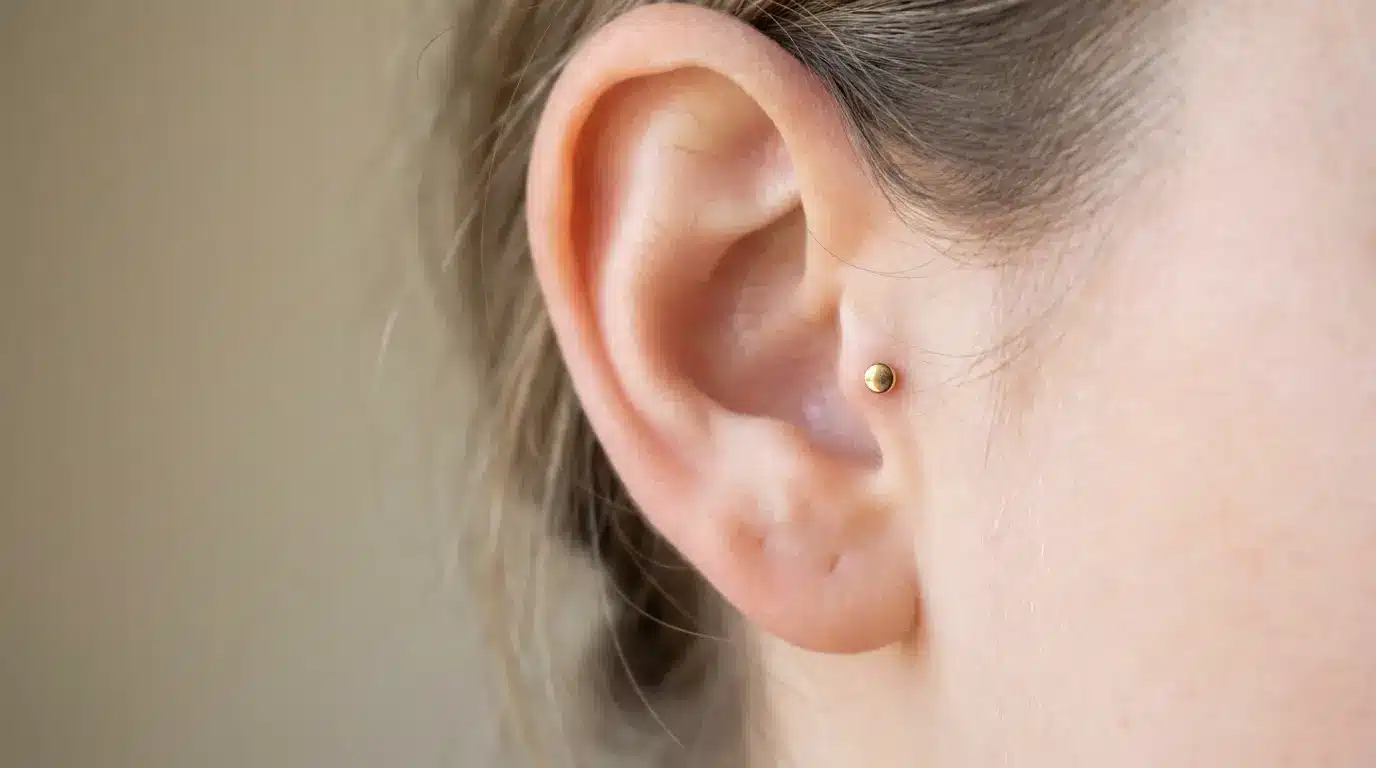
The tragus is one of the most popular modern placements. It is a thicker piece of cartilage, so there is more pressure during the piercing, but it heals well with proper care.
- Placement: A small nub of cartilage that covers the ear canal
- Pain level: 5/10
- Healing time: 6 to 12 months
- Best jewelry: Small flat-back studs, tiny hoops
- Beginner-friendly: Moderately beginner-friendly with careful aftercare
8. Anti-Tragus Piercing

This sits on the fold directly opposite the tragus. Not all ears have enough of a ridge for this placement, so always check with a piercer first.
- Placement: Small raised ridge opposite the tragus, above the lobe
- Pain level: 6/10
- Healing time: 6 to 12 months
- Best jewelry: Curved barbells, small studs
- Beginner-friendly: No, anatomy and healing can be difficult
9. Conch Piercing (Inner Conch vs Outer Conch)
The inner conch sits deep in the center cup of the ear. A stud here sits right in the middle of the bowl. The outer conch is closer to the helix rim.
Large hoops are common for the outer conch because the jewelry wraps around the cartilage edge. Healing is similar for both, but outer conch piercings tolerate hoops sooner during healing.
- Placement: Center bowl of the ear (inner or outer)
- Pain level: 5/10
- Healing time: 6 to 12 months
- Best jewelry: Flat-back studs, large hoops for outer conch
- Beginner-friendly: Yes, especially the inner conch with a stud
10. Daith Piercing
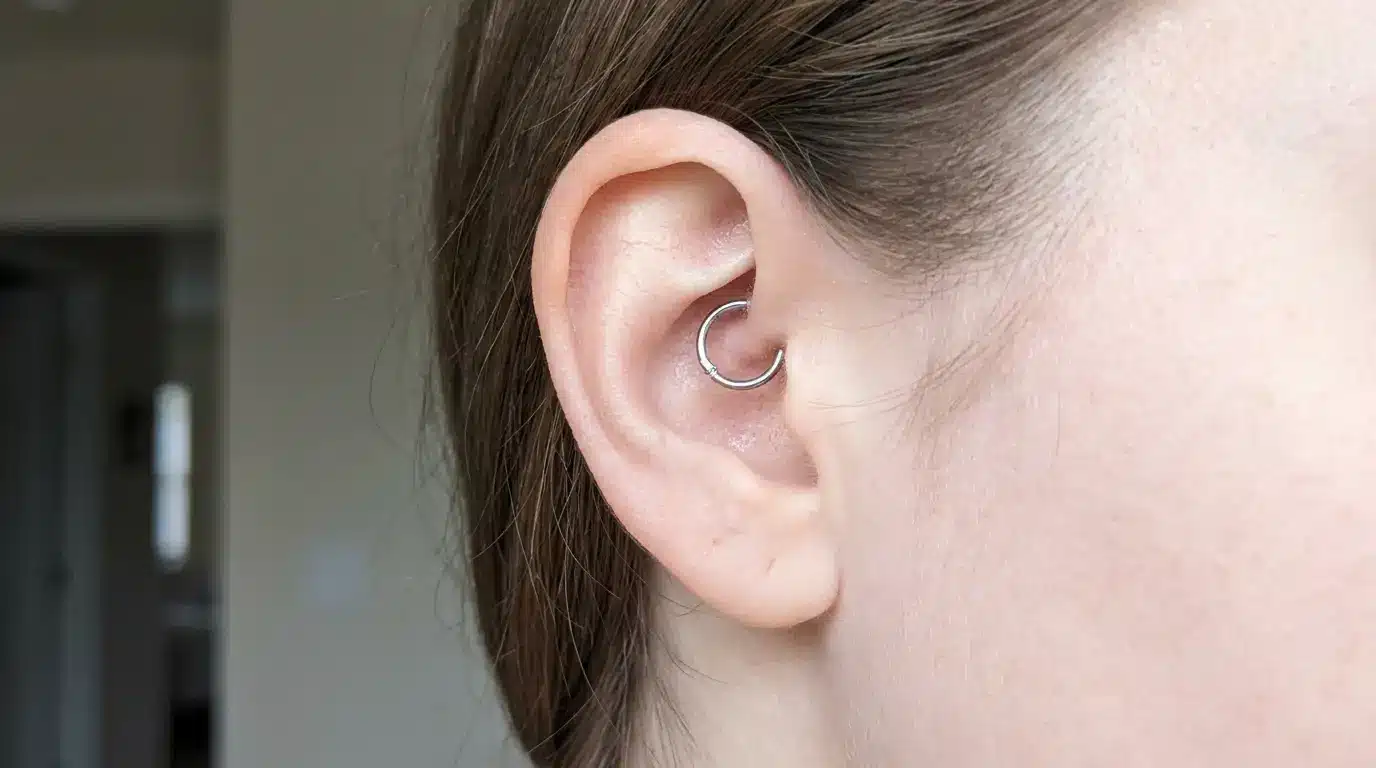
The daith sits tucked inside the ear, which makes it look delicate and unique. It is also one of the trickier piercings to clean because of its location.
Some people believe it helps with migraines due to its proximity to an acupuncture pressure point. However, the American Migraine Foundation does not recommend it as a treatment, and medical experts consider any reported relief to be a placebo effect rather than a physiological response.
- Placement: Innermost fold of cartilage just above the ear canal
- Pain level: 6/10
- Healing time: 9 to 12 months
- Best jewelry: Curved barbells, seamless rings, clicker hoops
- Beginner-friendly: No, cleaning and healing can be difficult
11. Rook Piercing
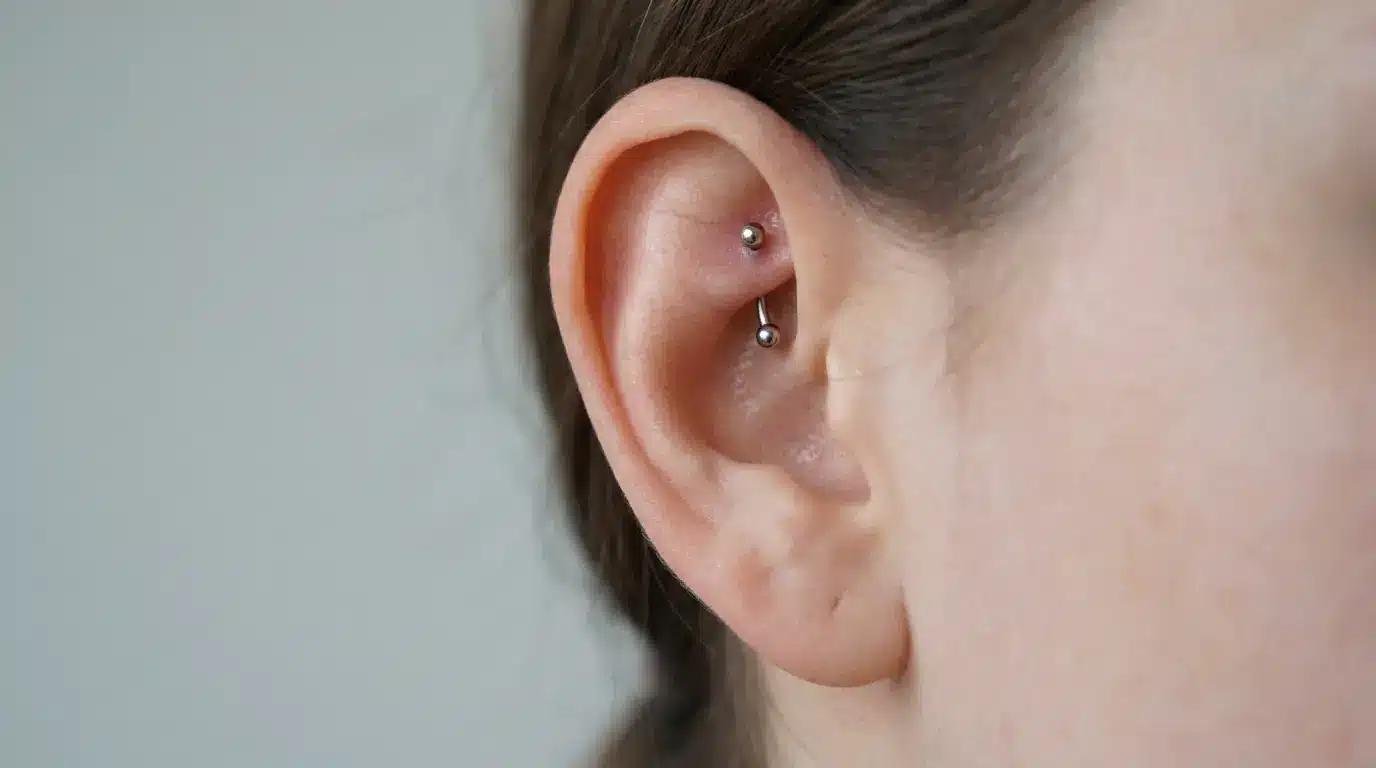
The rook goes through the thick anti-helix ridge inside the ear. It is one of the more unique cartilage placements and adds great dimension to a curated ear.
- Placement: Inner ridge of cartilage above the daith, near the top fold
- Pain level: 7/10
- Healing time: 6 to 18 months
- Best jewelry: Curved barbells, small hoops
- Beginner-friendly: No, thick cartilage and long healing make this better suited for experienced piercers
12. Snug Piercing

The snug goes through a thick inner cartilage wall, which makes it one of the more painful placements. It also has a higher rejection rate.
Many piercers recommend doing a flat or rook piercing instead if the anatomy is not ideal for a snug.
- Placement: Inner cartilage rim, mid-ear, along the anti-helix
- Pain level: 7/10
- Healing time: 8 to 16 months
- Best jewelry: Curved barbells
- Beginner-friendly: No, one of the harder cartilage piercings to heal
13. Industrial Piercing
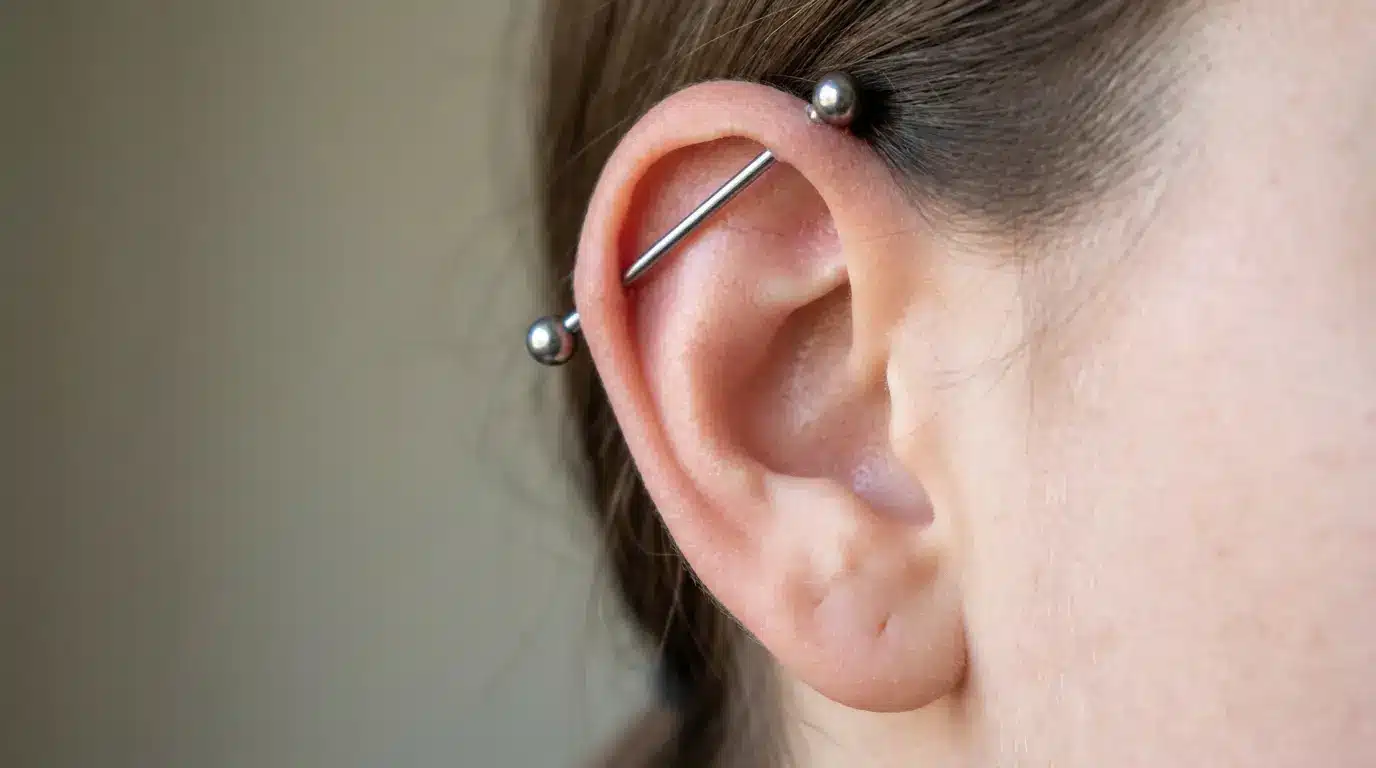
The industrial connects a forward-helix point to a standard-helix point with a single long bar. Not every ear has the right anatomy for this.
Piercers look for the right angle and ridge structure before proceeding. Because it is two piercings in one, healing is slower and more sensitive to pressure from sleeping.
- Placement: Two holes connected by a single barbell across the upper ear
- Pain level: 7/10
- Healing time: 9 to 12 months
- Best jewelry: Industrial barbells (sizing usually 38 mm to 45 mm)
- Beginner-friendly: No, healing can be challenging
14. Orbital Piercing
An orbital is not a new location but a configuration. Two separate piercings are connected by a single hoop.
The most common orbital placements are on the lobe or helix. The ring passes through both holes, creating a looping effect.
- Placement: Two holes in the same area connected by one ring
- Pain level: 4/10 to 5/10 depending on placement
- Healing time: 2 to 3 months for lobe orbitals, 6 to 9 months for cartilage orbitals
- Best placement spots: Lobe, helix, or conch
- Best jewelry: Captive bead rings, seamless hoops
- Beginner-friendly: Moderately beginner-friendly for lobe orbitals, harder for cartilage orbitals
15. Transverse Lobe Piercing
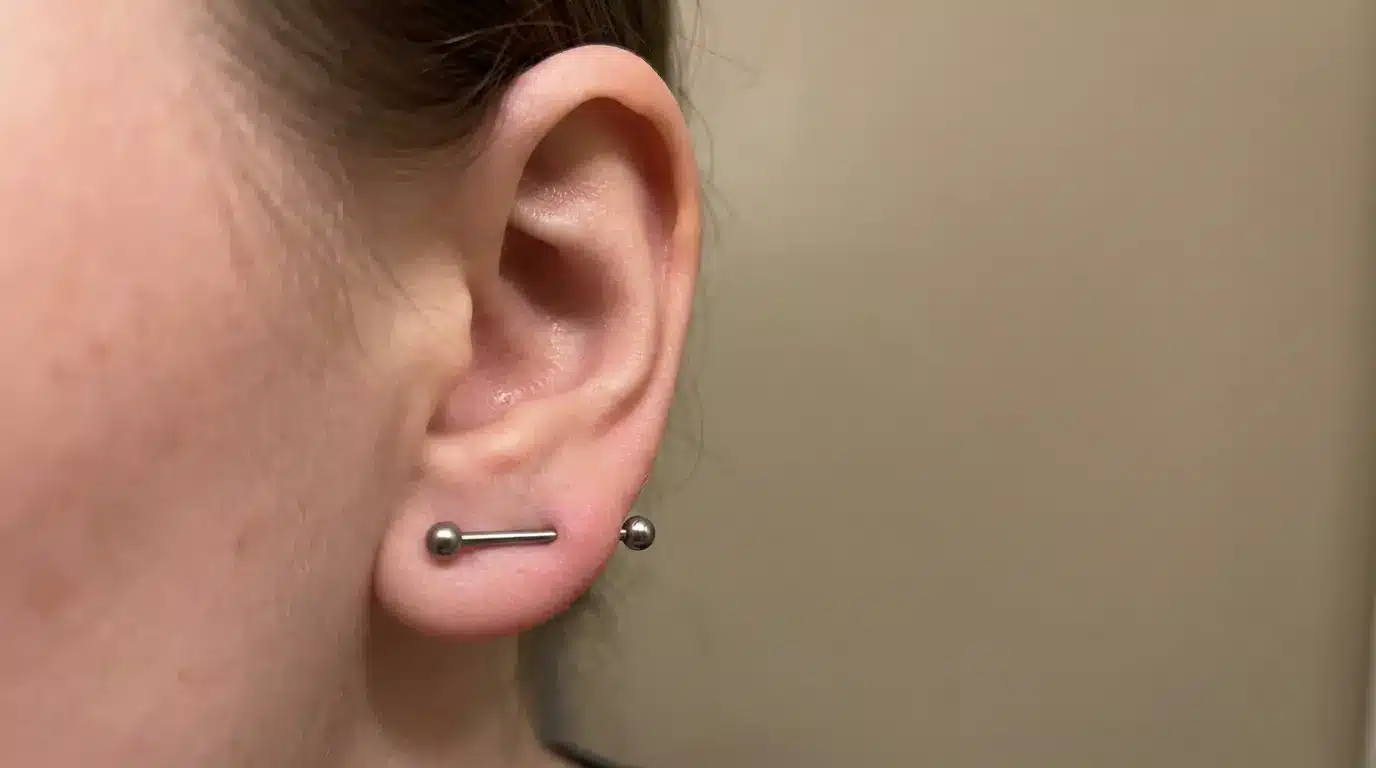
Instead of going front to back like a standard lobe piercing, this one goes sideways through the lobe.
The barbell ends show on both sides of the lobe. Anatomy plays a big role in whether this works on a given lobe shape.
- Placement: Horizontally through the lobe (side to side instead of front to back)
- Pain level: 4/10
- Healing time: 6 to 10 months
- Best jewelry: Straight or curved barbells
- Beginner-friendly: Moderately beginner-friendly if anatomy allows it
Ear Piercing Pain Levels and Healing Times
Pain and healing vary based on cartilage thickness, nerve density, jewelry pressure, and aftercare habits.
Lobe piercings usually heal faster because they have better blood flow, while cartilage piercings take longer and are more prone to swelling, irritation, bumps, and delayed healing.
Sleeping on a fresh cartilage piercing is one of the biggest reasons healing gets dragged out for months. Constant pressure and friction irritate the tissue even when the piercing looks healed on the surface.
Many people assume a piercing heals once the pain fades, but the cartilage continues to heal internally for months. Changing jewelry too early often causes swelling and irritation to return.
Snug and industrial piercings are usually the hardest to heal because they experience more movement and pressure than most piercings. Jewelry quality also matters more than people realize, since implant-grade titanium typically causes fewer healing problems than cheap metals.
Using a travel pillow or donut pillow can help reduce pressure while sleeping and make cartilage healing much easier.
Best Ear Piercing Placements for Beginners
If you are new to ear piercings, start with placements that heal easily and offer many jewelry options.
- Standard Lobe: Lowest pain, fastest healing, lowest risk of rejection. Any jewelry style works.
- High Lobe: Still soft tissue, slightly higher on the ear, stacks beautifully with a standard lobe.
- Helix: The most beginner-friendly cartilage option. Pain is manageable, jewelry choices are wide, and it heals better than deeper cartilage piercings.
- Conch: Slightly more involved but very popular for a reason. It sits in a protected area of the ear, which reduces the chance of snagging on clothing.
These four placements cover the full range of the ear and are a great foundation for building a curated look over time.
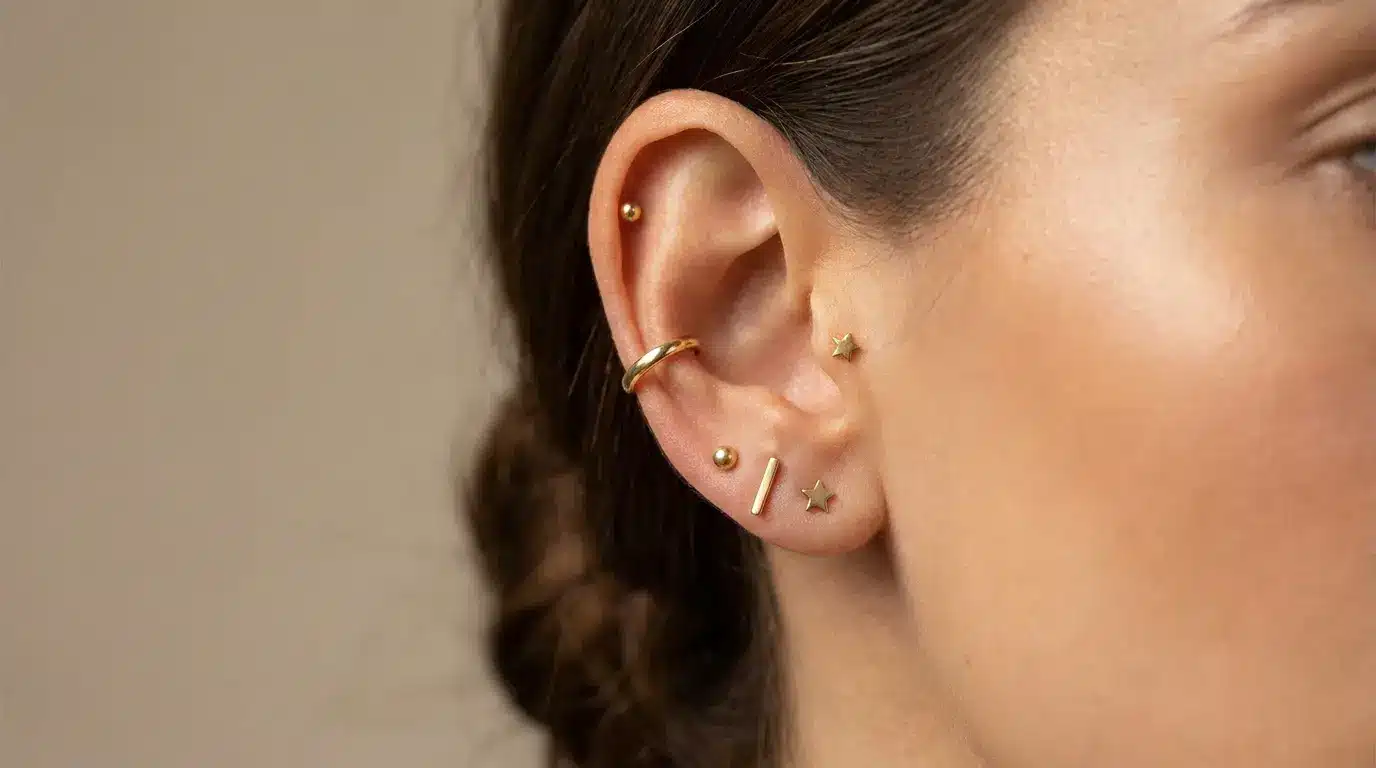
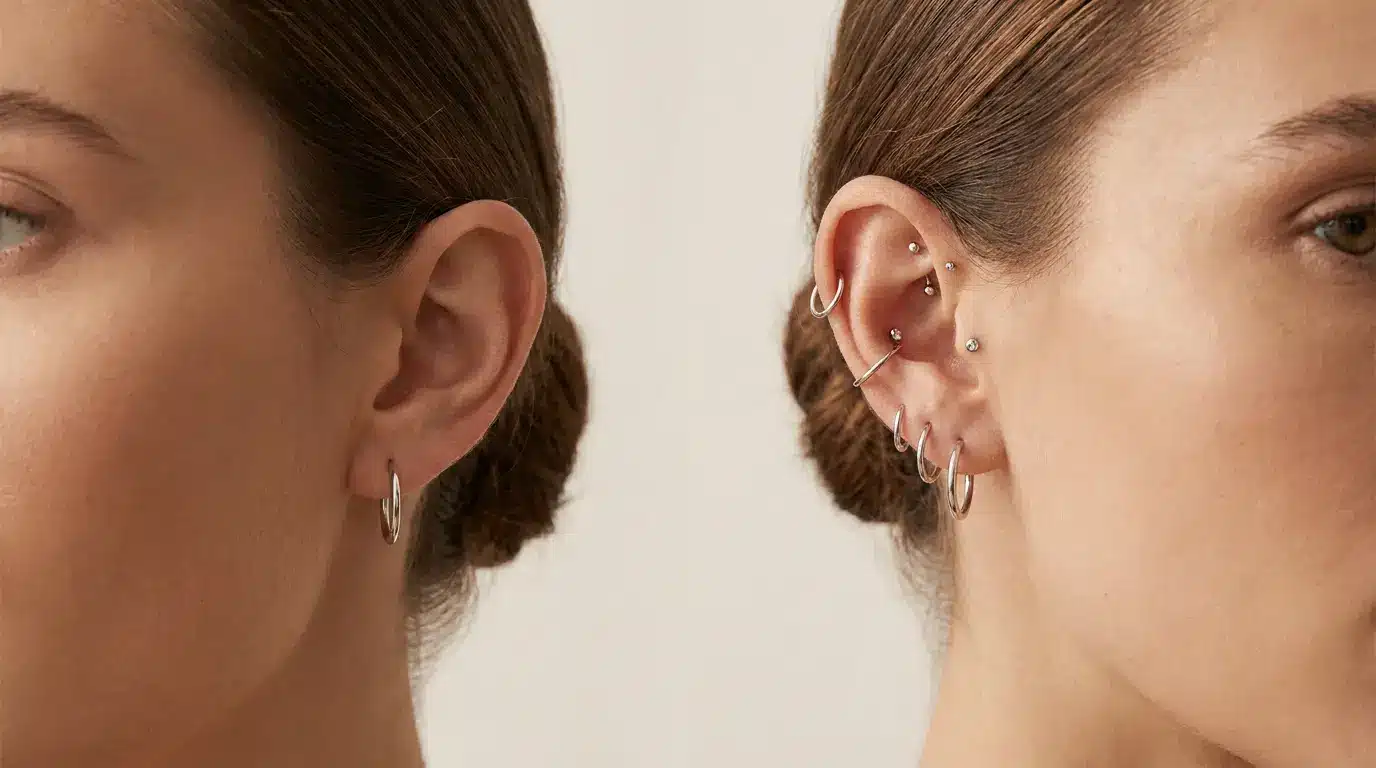
Trendy Ear Stack Ideas and Curated Ear Inspiration
Modern curated ears combine multiple placements to create balanced, layered jewelry looks. The goal is to build a collection of piercings that work together rather than getting everything done at once.
Minimalist Ear Stack
A clean, simple look usually includes a standard lobe, a high lobe, and one helix piercing. Thin gold flat-back studs keep it subtle and polished.
This style works well for everyday wear because it looks refined without feeling overloaded. Small jewelry pieces with consistent spacing help the entire ear feel balanced and intentional.
Gold Jewelry Curated Ear
All gold pieces create a warm, cohesive look. Mix stud sizes with one small hoop at the helix or lobe. Stick to one metal tone to keep it intentional.
Yellow gold tends to create a softer, classic aesthetic, while white gold feels more modern and minimal. Using textured pieces or tiny gemstone accents adds variation without making the setup look chaotic.
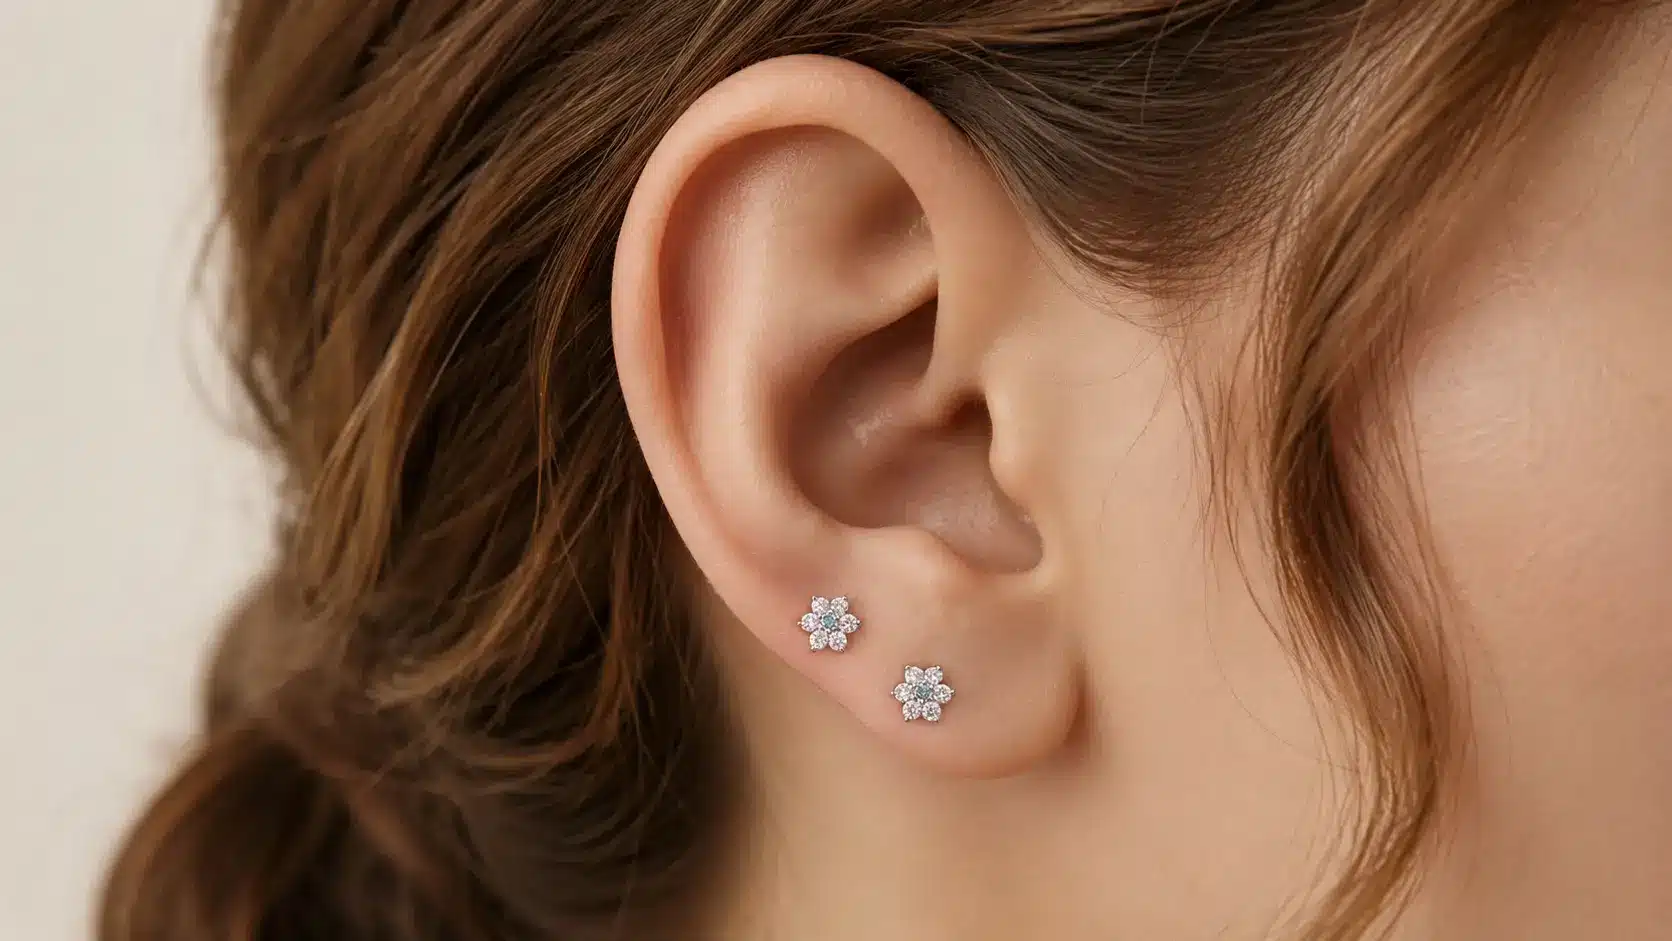
Double and Stacked Lobe Ideas
Two or three lobe piercings spaced evenly are one of the most popular trends right now. Space them about 4–5mm apart for a clean stack.
You can graduate sizes from small at the top to slightly larger at the bottom. Symmetry makes a big difference here.
Tiny hoops paired with flat-back studs create more visual depth than using identical earrings everywhere.
Leaving enough breathing room between piercings also helps the stack look cleaner instead of crowded.
Cartilage-Focused Ear Stack

A helix, a flat, and a conch all on one ear make for a bold, cartilage-heavy look. Keep lobe jewelry minimal to let the cartilage pieces stand out.
This setup usually works best with smaller jewelry because oversized pieces can make the ear feel visually cluttered.
Mixing shapes like hoops, studs, and curved barbells adds contrast and makes the stack look more customized.
Small Ear Piercing Ideas
If your ear is smaller or more delicate, stick to lower placements. Two lobe piercings and one tragus is a great compact combination. Flat-back studs in smaller sizes keep the proportions right.
Trying to force too many cartilage piercings onto a small ear usually makes the setup feel cramped.
Minimal spacing and dainty jewelry help smaller ears look cleaner and more proportional.
Balanced Asymmetrical Ear Styling
You do not need both ears to match. Many people do more piercings on one side and keep the other ear simpler. This creates an intentional asymmetric look that feels modern and personal.
A heavier cartilage stack in one ear, balanced by simple lobe jewelry in the other, often creates the best contrast.
The key is making both ears feel connected through similar jewelry styles, metals, or overall spacing.
How to Choose the Right Ear Piercing Placement
Before choosing a piercing, it helps to think beyond just the way it looks. The right placement should fit your anatomy, lifestyle, pain tolerance, and long-term styling goals.
- Ear anatomy: Not every placement works on every ear. Industrial, snug, and certain rook placements all depend on having the right cartilage shape. A good piercer will tell you honestly what your anatomy supports.
- Pain tolerance: Start with lower-pain placements if you are not sure how you handle it. Build up cartilage over time.
- Your lifestyle: If you sleep on your side, cartilage piercings on that side will take longer to heal and be more uncomfortable. If you wear headphones or earbuds daily, a tragus or conch might not be practical while healing.
- Work or school rules: Some workplaces and schools have jewelry restrictions. A small flat-back stud is less visible than a hoop and easier to work around.
- Jewelry preferences: If you love hoops, a lobe or outer conch works well. If you prefer studs, flat piercings, and forward helix placements are perfect.
- Long-term plan: Think about the full ear look you want before getting each piercing. Getting too many at once slows healing and makes aftercare much harder.
The best ear piercing placement is not always the trendiest one. The right choice is the placement that fits your anatomy, heals well with your lifestyle, and still matches the long-term ear setup you actually want.
Common Ear Piercing Mistakes to Avoid
Getting too many cartilage piercings at once can overwhelm the healing process and increase irritation. Most piercers recommend no more than two or three new piercings per session.
Using a piercing gun on cartilage carries real piercing gun risks; it forces blunt jewelry through the ear and can damage the tissue. Needles are safer, cleaner, and heal better.
Sleeping on fresh piercings puts pressure on the area and often causes irritated bumps. A travel pillow or donut pillow can help reduce friction while healing.
Cheap jewelry materials can trigger irritation and allergic reactions. Implant-grade titanium, solid 14k gold, and implant-grade surgical steel are usually the safest options.
Changing jewelry too early can restart the healing process, even if the piercing feels fine. Cartilage piercings often take months to heal internally.
Following proper aftercare guidelines, saline spray twice a day is usually enough. Harsh products and excessive cleaning often make things worse.”
Ear Piercing Jewelry Guide
The jewelry you choose affects both healing and comfort. Some styles look great but are terrible for fresh piercings.
- Studs vs hoops: Studs are recommended for healing. Hoops move more and can cause irritation in fresh piercings.
- Barbells: Curved barbells suit rook and daith piercings. Straight barbells are used for industrial piercings.
- Flat-back earrings: These are the most comfortable for daily wear and healing. The flat disc sits flush against the skin, reducing irritation.
- Titanium vs surgical steel vs gold: Implant-grade titanium is the top choice for healing due to its lightweight and hypoallergenic properties. Solid 14k or 18k gold is also safe. Surgical steel is fine for many people, but it contains trace nickel, which can cause reactions in sensitive skin.
- Best jewelry for healing: Flat-back titanium or gold studs in a simple design. No dangling pieces, no cheap alloys, and no hoops until fully healed.
Good jewelry reduces irritation, speeds up healing, and makes daily wear more comfortable. Choosing quality materials early saves a lot of problems later.
Conclusion
Picking the right ear piercing placement takes more than just pointing at a picture. Your ear shape, pain tolerance, healing commitment, and daily routine all matter.
Some piercings heal in weeks, while others take over a year. Start slow, choose placements that suit your anatomy, and build your curated ear one step at a time.
A well-planned ear stack always looks better than a rushed one. Before your next appointment, save your favorite ear piercing chart ideas and go in with a clear plan.
Your future self will thank you.
Frequently Asked Questions
How Many Ear Piercings Can You Get at Once?
Most piercers recommend no more than two or three piercings per session. Getting more at once makes aftercare harder and slows healing.
What Is the Easiest Ear Piercing to Heal?
Standard lobe piercings heal the fastest, usually within six to eight weeks. Soft tissue heals quicker than cartilage because blood flow is better.
Do Cartilage Piercings Hurt More Than Lobe Piercings?
Yes, cartilage is denser and has more nerve endings than soft lobe tissue. Most people describe it as firm pressure rather than a sharp sting.
What Jewelry Is Safe for a New Ear Piercing?
Implant-grade titanium and solid 14k or 18k gold are the safest options for healing piercings. Flat-back studs are best since they sit flush against the skin and reduce movement.