You know that feeling when you’ve been scrolling your phone too long and somehow feel bored and tired at the same time? That’s usually my sign to start one of my favorite fun crafts to do at home.
I’m the kind of person who begins with one simple idea and ends up surrounded by paper scraps, glue, and ribbon. But it always helps.
Crafts are affordable, easy to start, and usually use supplies you already have nearby. Best of all, they pull you out of that foggy mood and make the day feel lighter again.
Why Crafting at Home is Perfect for Everyone
Crafting gives you something tangible to show for your time. You’re not just scrolling or watching you’re making something real. Kids gain confidence when they finish a project and see what their hands created.
Teens need spaces they control, and decorating their rooms themselves matters more than you’d think. Adults? Most of us spend all day on screens.
Working with physical materials feels different. Your brain switches gears. And when you use stuff you already own, there’s this satisfying feeling of solving two problems at once: boredom and clutter. It’s practical creativity.
Fun Crafts to Do at Home for Kids
Kids need projects they can actually finish. These crafts work for ages 3-10 and use stuff you probably have lying around. Some get messy, that’s part of the fun. Pick one based on what your kid’s into right now, and don’t stress about perfection.
1. Paper Plate Animal Masks

Turn boring paper plates into lions, cats, or whatever animal your kid loves. They’ll wear it around the house for days. Set up a few of these at your next birthday party, and kids will stay busy for an hour while you handle the cake.
- Tools & Materials: You’ll need paper plates, scissors, paint or markers, glue, construction paper scraps, and a popsicle stick.
- Steps: First, cut eye holes in the plate. Then paint the plate your base color. Next, glue on ears, nose, and whiskers cut from paper. Finally, tape a popsicle stick to the bottom as a handle.
2. Finger Painting with Homemade Paints
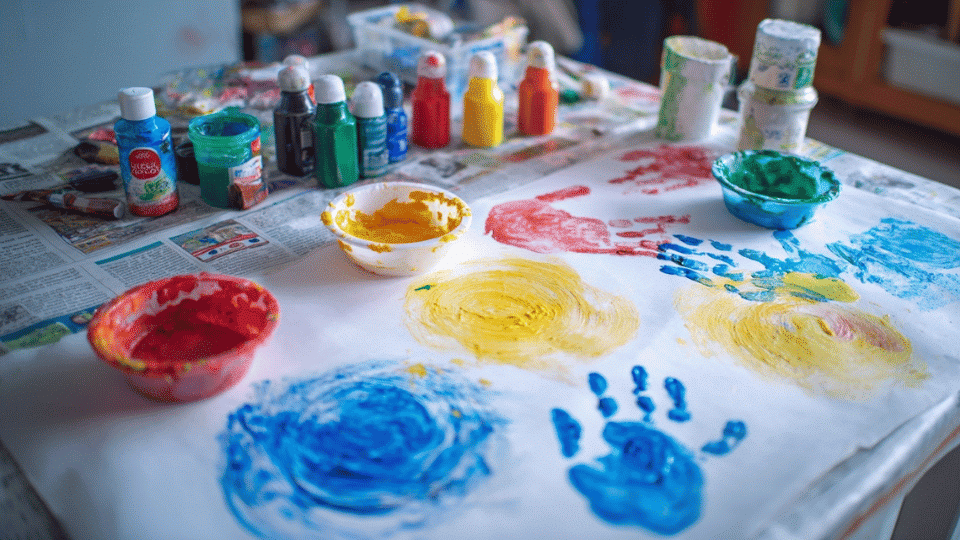
Mix flour, water, salt, and food coloring. That’s it. Safer than store paint if you’ve got a kid who still tastes things. Spread out a newspaper and let them go wild. The texture feels different from regular paint, and they love that.
- Tools & Materials: Grab 1 cup of flour, 1 cup of water, a pinch of salt, food coloring, paper or cardboard, and newspaper to protect your table.
- Steps: Mix flour, water, and salt until smooth, then split into bowls and add different colors. Let your kid paint with their fingers directly on the paper, and let it air-dry completely when they’re done.
3. Popsicle Stick Photo Frames
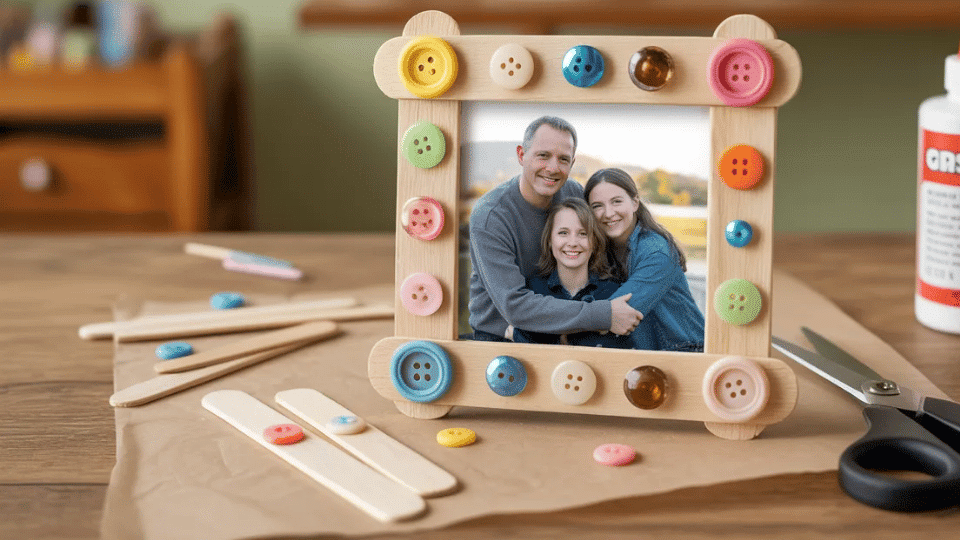
Glue four sticks into a square, decorate with whatever’s around, then tape a photo on the back. Simple enough for little kids, but teens sometimes make these too. They actually look decent on a shelf.
- Tools & Materials: You’ll need 4 popsicle sticks per frame, white glue, buttons, beads, or stickers for decorating, a photo, and tape.
- Steps: Arrange four sticks in a square shape and glue the corners together. Let it dry completely, then decorate the front with buttons or stickers and tape your photo to the back.
4. Handprint Art on Paper or Canvas
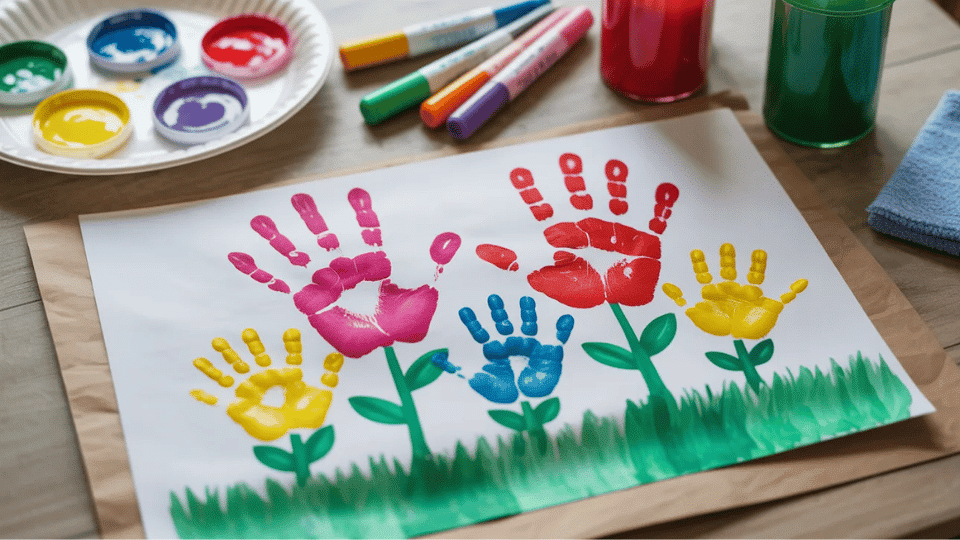
Press their hand in paint and stamp it on paper. You can turn handprints into flowers, turkeys, trees—tons of options. Parents get sentimental about these, so make extras for grandparents.
- Tools & Materials: You’ll need washable paint, paper or canvas, a plate for the paint, a wet cloth for cleanup, and markers if you want to add details.
- Steps: Pour paint onto a plate and press your kid’s hand in evenly. Have them stamp firmly onto paper, then add details with markers after everything dries.
5. DIY Paper Flowers

Cut colored paper into petal shapes, layer them, and poke a pipe cleaner through the middle. Younger kids need help with cutting, but they can handle the arranging. These don’t die like real flowers.
- Tools & Materials: Grab colored paper or tissue paper, scissors, green pipe cleaners, tape or glue, and a button for the flower center.
- Steps: Cut 5-8 petal shapes from paper and layer them in a circle. Poke a pipe cleaner through the center of the stem, then glue a button in the middle to hold everything together.
6. Salt Dough Ornaments
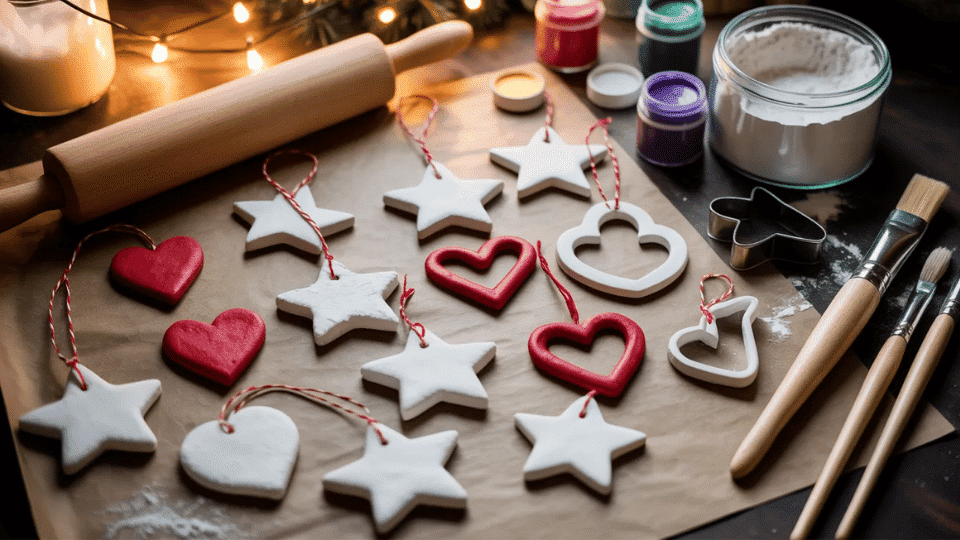
This dough bakes hard, so kids can keep what they make. Mix flour, salt, and water, then cut shapes with cookie cutters. Paint them after baking. Fair warning: they’ll want to make twenty ornaments.
- Tools & Materials: You’ll need 2 cups of flour, 1 cup of salt, 1 cup of water, cookie cutters, a rolling pin, and paint for decorating.
- Steps: Mix flour, salt, and water into a dough, then roll it out and cut shapes. Bake at 200°F for 2-3 hours until hard, and let your kids paint them when they’re completely cool.
7. Cotton Ball Sheep Craft
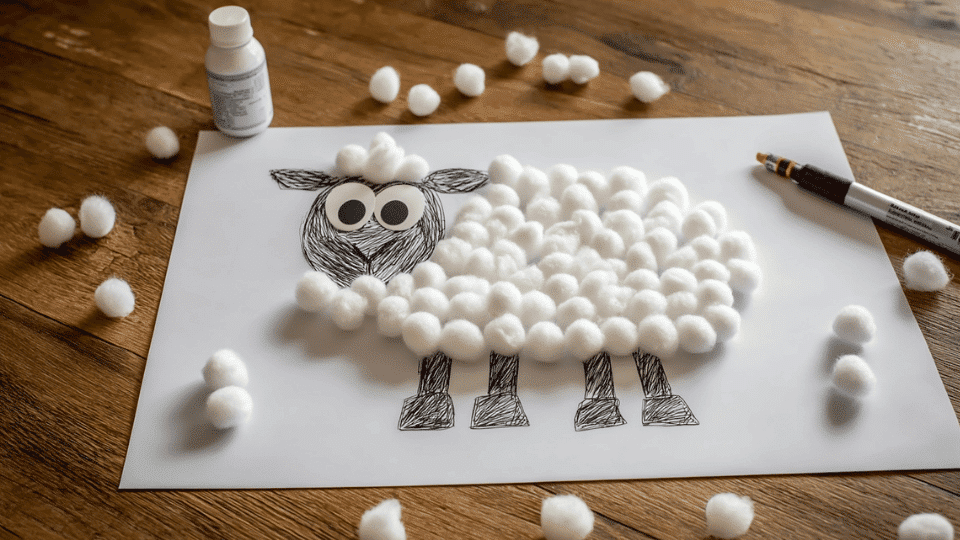
Draw a sheep body on paper, then glue cotton balls all over for wool. Super easy, and kids love the fluffy texture. Works for toddlers since there’s no complicated cutting involved.
- Tools & Materials: You’ll need paper, cotton balls, a black marker, glue, and googly eyes if you want to get fancy.
- Steps: Draw a sheep outline with a marker and spread glue inside the body area. Have your kid stick cotton balls all over the body to cover it, then add googly eyes and draw legs with the marker.
8. Toilet Paper Roll Animals
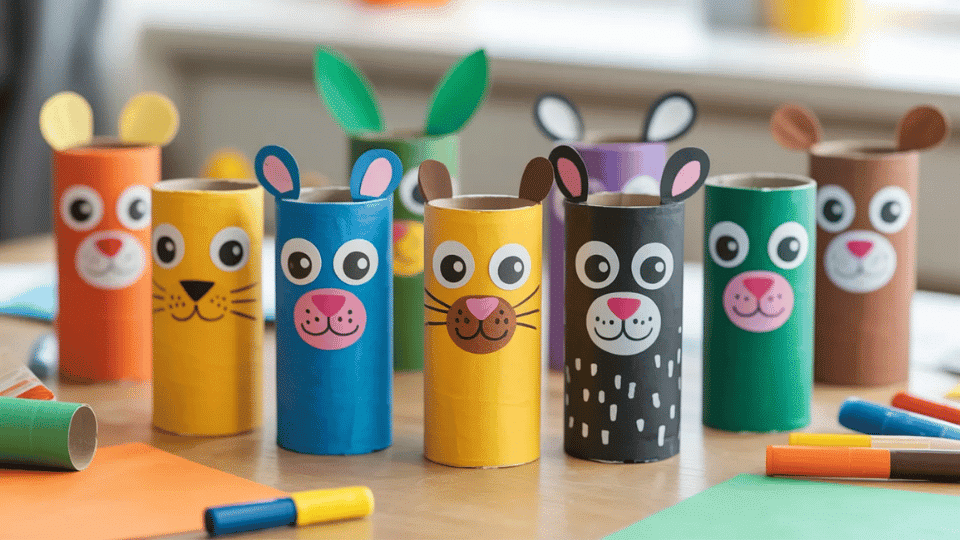
Save your empty rolls and turn them into zoo animals. Paint them, add paper ears and tails, and draw faces. Cheap, easy, and you’re recycling. Kids can make a whole collection.
- Tools & Materials: Collect empty toilet paper rolls, paint, construction paper, glue, markers, and googly eyes for the faces.
- Steps: Paint the roll whatever color you want and let it dry. Cut ears and a tail from construction paper and glue them onto the roll, then draw or glue on face details to finish your animal.
These crafts keep kids busy without costing much. Most take 20-30 minutes, which is perfect for short attention spans. Save the finished projects or give them as gifts; either way, your kid made something real with their own hands.
Fun Crafts to Do at Home for Teens & Tweens
Teens want crafts that don’t look like kid stuff. These projects make things you’d actually use or display in your room. Most are cheap enough to mess up on your first try, which matters when you’re experimenting with your own style.
9. DIY Friendship Bracelets
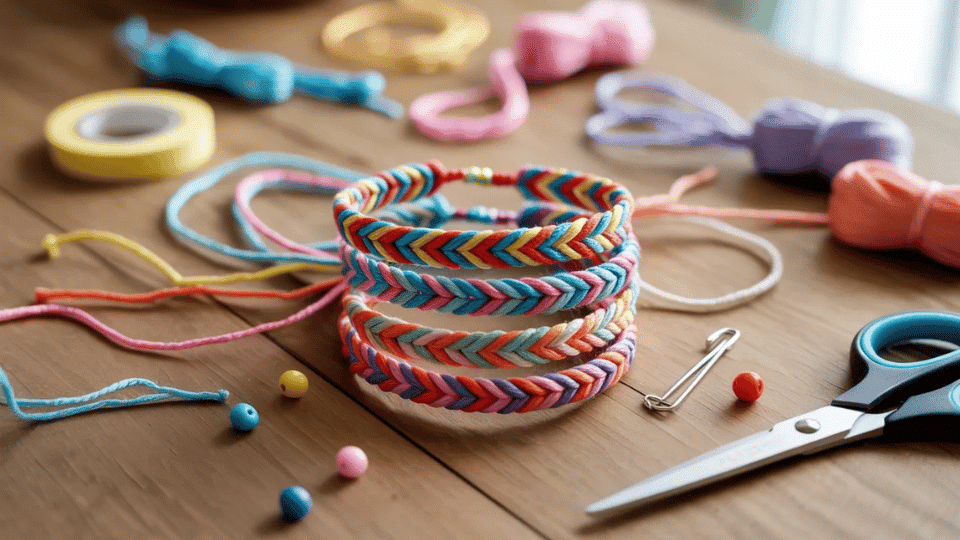
String together embroidery floss in patterns and give them to friends. The classic chevron pattern looks complicated, but it’s just repeating one knot. You can wear a stack of them or make one nice one.
- Tools & Materials: You’ll need embroidery floss in 3-5 colors, scissors, tape or a safety pin to hold it while you work, and maybe some beads if you want to add them.
- Steps: Cut strands about 24 inches long and tie them together at the top. Tape the knot to a table, then make diagonal knots across each row following your pattern until it’s long enough to tie around your wrist.
10. Tie-Dye T-Shirts or Socks
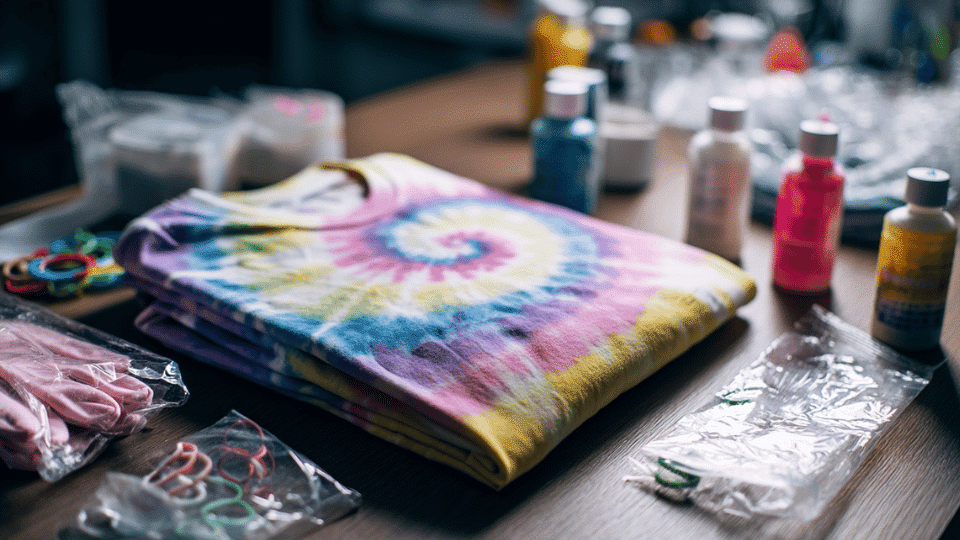
Twist the fabric, tie it with rubber bands, and squeeze dye into the sections. The random factor is part of what makes it work; no two ever look the same. White cotton picks up color best.
- Tools & Materials: Grab white t-shirts or socks, a tie-dye kit or fabric dye, rubber bands, plastic gloves, plastic bags for setting, and a bucket for rinsing.
- Steps: Twist or fold your fabric, and secure the sections with rubber bands as tightly as possible. Squeeze dye into each section, flip and repeat on the back, then wrap in plastic and let it sit 6-8 hours before rinsing.
11. Custom Phone Case Design
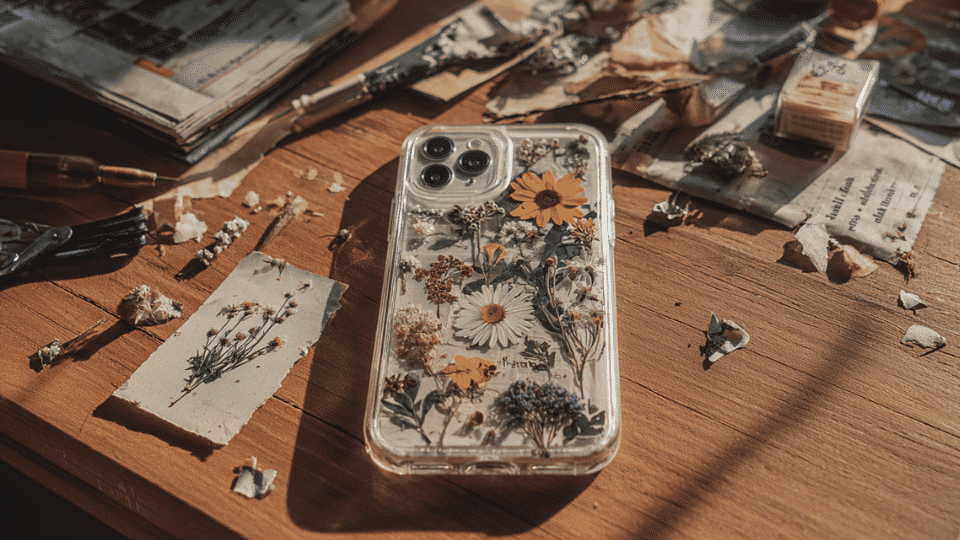
Buy a clear case and decorate the inside with whatever you’re into right now. Magazine cutouts, stickers, dried flowers, change it whenever you want. Way cheaper than constantly buying new cases.
- Tools & Materials: You’ll need a clear phone case for your model, magazine clippings or printed images, scissors, Mod Podge or clear glue, and a small paintbrush.
- Steps: Cut out your images small enough to fit inside the case. Arrange them however you want, then glue each piece down flat and let it dry before snapping the case onto your phone.
12. Painted Tote Bags
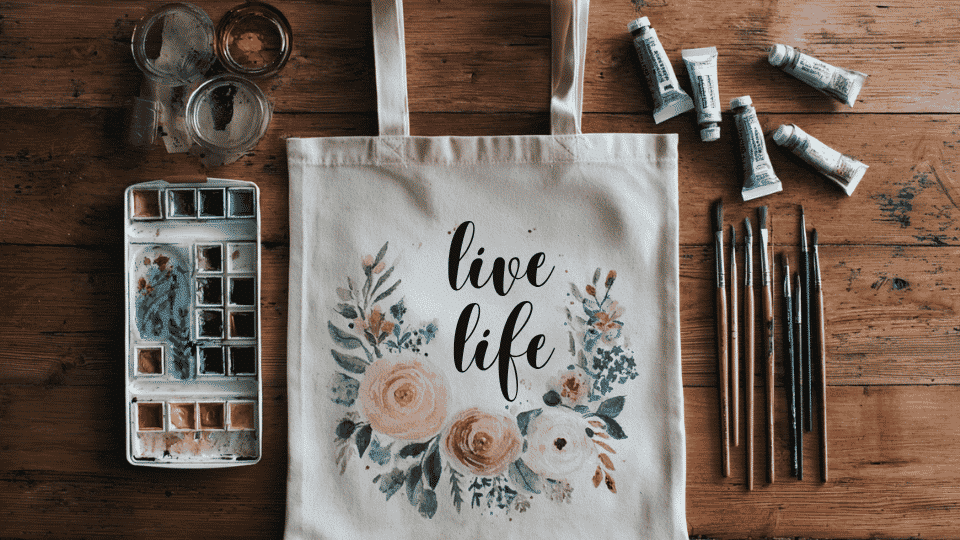
Plain canvas bags are like three dollars, and you can paint anything on them. Use fabric paint or acrylics mixed with fabric medium. Quotes, band logos, whatever. Beats carrying a plastic bag everywhere.
- Tools & Materials: Get a plain canvas tote bag, fabric paint or acrylic paint with fabric medium, paintbrushes, a pencil for sketching, and cardboard to put inside while painting.
- Steps: Sketch your design lightly in pencil first and stick cardboard inside so paint doesn’t bleed through. Paint your design in layers if needed, let each layer dry, then heat-set with an iron if the paint instructions say to.
13. DIY Zipper Pouches
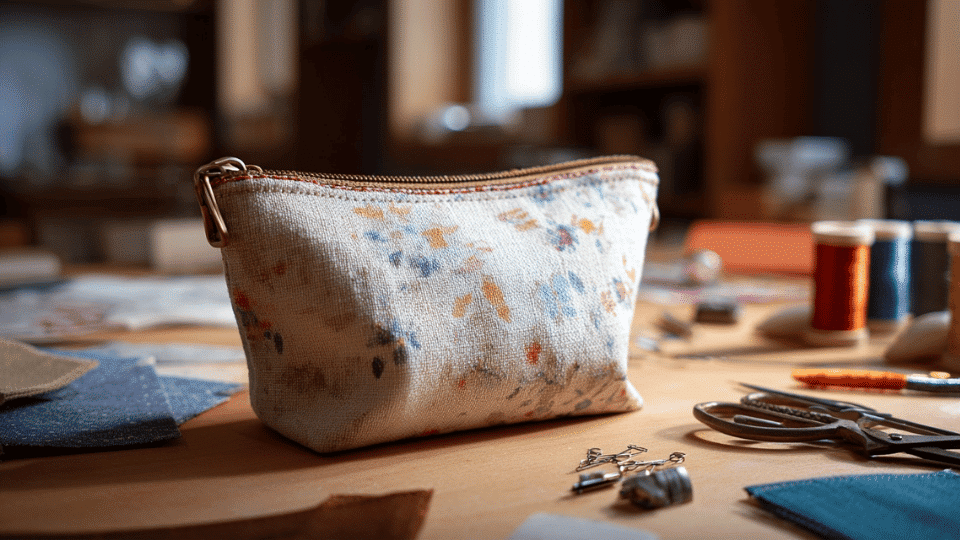
Sew a simple rectangle, add a zipper, and you’ve got a pencil case or makeup bag. Even if your sewing looks rough, it still works. The zipper part seems scary, but it’s just a straight line.
- Tools & Materials: You’ll need two pieces of fabric about 6×8 inches, a 7-inch zipper, thread, a sewing machine or needle, scissors, and pins to hold everything in place.
- Steps: Pin the zipper face down on one fabric piece and sew along the edge. Repeat with the second piece on the other side of the zipper, then fold and sew up both side seams and turn it right-side out.
14. DIY Room Decor Wall Collages

Print out photos, magazine pages, postcards, whatever represents your vibe right now. Arrange them on your wall with tape or tack them to a board. You can rearrange it whenever you change your mind.
- Tools & Materials: Collect printed photos, magazine clippings, postcards, posters, washi tape or poster putty, scissors, and either wall space or a corkboard as your base.
- Steps: Spread everything on the floor first and arrange it until you like how it looks. Take a photo of the layout, then stick pieces on your wall one by one, following your photo, so you don’t forget the arrangement.
15. Clay Keychains or Charms
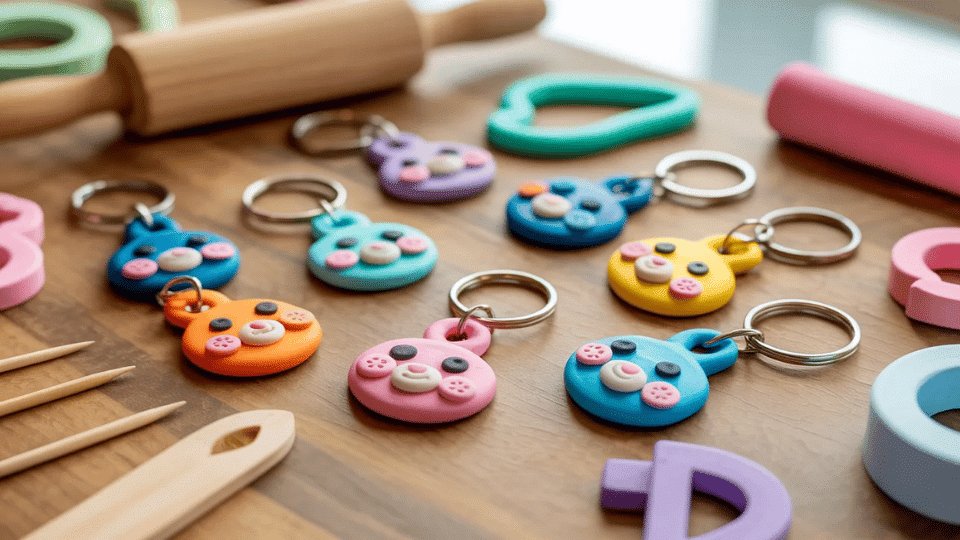
Polymer clay bakes in your regular oven and comes in tons of colors. Roll it, cut shapes, and add details with a toothpick. You can make matching sets for friends or weird little guys just for yourself.
- Tools & Materials: You’ll need polymer clay in whatever colors you want, a small rolling pin or smooth bottle, cookie cutters or a knife, a toothpick for details, keychain rings, and an oven.
- Steps: Roll out the clay about ¼ inch thick, then cut your shapes. Poke a hole near the top for the keychain ring, add any details with the toothpick, then bake according to package directions and attach the ring after cooling.
These aren’t baby crafts. They make actual stuff you’ll use or give away. Most cost under ten bucks to try, and if you mess up, you learned something for next time. Start with whichever one matches what you need right now.
Fun Crafts to Do at Home for Adults
Adult crafts hit differently than kid projects. You’re making stuff that looks good in your space or that you’d actually give as gifts. Some take an hour, some are weekend projects.
16. Macrame Plant Hangers
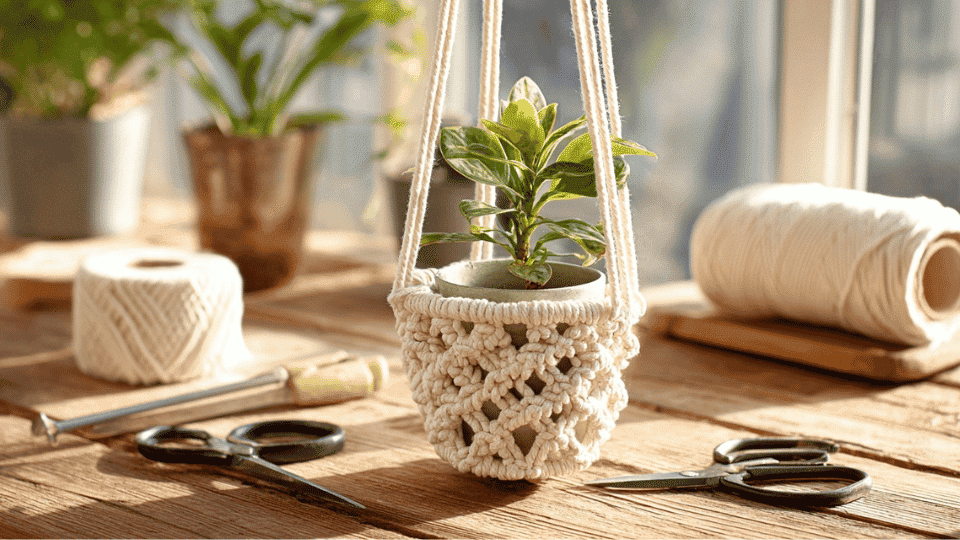
Tie knots in the rope to create a hanging holder for your plants. Sounds old-school, but they’re back, and they look good. The basic square knot pattern repeats the whole way down, so once you learn it, you’re set.
- Tools & Materials: You’ll need macrame cord or cotton rope (about 100 feet), a metal ring for hanging, scissors, a measuring tape, and a plant pot to test fit as you go.
- Steps: Cut four strands of cord, each about 8 feet long, and fold them in half through the ring. Separate into pairs and tie square knots in a spiral pattern down about 20 inches, then gather all cords together at the bottom with a final knot to hold the pot.
17. DIY Scented Candles
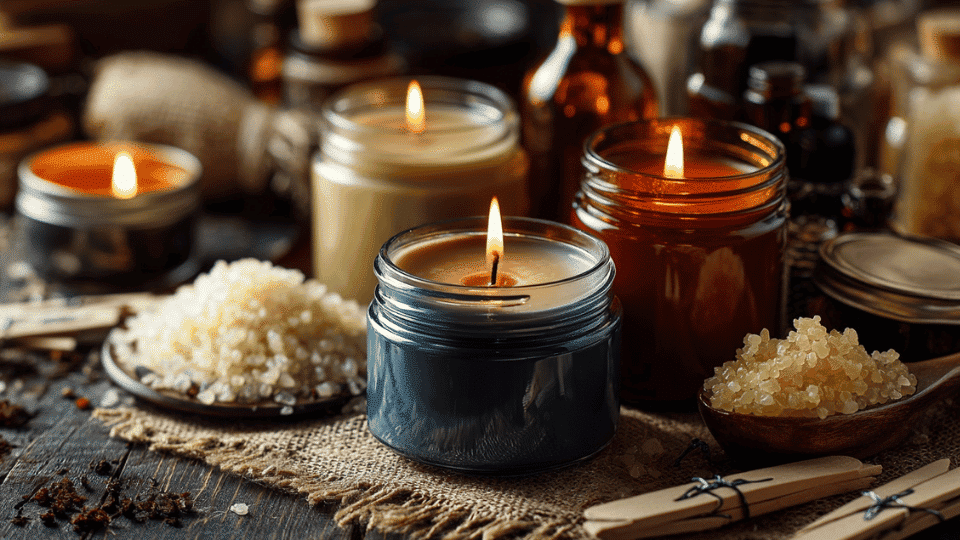
Melt the wax, add your desired scent, and pour into containers. You control the fragrance strength instead of guessing what “ocean breeze” actually smells like. Plus, homemade candles make solid gifts that people actually use.
- Tools & Materials: Get soy wax flakes, cotton wicks with metal tabs, glass jars or tins, essential oils or fragrance oils, a double boiler or large bowl, and clothespins to hold wicks centered.
- Steps: Melt wax in a double boiler until completely liquid, then remove from heat and stir in your fragrance oil. Secure the wick in the center of your container, pour the wax slowly, and use a clothespin across the top to keep the wick straight while it hardens overnight.
18. Embroidery Hoop Art
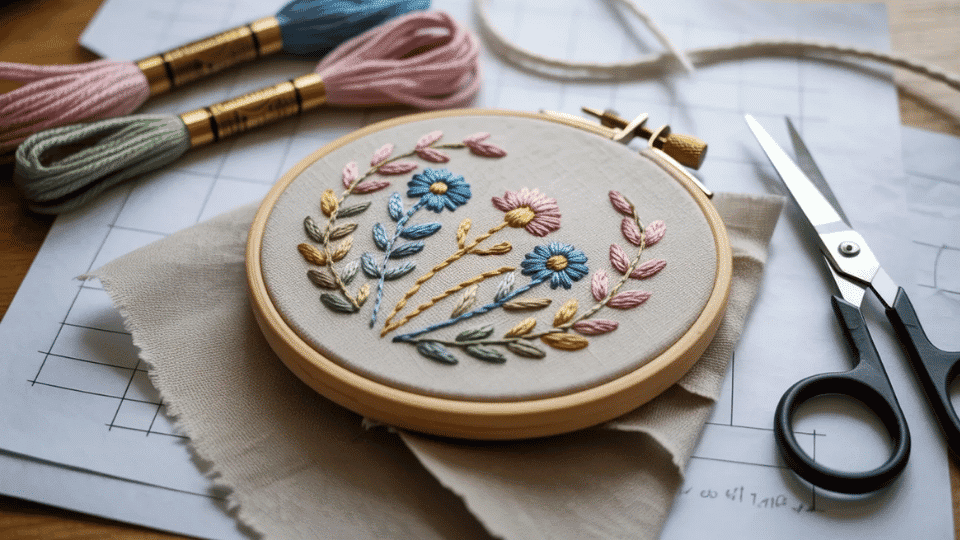
Stretch fabric in a hoop and stitch whatever design you want. Start simple with outlines or words. You can find free patterns online or draw your own. The repetitive stitching is actually pretty relaxing once you get going.
- Tools & Materials: You’ll need an embroidery hoop (6-8 inches works well), fabric like cotton or linen, embroidery floss in various colors, embroidery needles, scissors, and a pattern printed or drawn on paper.
- Steps: Stretch your fabric tight in the hoop and transfer your design with a pencil or iron-on transfer. Thread your needle and stitch following your pattern using basic stitches like backstitch or satin stitch, then trim the excess fabric from the back when finished.
19. Pressed Flower Bookmarks
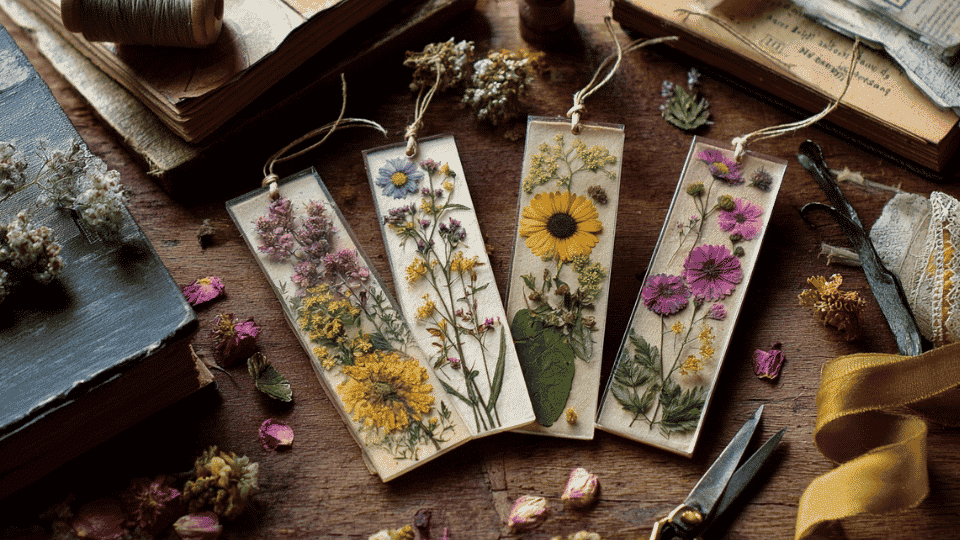
Pick flowers, press them flat between book pages for a week, then seal them onto cardstock with clear contact paper. They look delicate but last for years. Makes reading feel fancier than it actually is.
- Tools & Materials: Collect fresh flowers or petals; heavy books for pressing; cardstock or cardboard strips; clear contact paper or laminating sheets; scissors; and wax paper to protect the book pages.
- Steps: Place flowers between wax paper inside a heavy book, and wait about a week until they are completely dry and flat. Arrange dried flowers on cardstock strips, cover with contact paper, smooth out any bubbles, then trim the edges and punch a hole at the top if you want to add ribbon.
20. Scrapbooking Memory Pages

Glue photos, tickets, and other paper memories onto decorated pages. Less about perfection and more about keeping stuff you’d otherwise lose. You can make whole albums or just do single pages for frames.
- Tools & Materials: You’ll need a scrapbook or cardstock pages, photos and printed memories, decorative paper, scissors, photo-safe glue or tape, stickers or embellishments, and journaling pens for adding notes.
- Steps: Choose a theme for each page and select your photos and memorabilia. Arrange everything on the page before gluing to figure out the layout, then attach items permanently and add journaling or dates to give context to what you’re preserving.
I’m the friend who once spent three weekends making a scrapbook for a bachelorette party, so trust me when I say handmade gifts are almost always remembered longer than expensive ones. If you’re looking for more ways to make presents people will actually keep, DIY gifts like homemade candles, photo albums, and custom decor hit the same way.
21. Handmade Greeting Cards
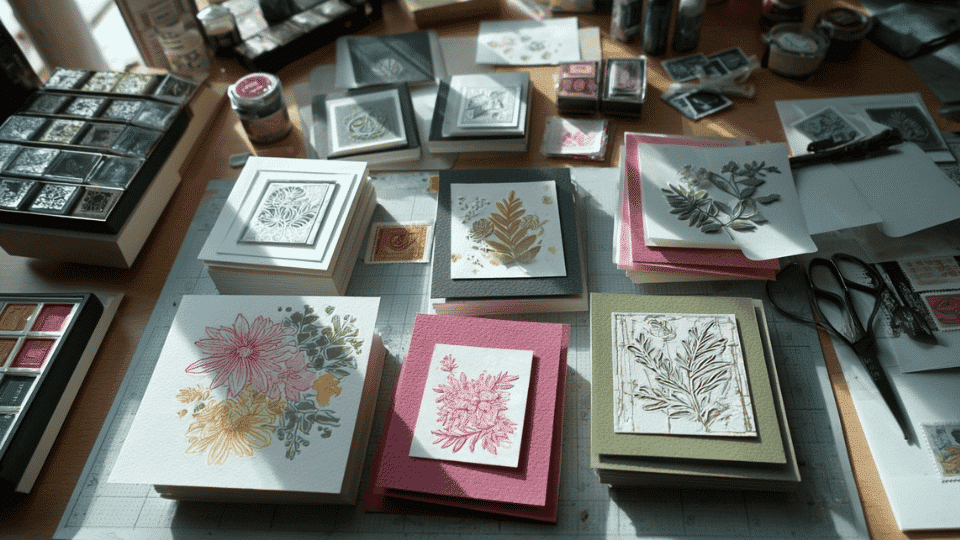
Fold cardstock, add some decorative paper or stamps, and write inside. Store-bought cards cost five bucks anyway, and half the time they don’t say what you actually want. Making your own means it matches the occasion exactly.
- Tools & Materials: Get cardstock in various colors, decorative paper or scrapbook paper, stamps and ink pads, scissors, glue stick, markers or pens, and envelopes that fit your card size.
- Steps: Fold cardstock in half to create the card base and cut decorative paper slightly smaller than the front. Glue the paper on and add embellishments like stamped images or cut-out shapes, then write your message inside and let any glue dry before putting it in the envelope.
22. Woven Yarn Wall Hanging
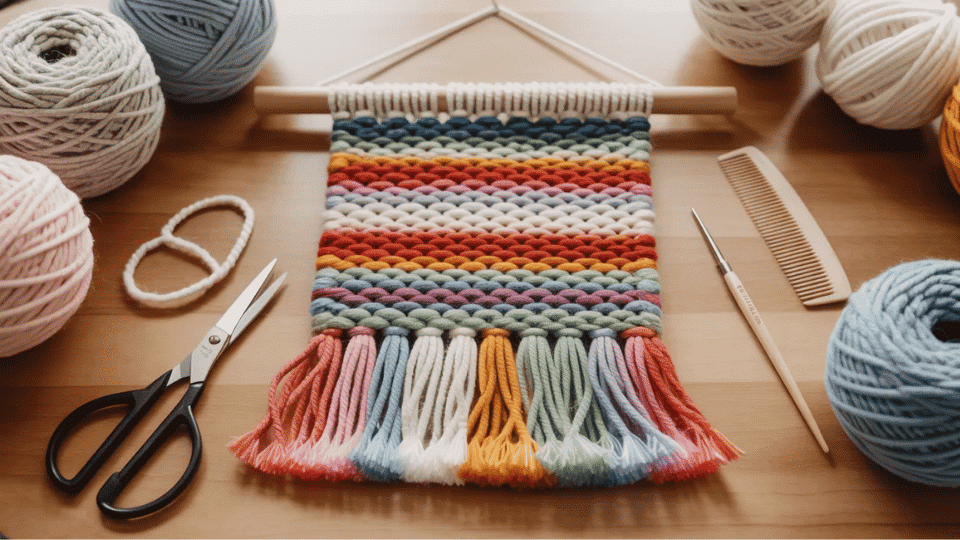
Tie yarn across a stick and weave more yarn through it in patterns. The imperfect, handmade look is the point. You can go minimal with neutral colors or wild with every color you own.
- Tools & Materials: You’ll need a wooden dowel or stick (12-18 inches), various yarns in your chosen colors, scissors, a comb or fork for pushing rows together, and string for hanging at the top.
- Steps: Tie long vertical yarn strands to your dowel, spacing them about half an inch apart. Weave horizontal strands over and under the vertical ones, alternating rows. Push each row tight with a fork, then trim the bottom into a V-shape, leave it straight, or add a hanging loop.
23. DIY Coasters Using Tiles or Cork
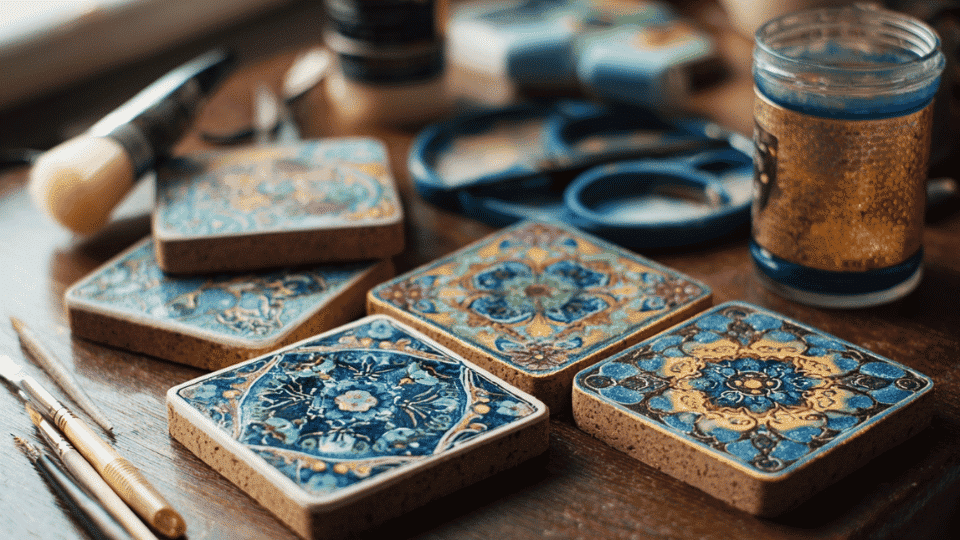
Glue fabric or paper to tiles, seal it, and stick felt on the bottom. They protect your furniture, and you can match your actual decor instead of whatever Target has. Make a set of four in an hour.
- Tools & Materials: Get 4-inch ceramic tiles or cork squares, fabric or decorative paper, Mod Podge or craft glue, foam brush, clear acrylic sealer spray, felt pieces for backing, and scissors.
- Steps: Cut your fabric or paper to fit the tile size, then brush Mod Podge onto the tile surface. Smooth the material on top, eliminating bubbles, seal with another layer of Mod Podge, and spray with acrylic sealer once dry before gluing felt squares to the bottom.
These projects don’t require special skills, just patience and decent lighting. Some you’ll finish in one sitting, others you’ll pick up across a few evenings.
Seasonal and Holiday Craft Ideas
Every season gives you a reason to make something new. These crafts work for decorating your space or giving as gifts when holidays roll around.
24. Handmade Christmas Ornaments
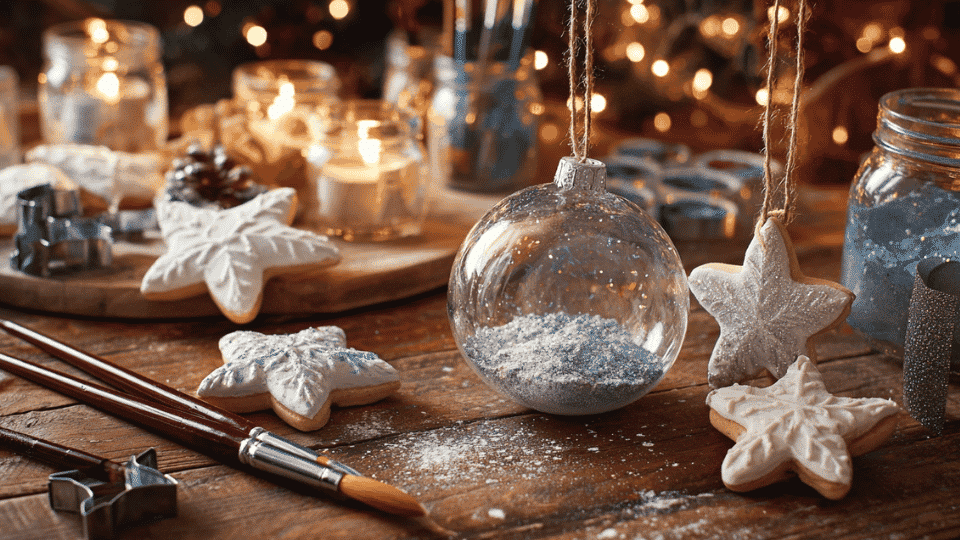
Salt dough or clear glass balls filled with stuff both work great. Paint them, add glitter, and write the year on them. They beat buying another box of generic ornaments, and you can make one for everyone on your list.
- Tools & Materials: You’ll need clear glass or plastic ornament balls, or salt dough (flour, salt, water), paint, ribbon for hanging, glitter or small decorations, and Mod Podge if you’re sealing salt dough.
- Steps: For glass balls, remove the top, fill with fake snow, small ornaments, or glitter, then replace the cap and tie a ribbon through it. For salt dough, roll flat, cut shapes with cookie cutters, poke a hole for ribbon, bake until hard, then paint and seal with Mod Podge.
25. Spring Butterfly Window Clings
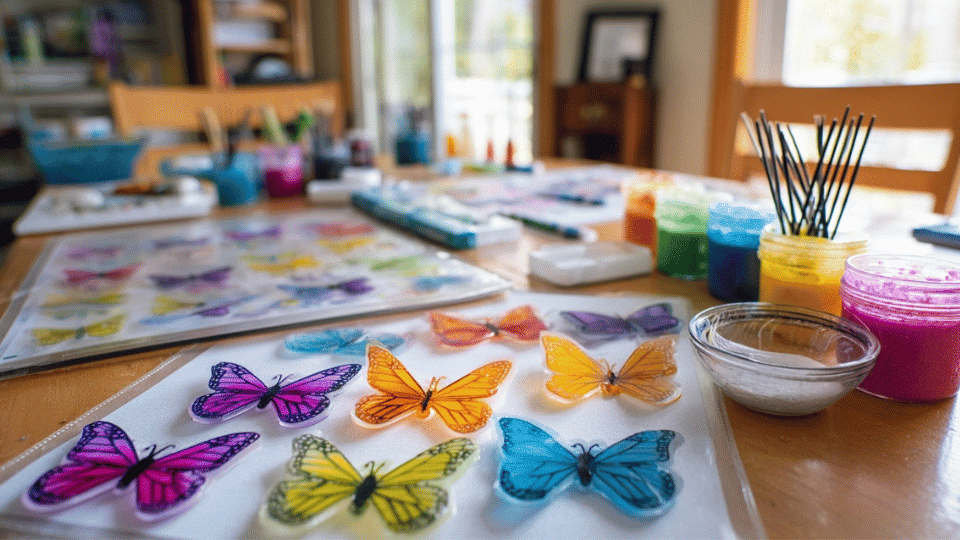
Mix dish soap and food coloring in plastic page protectors to make gel clings that stick to windows. They peel off without leaving residue, so you can move them around. Kids love these, but adults make better, more detailed ones.
- Tools & Materials: Get clear page protectors or plastic sheets, white school glue, food coloring, small mixing bowls, toothpicks for spreading, and butterfly outline templates, printed or drawn.
- Steps: Slip your template inside the page protector and trace the outline with glue from the bottle. Mix glue with food coloring in separate bowls, fill in sections with colored glue using toothpicks, then let dry completely flat for 24 hours before peeling off and sticking to windows.
26. Halloween Pumpkin Painting
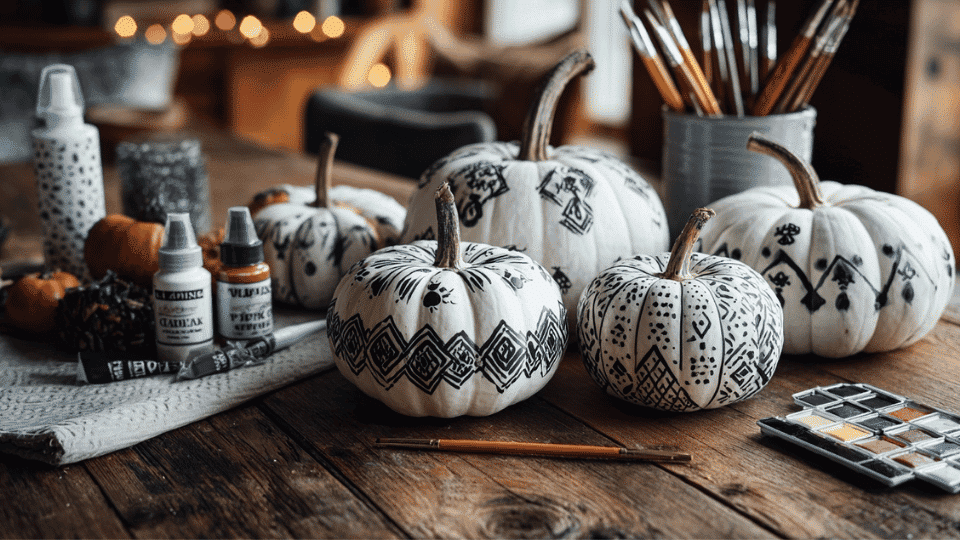
Skip the carving mess and just paint pumpkins instead. They last way longer, and little kids can help without knives involved. Go spooky, funny, or elegant, whatever matches your vibe. Black and white looks surprisingly good.
- Tools & Materials: You’ll need pumpkins (real or foam), acrylic paint in your chosen colors, paintbrushes in different sizes, a pencil for sketching, paper towels, and clear sealer spray if using real pumpkins outside.
- Steps: Wipe your pumpkin clean and let it dry, then sketch your design lightly in pencil if you want a guide. Paint your design in layers, letting each color dry before adding the next, and spray with sealer if you’re putting them outside so rain doesn’t ruin your work.
27. Heart Garlands
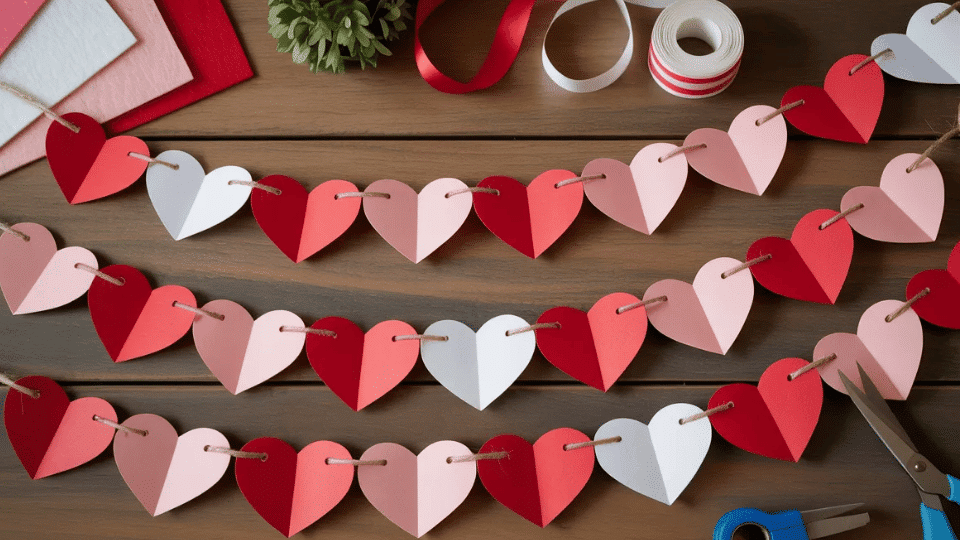
Cut hearts from paper or felt, string them together, hang them wherever. Valentine’s Day is the obvious time, but they work for anniversaries or weddings too. Make them all one color or go rainbow.
- Tools & Materials: You’ll need colored paper or felt sheets, scissors, a heart-shaped template or cookie cutter to trace, twine or ribbon for stringing, a hole punch, and tape or glue if layering hearts.
- Steps: Trace and cut out hearts in your chosen colors, making sure you have enough to fill your space. Punch holes at the top of each heart, thread them onto your twine, spacing them evenly, and hang the garland using tape or small nails wherever you want a pop of color.
28. Easter Egg Decorating
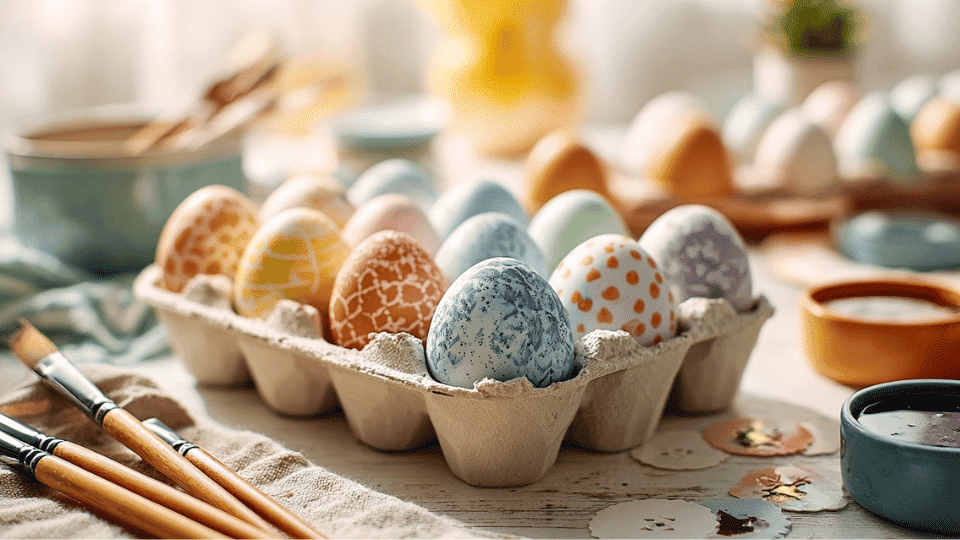
Dye hard-boiled eggs or blow out the insides and paint the shells. You can go traditional with pastel dyes or get weird with patterns and metallic paint. Blown-out eggs keep forever if you’re gentle with them.
- Tools & Materials: Get eggs (hard-boiled or blown-out), egg dye kit or food coloring with vinegar, small bowls for dye, paintbrushes, acrylic paint, stickers or washi tape for patterns, and an egg carton for drying.
- Steps: If dyeing, mix your colors in bowls according to the kit directions, and dip the eggs until you like the shade. If painting, let eggs dry completely after boiling or blowing out, then paint your designs and let them dry in the carton before displaying or hiding them.
29. Summer Shell Crafts

Collect shells from the beach and turn them into something you’ll keep. Glue them to frames, make wind chimes, or fill glass jars for shelf decor. Beats letting them sit in a bag until you throw them out next spring.
- Tools & Materials: You’ll need cleaned shells from the beach, a hot glue gun and glue sticks, picture frames, glass jars, or driftwood, fishing line for hanging, a small drill for making holes if needed, and paint or sealer (optional).
- Steps: Clean your shells with soapy water, let them dry completely, and plan your arrangement before gluing. Hot-glue shells to your chosen base, creating whatever pattern you like; drill small holes and string shells for wind chimes if going that route; and seal with clear spray if you want extra shine.
30. Fall Leaf Art and Wreaths
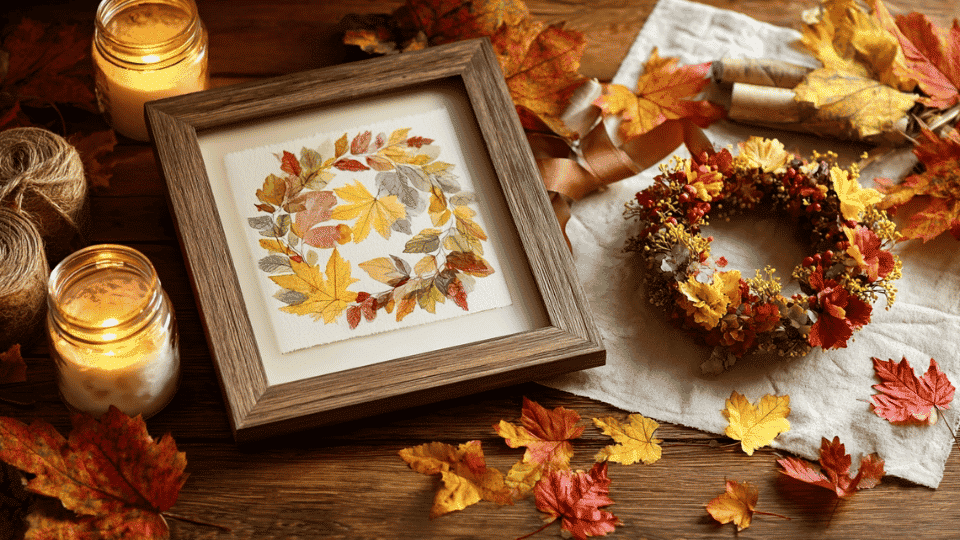
Press colorful leaves between book pages for a few days, then arrange them on paper behind glass or glue them to a foam wreath form. The colors only last a few weeks, even when preserved, but that’s kind of the point of fall decorations.
- Tools & Materials: You’ll need freshly fallen colorful leaves, heavy books for pressing, wax paper, foam wreath form or picture frame with glass, Mod Podge or craft glue, and ribbon for hanging the wreath.
- Steps: Press leaves between wax paper inside heavy books for 5-7 days until flat and dry. For wreaths, glue leaves overlapping around the foam form and seal with Mod Podge, or for framed art, arrange leaves on paper, glue them down, and frame behind glass to preserve them longer.
Seasonal crafts give you a reason to make something new every few months, rather than unpacking the same decorations year after year.
Budget-Friendly Crafts Using Recycled Materials
You’re already paying for this stuff once; might as well use it twice. These crafts turn trash into things you’d actually keep around your house. Nothing here needs special supplies, just whatever’s headed to your recycling bin anyway.
31. Plastic Bottle Herb Garden
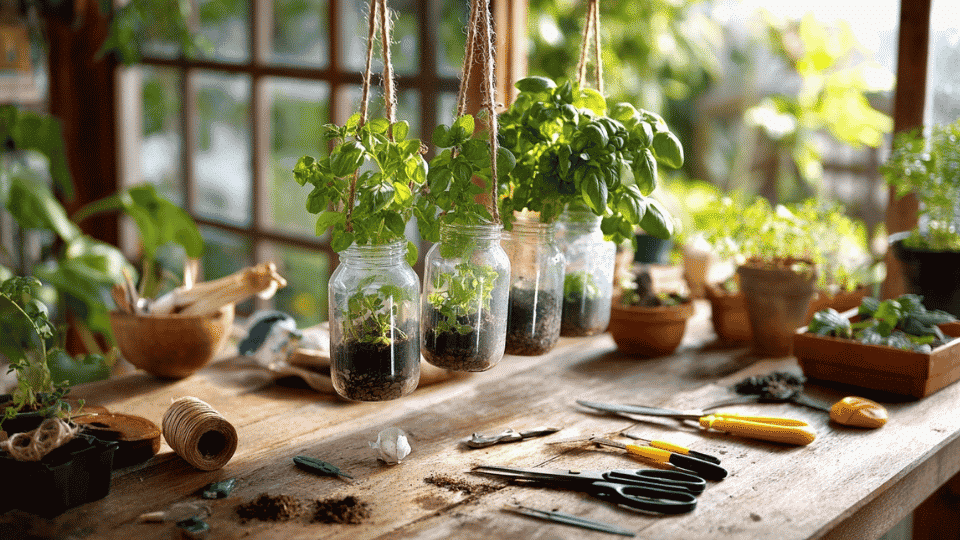
Cut bottles in half, punch drainage holes, fill with soil, and plant herbs. Hang them on a fence or wall with a string. You get fresh basil or mint, and your kitchen scraps become something useful instead of just more plastic waste.
- Tools & Materials: You’ll need empty plastic bottles (soda or water bottles work), scissors or a craft knife, string or wire for hanging, potting soil, herb seeds or seedlings, and a nail or screwdriver for poking holes.
- Steps: Cut each bottle in half and poke several small holes in the bottom for drainage. Fill with potting soil, leaving an inch at the top, plant your herbs, then tie a string around the bottle neck and hang them in a sunny spot where you can water them easily.
32. Tin Can Pencil Holder
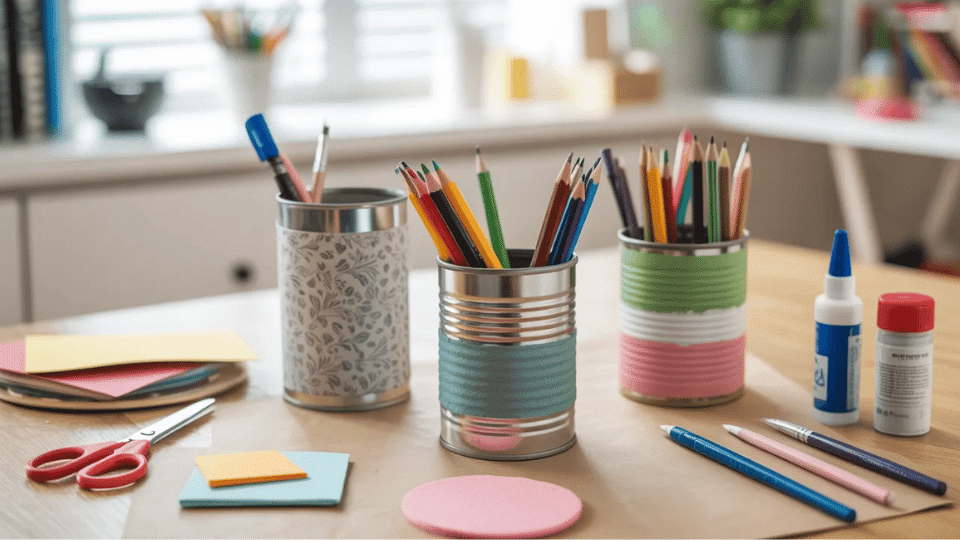
Wash out old soup or vegetable cans and cover them with paper, fabric, or paint. Group a few together for different supplies. Beats spending money on fancy desk organizers that do the exact same thing.
- Tools & Materials: Get clean, empty tin cans with smooth edges, decorative paper or fabric scraps, Mod Podge or white glue, scissors, paint and brushes (optional), and felt circles for the bottom to prevent scratching.
- Steps: Remove labels and wash cans thoroughly, then cut your paper or fabric to wrap around each can. Glue it smoothly with Mod Podge, brushing out any bubbles, let it dry completely, and glue felt to the bottom so the cans don’t scratch your desk when you move them around.
33. Newspaper Basket Weaving
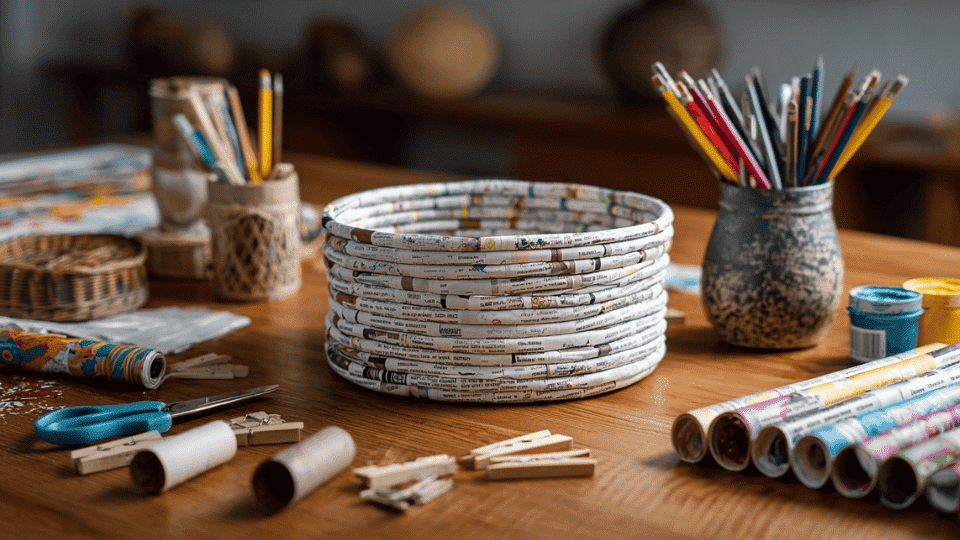
Roll the newspaper into tight tubes, then weave them like you would with actual basket materials. Paint or seal them after, and they’re surprisingly sturdy. Good for storing mail, magazines, or random stuff that doesn’t have a home.
- Tools & Materials: You’ll need old newspapers, a thin dowel or knitting needle for rolling, a glue stick or tape, scissors, clothespins to hold pieces while drying, and paint or varnish to seal the finished basket.
- Steps: Roll newspaper sheets diagonally around a dowel to form tight tubes, then glue the edges. Make about 30 tubes, then weave them in an over-under pattern, starting with a flat base and building up the sides, using clothespins to hold the shape until you glue and seal everything.
34. Egg Carton Ladybugs
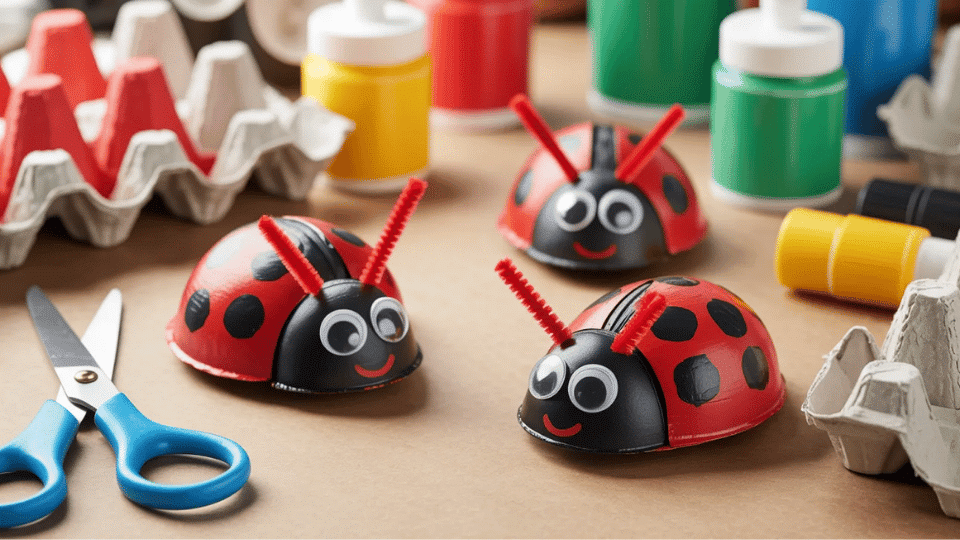
Cut out individual cups from cardboard egg cartons and paint them red with black spots. Glue on googly eyes and pipe cleaner antennae. Kids love making these, and they’re cute enough to keep around as little decorations.
- Tools & Materials: You’ll need a cardboard egg carton, scissors, red and black acrylic paint, paintbrushes, googly eyes, black pipe cleaners for antennae, and hot glue or craft glue.
- Steps: Cut out individual cups from the carton and trim the edges smooth. Paint each cup red and let it dry, then add black spots and a black line down the middle for wings. Glue on googly eyes and poke small pieces of pipe cleaner through the top for antennae.
35. Glass Jar Lantern Wraps
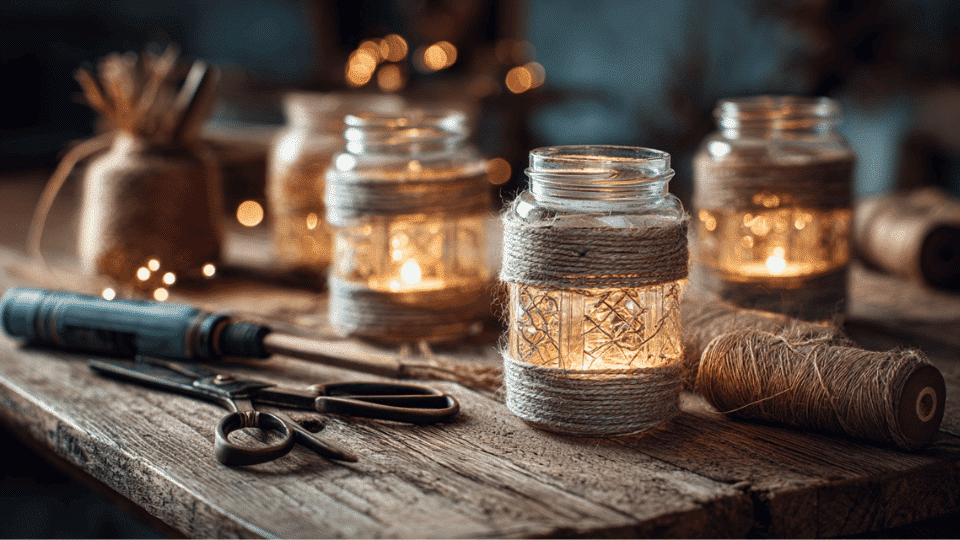
Wrap twine around old jars in patterns and drop tea lights inside. The light shines through the gaps and looks way fancier than it actually is. Line them up on a table or hang them with wire handles.
- Tools & Materials: You’ll need clean glass jars (mason jars or pasta sauce jars), twine or jute string, a hot glue gun and glue, scissors, tea light candles or battery-operated LED lights, and wire for handles if hanging.
- Steps: Start at the bottom of the jar and hot glue the end of your twine, then wrap it around in whatever pattern you want, gluing every few wraps to hold it. Leave some gaps for light to shine through, add a wire handle if you want to hang it, and drop a tea light inside when you’re done.
36. T-Shirt Tote Bag
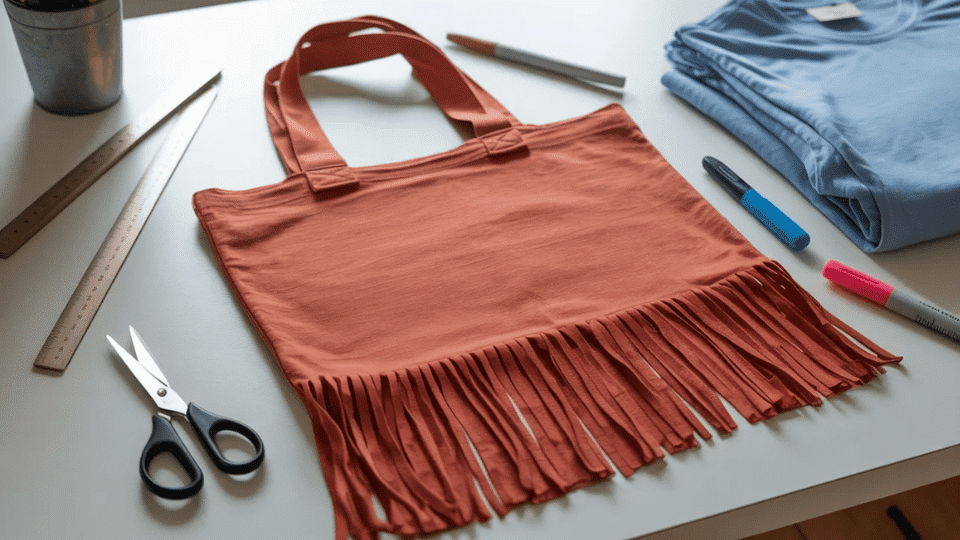
Cut off the sleeves and neckline of an old shirt, then cut fringe along the bottom and tie the strips together. That’s it. You’ve got a bag that actually holds groceries, and you didn’t have to touch a sewing machine.
- Tools & Materials: You’ll need an old t-shirt (larger sizes work better), sharp fabric scissors, a ruler or measuring tape for making even cuts, and a marker to draw cutting lines if you want them to be perfect.
- Steps: Lay the shirt flat and cut off both sleeves and the neckline to create handles and an opening. Cut fringe strips about an inch wide and four inches deep along the bottom hem, then tie each front strip to its matching back strip in double knots to close the bottom.
37. Cereal Box Drawer Organizer
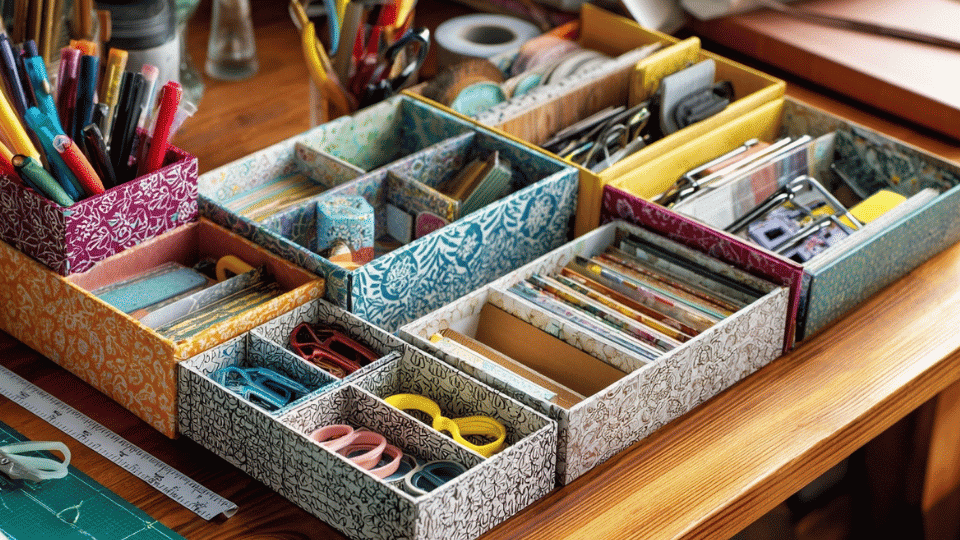
Cut cereal boxes to different heights, cover them with paper or fabric, and fit them inside your junk drawer. Finally, all those twist ties, batteries, and random keys have their own spots instead of floating around loose.
- Tools & Materials: You’ll need empty cereal boxes, scissors or a box cutter, decorative paper or contact paper, tape or glue, a ruler for measuring, and a pen to mark the cut line.
- Steps: Measure your drawer height and cut boxes down to fit, trimming some shorter than others for different items. Cover the outside with decorative paper using tape or glue to secure it, then arrange all the boxes in your drawer, creating separate compartments for all the small stuff that usually gets lost.
These projects cost basically nothing since you’re using stuff you’d throw away anyway. Some take ten minutes, some take an hour, but all of them keep trash out of landfills while making something you’ll actually use around your house.
Tips for Successful Crafting at Home
Most craft fails happen because of rushed prep or bad storage. You don’t need a perfect setup, but a few smart habits make everything easier. These tips work whether you’re crafting once a month or every weekend.
- Protect your surfaces first: Throw down newspaper, plastic tablecloths, or old sheets before you start. Paint and glue leak through paper towels way more than you’d think, and scraping dried glue off a table sucks.
- Read instructions all the way through before starting: You’ll catch the “let dry 24 hours” step before you’re already halfway done. Nothing’s worse than realizing you needed something to cure overnight when you planned to finish today.
- Keep a junk drawer of basics: Scissors, glue stick, tape, and markers. Having them in one spot beats hunting around your house every single time. Toss in rubber bands and paper clips, too.
- Work in good light: You can’t see what you’re doing under that dim ceiling bulb. Move near a window or get a cheap desk lamp. Your eyes and your craft will thank you.
- Don’t buy all the supplies at once: Start with one project’s materials. If you actually like crafting, then stock up. Otherwise, you’ve got drawers full of stuff you’ll never touch.
The best craft setup is the one you’ll actually use. Don’t wait for the perfect space or expensive supplies, just clear off a table and start. You’ll figure out what you really need as you go.
The Bottom Line
You’ve got plenty of fun crafts to do at home, now enough ideas to last months. Some are quick, others fill a weekend. The point isn’t perfection or Instagram-worthy results.
It’s about making something real with your hands instead of just scrolling. Pick a craft that matches what you’ve got lying around right now.
Kids, teens, adults, there’s something here that’ll work for your situation and skill level. Whatever you choose, start small and see where it takes you. Don’t overthink it.
Ready to start? Grab whatever materials you already have and try a project this week. Your first attempt teaches you more than reading ever will.
Frequently Asked Questions
What is a 5 Minute Craft?
A 5-minute craft is a quick and easy project that takes only a few minutes to make. It often uses simple supplies like paper, glue, or markers.
What is Slick Slime Sam?
Slick Slime Sam is a popular YouTube character from a craft channel that shares slime videos, DIY ideas, and fun projects for kids.
What is the Easiest Craft?
The easiest craft is usually coloring, paper folding, or making a simple card. These need a few supplies and are great for beginners.